
Achieving a flawless, professional finish with clear cellophane wrap transforms any gift or hamper into a stunning presentation. The secret lies in mastering tension, making clean cuts, and using discreet securing methods to eliminate unsightly wrinkles and loose edges. Unlike traditional wrapping paper, transparent film reveals every detail underneath, meaning your preparation, folding technique, and choice of adhesive must be precise. By setting up a clean workspace and selecting the right material thickness, you can easily wrap gift baskets, irregular items, and flat boxes with the polished look of a high-end boutique.
Tools and Materials You Will Need
To achieve a crisp, wrinkle-free finish, you must start with the right grade of clear cellophane wrap. Standard retail rolls typically range from 20 to 40 microns in thickness. For most gift baskets and heavier items, a thickness of 30 to 40 microns is ideal because it resists tearing and holds its shape when gathered. Thinner films are highly prone to splitting and puncturing under tension. Ensure the roll width is wide enough to cover your entire gift with generous overlap; a width of 70 to 80 centimeters is a versatile standard for medium-sized hampers.
Your cutting tools are equally critical. Dull scissors will drag against the plastic, leaving jagged, frayed edges that ruin the clean aesthetic. Use a pair of long, ultra-sharp stationery scissors or a rotary cutter on a self-healing mat to achieve perfectly straight, continuous cuts. Always handle these sharp blades with care, keeping your fingers clear of the cutting path.
Products mentioned in this guide
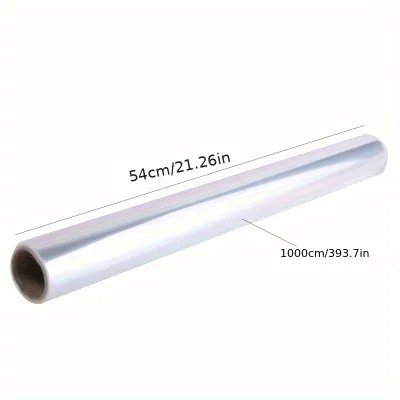
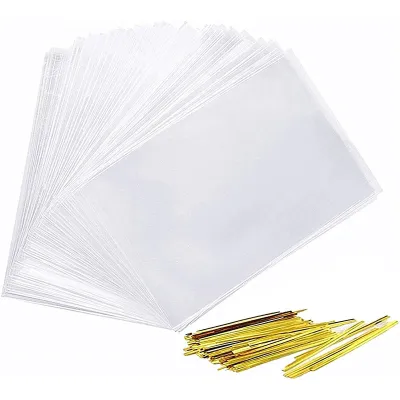
Prices are valid at publication and may change. Please refer to the product page for the latest price.
For securing the wrap, standard clear office tape often stands out too much on transparent film. Instead, opt for high-quality double-sided tape, which can be hidden entirely within the folds. You will also need decorative fasteners, such as wire-core twist ties, satin ribbons, or metallic cords, to secure gathered tops and add a polished touch.
Preparing Your Gift and Workspace
Clear cellophane acts like a magnet for dust, lint, and fingerprints due to static electricity. Before unrolling your film, thoroughly clean and dry your work surface. Wipe down the table with a microfiber cloth to remove any loose particles, and wash your hands to prevent transferring natural skin oils or smudges onto the clear wrap. If you are wrapping in a humid environment, such as Singapore, ensure your workspace is well-ventilated or air-conditioned to prevent moisture from getting trapped inside the sealed wrap, which can cause condensation or soften cardboard bases.

If your gift consists of multiple small items, do not attempt to wrap them loose. Group them securely on a sturdy base tray, such as a thick cardboard sheet, a shallow wooden crate, or a woven basket. Use small pieces of double-sided tape or adhesive dots to anchor the individual items to the base and to each other. This prevents the items from shifting or toppling over when you lift the cellophane.
To determine how much cellophane to cut, place your gift in the center of the unrolled sheet. Pull the film up on both sides to meet at the top. For a gathered basket wrap, the film should extend at least 15 to 20 centimeters above the tallest item to allow for a generous decorative ruff. For a flat wrap, ensure there is an overlap of at least 5 to 8 centimeters along the main seam to allow for secure taping. Cut the film in one smooth, continuous motion to keep the edges pristine.
Step-by-Step Cellophane Wrapping Techniques
The key to a professional finish is matching your wrapping technique to the physical geometry of the gift. A technique that works beautifully for a structured rectangular box will look messy on an irregular fruit basket. Regardless of the shape, maintaining consistent tension throughout the process is vital; the film must be pulled taut enough to eliminate slack and air pockets, but not so tight that it warps the base or tears at the corners.
The Classic Basket or Irregular Shape Wrap
For gift baskets, hampers, or oddly shaped items, the gathered top wrap is the most reliable and visually appealing method. Begin by placing your prepared basket directly in the center of your pre-cut cellophane sheet. Ensure the basket is aligned parallel to the cut edges of the film.
Reach for the front and back edges of the cellophane, pulling them straight up and meeting them directly above the center of the basket. Hold these two edges together with one hand. With your free hand, begin gathering the left side of the film toward the center, creating neat, vertical pleats as you bring the material inward. Repeat this process on the right side. The goal is to create symmetrical folds that channel the excess film smoothly up to the central gathering point.
Once all the cellophane is gathered tightly above the basket, secure it temporarily with a twist tie or a piece of floral wire. This holds the tension while allowing you to adjust the pleats. Gently pull down on the outer edges of the film to smooth out any loose pockets around the base of the basket. Once the wrap is taut and symmetrical, trim the excess cellophane at the top. Cut at a slight upward angle from the outer edges toward the center to create a beautiful, flared crown. Finish by tying a decorative ribbon over the twist tie to conceal it.
The Flat Square or Rectangular Wrap
For flat boxes, books, or rectangular trays, an envelope-style fold provides a sleek, modern look that mimics high-end product packaging. Place your box face down in the center of the cellophane sheet.
Pull one long side of the film over the bottom of the box, followed by the opposing side, overlapping them in the center. Pull the film taut and secure the seam with a strip of double-sided tape placed between the overlapping layers. This keeps the adhesive completely invisible from the outside.
To fold the ends, treat the cellophane similarly to wrapping paper, but with extra care to avoid creasing the plastic unnecessarily. Press the top flap down against the side of the box, creating clean, sharp creases along the edges. Fold the resulting side flaps inward to form neat triangles. Finally, pull the bottom flap upward tightly over the side of the box. Secure this final flap with a small piece of double-sided tape hidden underneath the edge. Repeat this process on the opposite end of the box, ensuring the tension is balanced so the box does not warp.
Securing and Finishing the Edges
The difference between an amateur wrap and a professional presentation often comes down to how the edges and seams are secured. Standard clear tape can yellow over time or catch the light in a way that highlights the seams. Double-sided tape is the preferred choice for flat wraps because it remains hidden between the overlapping layers of film. If you must use single-sided tape, select a matte-finish invisible stationery tape, which diffuses light and blends seamlessly with the clear plastic.
For gathered wraps, the fastening point is a major focal point. Never rely solely on tape to hold a gathered top, as the tension will eventually pull it loose. Always use a structural fastener first, such as a wire twist tie, chenille stem, or zip tie, to lock the gather in place. Once the structure is secure, cover the fastener with a wide, high-quality ribbon. A satin, organza, or grosgrain ribbon adds a luxurious texture contrast to the glossy cellophane.
After securing the main structure, inspect the entire package for loose flaps or open gaps. If you find any loose edges along the sides of a basket wrap, tuck them neatly toward the back or bottom and secure them with a tiny dot of clear adhesive or double-sided tape. This step prevents dust from entering the package and keeps the silhouette perfectly clean.
Troubleshooting Common Wrapping Issues
Working with clear cellophane wrap can be challenging due to its lightweight, static-prone nature. If you experience static cling that causes the film to stick to your hands or attract dust, lightly mist your hands with water or wipe your work surface with an anti-static dryer sheet before unrolling the film. This simple step neutralizes the static charge and makes the material much easier to handle.
If you notice wrinkles or loose pockets after securing your wrap, do not immediately tear it down. For minor slack in a gathered wrap, you can often slide your hands down the sides of the film, gently pulling the excess material upward toward the gathered top, then tightening the twist tie. If a flat wrap has a loose corner, carefully peel back the tape, pull the flap taut, and re-secure it.
In the event of a small tear or puncture, you can often save the wrap without starting over. For a flat wrap, place a small piece of matte invisible tape directly over the tear on the inside of the film before folding, which keeps the patch hidden. For a gathered wrap, if the tear is near the top, you can often trim the crown slightly lower to remove the damaged section entirely. If the tear is large or located on a highly visible front panel, it is best to replace the film to maintain a truly professional standard.
Frequently Asked Questions (FAQ)
Can I use a hairdryer to shrink or smooth clear cellophane wrap?
No, you should not use a standard hairdryer to shrink or smooth regular clear cellophane wrap. True cellophane is made from cellulose and does not shrink when exposed to heat; instead, high heat will cause it to warp, crinkle, or melt, potentially damaging your gift. Shrink wrap, which is made from polyolefin or PVC, is a completely different material designed specifically for heat application. To smooth out wrinkles in clear cellophane, rely on proper tensioning techniques, pulling the film taut and securing it firmly with tape or ties rather than applying heat.
How do I prevent clear cellophane from sticking to itself while cutting?
To prevent clear cellophane from clinging to itself, minimize static electricity in your workspace. Avoid working on synthetic carpets or plastic tables without a cotton or wooden cover. You can use heavy, clean objects—such as metal rulers, paperweights, or tape dispensers—to weigh down the corners of the sheet as you unroll and cut it. When cutting, hold the film taut with one hand while gliding your scissors smoothly through the material. This tension prevents the cut edges from curling back and sticking to the main roll.

Community discussion
Share your experience or ask a question. Comments are reviewed before publication.