
Using transparent drawstring bags for gift wrapping is an elegant, modern, and highly efficient way to present gifts. Unlike traditional wrapping paper, which completely hides the item, a clear drawstring bag allows the gift itself to become a central part of the visual presentation. This style of wrapping is perfect for showcasing beautifully designed products, colorful treats, or curated gift sets. The key to achieving a professional, polished look lies in selecting the correct bag size, layering inner fillers to create a stable and attractive backdrop, pulling the drawstrings evenly to gather the material symmetrically, and adding personalized embellishments like tags or ribbons.
By mastering a few simple techniques, you can transform a basic clear pouch into a stunning, boutique-style gift presentation. This step-by-step tutorial will guide you through the entire process, from initial measurements to troubleshooting common wrapping mishaps, ensuring your gifts look intentional, neat, and exceptionally thoughtful.
Preparing Your Gift and Materials
Before you begin wrapping, gathering the correct materials and taking accurate measurements of your gift is essential. Because transparent drawstring bags lack the structural flexibility of paper wrapping, choosing a bag that is too small will stretch the seams and distort the shape of the bag, while a bag that is too large will leave the contents looking swimming and unorganized.
Products mentioned in this guide
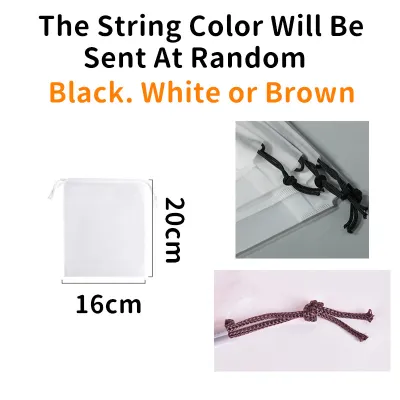
![mixshop Translucent Reusable Drawstring Bag Drawstring Pouch Travel Gift Storage Bag [7 Sizes]](https://img.lazcdn.com/g/p/88aac63a68a44464a4b65a7733ba959a.jpg_400x400q80.jpg_.webp)
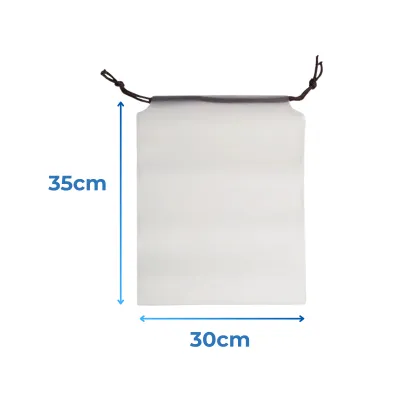
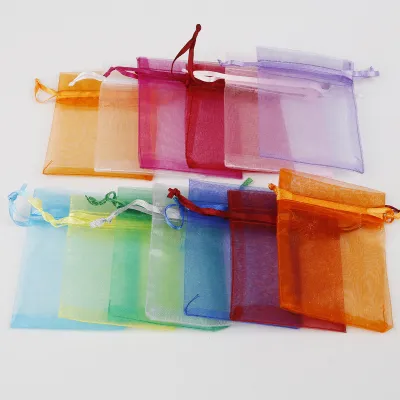
Prices are valid at publication and may change. Please refer to the product page for the latest price.
Start by measuring the three primary dimensions of your gift: the width, height, and depth. When selecting a transparent drawstring bag, ensure that the flat width of the bag is at least two to three centimeters wider than the combined width and depth of your item. Additionally, the height of the bag should extend at least five to eight centimeters above the top of the gift to allow ample room for the material to gather neatly when the drawstrings are pulled closed.
Next, select complementary inner fillers to enhance the presentation. Fillers such as crinkle cut paper, soft tissue paper, or delicate fabric scraps serve a dual purpose: they provide a stable base for the gift to sit on and hide any unsightly barcodes, price tags, or plain cardboard packaging. For a clean and modern look, choose a filler color that matches or contrasts beautifully with the gift itself.
Finally, gather your basic wrapping tools. Having a pair of sharp scissors, some double-sided tape, and a small ruler nearby will make the process much smoother. Double-sided tape is particularly useful for securing loose decorative elements inside the bag, ensuring they do not shift or slide around during transport.
Arranging Items Inside the Transparent Bag
Creating an attractive display through a clear material requires a thoughtful arrangement of the contents. Since every angle is visible, you must position each item with intention, treating the inside of the bag like a miniature shop window display.

Begin by placing a generous layer of your chosen filler at the bottom of the bag. Gently fluff the crinkle paper or fold the tissue paper so it creates a supportive, cushioned nest. This base layer elevates the gift, ensuring it does not sit flat against the bottom seams of the bag, which can look unfinished.
Position the main gift in the center of the bag, facing forward. If you are wrapping multiple items, place the largest and heaviest item at the back to act as an anchor, then layer the smaller items in front. If any of the items have unattractive backs, such as ingredient lists or manufacturing labels, place a piece of colored cardstock or a folded sheet of tissue paper directly behind them to create a clean, solid background.
Use additional filler to pack around the sides of the items. This extra cushioning prevents the gifts from shifting, tipping over, or knocking against each other, which is especially important for fragile items like small ceramic mugs, glass jars, or delicate stationery. The filler should hold the items firmly in place without overstuffing the bag.
Before sealing the bag, address any static cling or dust. Synthetic transparent bags often accumulate static electricity, which attracts lint, hair, and dust particles to the surface. To resolve this, gently wipe both the inside and outside of the bag with a clean, dry microfiber cloth. Use your hands to smooth out any major folds or creases in the material, working from the bottom of the bag upward to ensure a crystal-clear view of your beautifully arranged gift.
Tying and Securing the Drawstring
The way you close the bag and tie the drawstring determines the overall structure and neatness of the presentation. A rushed or unevenly pulled drawstring can result in a lopsided, messy collar at the top of the bag.
To begin, hold both ends of the drawstring cords firmly. Pull them outward simultaneously with equal tension. This action ensures that the transparent material gathers symmetrically around the neck of the bag, creating a neat, ruffled collar rather than an uneven, bunched-up opening. Keep your fingers close to the neck of the bag to guide the pleats as they form.
Once the bag is fully gathered, hold the neck tightly with one hand to maintain the tension. Use your other hand to tie a secure half-knot at the base of the gathers. This initial knot acts as a anchor, preventing the weight of the gift from pulling the bag open when it is carried or moved.
Next, decide on the style of your final knot. For a classic, elegant look, tie a neat, symmetrical bow using the remaining cord length. Keep the loops of the bow relatively small and pull the tails downward so the bow sits horizontally across the neck of the bag. If the drawstrings are made of a thick, rustic material like jute twine, a clean square knot or a simple loop knot may look more intentional and modern than a traditional bow.
Inspect the dangling ends of the drawstrings once the knot is secure. If the cords are excessively long, use sharp scissors to trim them at a clean angle to prevent fraying. Alternatively, you can tuck the excess cord ends neatly behind the gathered collar for a clean, minimalist finish that keeps the focus entirely on the gift inside.
Adding Embellishments and Final Touches
Once the bag is securely tied, you can elevate the presentation from simple to extraordinary by adding personalized external decorations. These final touches add texture, color, and a sense of luxury to the wrapping.
Attaching a personalized gift tag or a custom label is an excellent way to start. Slide the tag onto one of the drawstring cords before tying the final bow, or use a small piece of double-sided tape to adhere a label directly to the flat front surface of the bag. For a vintage or formal touch, you can even apply a wax seal over the center of the drawstring knot.
To add more texture and visual interest, consider wrapping a secondary ribbon over the drawstring. A velvet, grosgrain, or satin ribbon in a coordinating color can be wrapped around the gathered neck of the bag and tied into a larger, more dramatic bow. This secondary ribbon completely conceals the plain utility cords of the drawstring, making the packaging look highly customized.
Tucking small natural elements under the knot is another wonderful way to add character. Slide a small sprig of dried lavender, a tiny pine cone, a dried eucalyptus leaf, or a dehydrated citrus slice under the ribbon or drawstring. These organic elements provide a beautiful tactile contrast to the smooth, clean surface of the transparent bag and add a subtle, pleasant scent to the presentation.
Troubleshooting Common Wrapping Issues
Even with careful preparation, you may encounter minor visual or structural issues during the wrapping process. Knowing how to quickly identify and fix these problems will ensure your final presentation looks flawless.
If you notice uneven gathering or bunched-up material at the neck of the bag, do not try to force the cords tighter. Instead, loosen the knot slightly to release the tension. Use your fingers to manually distribute the pleats evenly around the entire circumference of the neck, ensuring the ruffles are uniform, then pull the drawstrings tight again and re-tie the knot.
Slipping knots are a common issue when working with smooth, synthetic drawstring cords like satin or polyester. If your knot keeps coming undone, tie a double half-knot or a surgeon’s knot to create extra friction. Alternatively, you can wrap a small, clear elastic band around the gathered neck of the bag before tying the drawstring, which provides a non-slip surface for the cords to grip.
Wrinkled or creased transparent material can ruin the clean look of your gift. Never use a hot iron directly on plastic or synthetic transparent bags, as they will melt instantly. Instead, hang the empty bag in a warm, humid room, such as a bathroom after a hot shower, to allow the mild creases to relax naturally. For stubborn wrinkles, you can use a hair dryer on its lowest heat setting; hold the dryer at least 30 centimeters away from the bag and move it constantly to gently warm and smooth the material without damaging it.
Frequently Asked Questions (FAQ)
Can I reuse transparent drawstring bags for future gifts?
Yes, transparent drawstring bags are highly reusable if they are handled and stored correctly. To untie tight knots without damaging the cords, use a blunt tool like a wooden toothpick to gently pry the knot apart rather than pulling hard, which can fray or break the fibers. Once the bag is empty, wipe the inside with a dry microfiber cloth to remove any leftover dust or filler debris. Flatten the bag completely and store it flat in a cool, dry drawer away from direct sunlight to prevent the transparent material from yellowing, warping, or developing permanent creases over time.
What types of gifts are not suitable for transparent bags?
Transparent drawstring bags are not suitable for gifts that require absolute privacy, surprise, or suspense, as the clear material immediately reveals the contents. Additionally, avoid using these bags for extremely heavy, sharp-edged, or highly irregular items. Sharp corners on metal tools, heavy books, or wooden toys can easily puncture or scratch the clear material, while excessively heavy items can stretch the drawstring opening or cause the bottom seams of the bag to fail during transport. For these items, traditional opaque boxes or heavy-duty gift bags are a much safer and more practical choice.

Community discussion
Share your experience or ask a question. Comments are reviewed before publication.