
Wrapping a gift in a clear plastic bag is an elegant, modern packaging method that showcases the item’s natural colors and textures while keeping it clean and protected. To achieve a neat, professional finish, you must select the right bag thickness, fold the plastic tightly to eliminate excess air, and secure the edges with discreet adhesives. Whether you are preparing a curated gift hamper, handmade stationery, or delicate baked goods, mastering this technique ensures your presentation looks polished rather than rushed.
By focusing on precise folding, clean lines, and thoughtful embellishments, you can transform a simple utility item into a stunning gift presentation. This guide walks you through the entire process, from selecting the ideal materials to troubleshooting common wrapping challenges.
Gathering the Right Materials and Preparing Your Gift
Before beginning, selecting the correct type of clear plastic bag is essential for a clean presentation. Not all clear plastics are created equal, and choosing the wrong material can result in a cloudy, wrinkled, or easily torn package.
Products mentioned in this guide
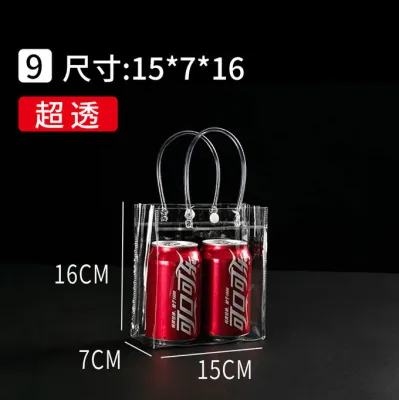
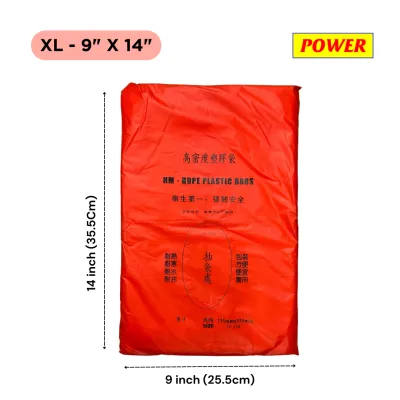
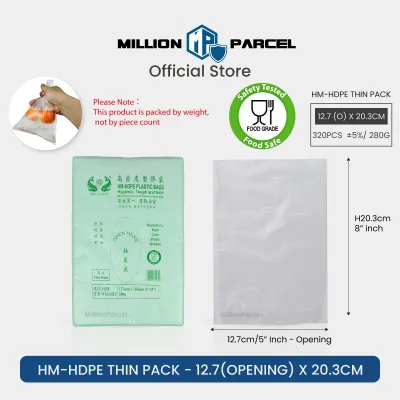
Prices are valid at publication and may change. Please refer to the product page for the latest price.
Selecting the Ideal Bag Type and Dimensions
When browsing local stationery shops or online marketplaces, you will generally encounter three main types of clear plastic bags:
- OPP (Oriented Polypropylene): This is the preferred choice for gift wrapping. It offers high clarity, a crisp crinkly texture, and excellent stiffness. It resists tearing and provides a highly professional, glass-like appearance.
- PP (Polypropylene): Slightly softer than OPP, PP bags are highly transparent and flexible, making them suitable for oddly shaped items that require a bit of stretch.
- PE (Polyethylene): These are softer, more durable, but have a slightly cloudy or milky appearance. They are best avoided for gifts where high visibility and sparkle are desired.
For the bag dimensions, measure your gift’s height, width, and depth. The bag should be at least two centimeters wider than the gift on each side to allow the item to slide in smoothly without stretching or tearing the seams. If you are wrapping a flat item like a notebook or art print, a flat bag with a self-adhesive strip works best. For three-dimensional items like mugs, candles, or small gift baskets, look for gusseted bags, which feature folded sides that expand to accommodate bulkier shapes.
Essential Tools Checklist
To ensure a seamless wrapping process, gather these tools before you start:
- Sharp scissors: Dull blades will snag and tear plastic, leaving jagged edges.
- High-clarity double-sided tape: Standard double-sided tape can sometimes look yellow or opaque. Opt for ultra-clear, acid-free double-sided tape designed for crafts.
- Ribbons or twine: Choose materials that complement the gift's color palette. Satin, grosgrain, or natural jute twine work exceptionally well.
- Decorative inserts: Tissue paper, shredded paper filler, or cardstock backings help support the gift and add visual depth.
Preparing the Gift Item
The presentation of a clear package depends entirely on the condition of the item inside. Ensure your gift is completely clean, dry, and free of dust or fingerprints. In humid climates like Singapore, moisture can easily get trapped inside a sealed plastic bag, leading to condensation or warping of paper elements. If your gift consists of multiple loose items, consider placing them on a sturdy cardboard base or inside a small open box first. This provides structural support, keeps the items from shifting, and makes the folding process significantly easier.
Step-by-Step Instructions for Wrapping the Gift
Once your materials are ready, follow these steps to wrap your gift with clean lines and minimal wrinkles.

Step 1: Positioning the Gift Inside the Bag
Gently open the clear plastic bag, taking care not to crease the sides. If you are using a gusseted bag, push the bottom corners out fully from the inside. Slide your gift into the bag, keeping it centered. If the gift has a clear front and back, ensure the front faces the seamless side of the bag. For flat items, push the gift all the way to the bottom edge, aligning it parallel to the bottom seam.
Step 2: Expelling Excess Air and Folding the Plastic
Trapped air is the enemy of a neat wrap, as it makes the bag look puffy and unstable. Place the bag flat on a clean, smooth work surface. Starting from the bottom of the gift, gently press your hands upward along the sides of the bag to push the air out of the top opening.
For a snug fit, fold the excess plastic on the sides backward. Pull the left side of the plastic tightly against the edge of the gift and fold it toward the back of the item. Repeat this process on the right side. The goal is to create sharp, clean creases along the vertical edges of your gift, mimicking the look of a professionally wrapped box.
Step 3: Securing the Folds and Edges
While holding the folded side flaps firmly in place, apply a small strip of high-clarity double-sided tape along the seam on the back of the gift. Press down firmly to secure the fold. If you are wrapping a flat item, fold the bottom corners inward at a 45-degree angle before folding the back flap up, creating neat triangular corners similar to traditional paper wrapping. Use small, discreet pieces of tape; excess adhesive can attract dust and ruin the clean aesthetic.
Step 4: Closing the Top Opening
How you close the top depends on the style of bag you have chosen:
- For self-adhesive bags: Peel off the protective liner, fold the flap tightly over the opening, and press it down from the center outward to prevent air bubbles.
- For open-top bags (gathered finish): Pinch the plastic together just above the top of the gift. Gather the plastic evenly from both sides toward the center to create neat, symmetrical pleats. Secure the gather temporarily with a small piece of clear tape or a twist tie before applying your decorative ribbon.
- For open-top bags (flat finish): Fold the top opening over toward the back of the gift, creating a clean, horizontal fold. Secure this fold with double-sided tape for a completely seamless look.
Adding Decorative Touches for a Polished Presentation
A clear plastic bag provides a blank canvas. Adding thoughtful decorative elements can elevate your packaging from simple utility to a beautiful, personalized gift.
Inserting Decorative Elements Inside the Bag
Before sealing your bag, consider adding internal decorations to frame your gift:
- Shredded paper or wood filler: Placing a layer of colorful shredded paper at the bottom of the bag provides a soft cushion and lifts the gift, making it more prominent.
- Tissue paper backing: If you want to keep the gift a partial surprise, slide a sheet of patterned tissue paper behind the item. This adds a pop of color while keeping the front of the gift visible.
- Confetti or dried botanicals: For a whimsical touch, toss a small handful of metallic confetti or dried flower petals inside the bag. Ensure these elements do not obscure the main gift.
External Embellishments
The way you finish the outside of the bag ties the entire presentation together. If you gathered the top of the bag, tie a high-quality ribbon around the gathered point. A classic bow made of satin or organza adds instant elegance. For a rustic look, wrap jute twine around the neck multiple times and tie it in a simple knot.
You can also slide a personalized gift tag onto the ribbon before tying the bow. If you opted for a flat, folded finish, placing a custom sticker or a wax seal over the folded seam on the back adds a premium, handcrafted touch.
Balancing Visibility and Decoration
While decorations add flair, the primary appeal of a clear plastic bag is the visibility of the gift itself. Avoid overcomplicating the design. If your gift is highly colorful or intricately detailed, keep the decorations minimal—perhaps just a simple white ribbon and a clean tag. If the gift is plain or monochromatic, you can use more vibrant tissue paper or patterned ribbons to create visual interest.
Troubleshooting Common Wrapping Mistakes
Even with careful preparation, working with clear plastic can sometimes be tricky. Here is how to resolve and prevent common wrapping issues.
Avoiding Excessively Large Bags
Using a bag that is too large for the gift results in excess plastic that bunches up, creating unsightly wrinkles and shadows. If you only have larger bags on hand, you can trim the excess plastic. Cut the top of the bag down to the desired height using sharp scissors, or fold the extra width neatly along the back of the gift and secure it with double-sided tape. Always measure twice before cutting to ensure you leave enough room for folding and sealing.
Preventing Trapped Air Pockets
If your wrapped gift looks bloated, air is trapped inside. To fix this without tearing the bag, you can use a fine sewing needle to prick a tiny, inconspicuous hole in the back of the plastic, near a fold or under a ribbon. Gently press the air out through the hole. The hole will be virtually invisible, and the plastic will instantly cling neatly to the contours of your gift.
Choosing the Right Adhesive
Standard household sticky tape often turns yellow over time, peels off in humid conditions, or leaves a messy residue if repositioned. Always use high-quality, clear double-sided tape or specialized packaging tape. If you make a mistake and need to reposition the tape, do not pull it off forcefully, as this can stretch or cloud the plastic. Instead, carefully cut away the taped section and start fresh with a new bag if necessary.
Frequently Asked Questions (FAQ)
Can I use a standard grocery clear plastic bag for gifts?
It is generally not recommended to use standard grocery bags for gift wrapping. Grocery bags are typically made of low-density polyethylene, which has a cloudy appearance, wrinkles easily, and often features printed logos or barcodes. They lack the optical clarity and stiffness required for a neat, premium presentation. For gifts, it is best to invest in dedicated OPP or cellophane craft bags, which are inexpensive and offer the crystal-clear transparency that makes gifts look appealing.
How do I keep the clear plastic looking pristine and scratch-free?
Clear plastic bags, especially those made of OPP, can easily attract static dust and show fingerprints or fine scratches. To keep them pristine, always wash and dry your hands thoroughly before wrapping, or wear lightweight cotton gloves. Work on a clean, soft surface, such as a fabric tablecloth or a clean cutting mat, to prevent the plastic from rubbing against rough tabletops. Finally, store your unused bags flat in their original packaging to prevent accidental creasing or scratching before use.

Community discussion
Share your experience or ask a question. Comments are reviewed before publication.