
Upcycling a brown paper bag into gift wrap is an excellent way to create a rustic, minimalist, and highly personalized presentation. With the right preparation and folding techniques, this humble material can look just as polished and elegant as premium store-bought wrapping paper. The secret lies in understanding how to handle the stiffness of the paper, hide raw seams, and execute crisp, clean folds.
By mastering a few basic stationery techniques, you can transform standard shopping bags into beautiful packages. This guide will walk you through selecting the right tools, preparing your paper, and executing flawless folds for a professional finish.
Essential Tools and Materials for a Polished Finish
Achieving a clean, professional look with a brown paper bag requires tools that can handle thicker, more fibrous paper without tearing it. Standard grocery bags are often made from recycled fibers, which can be stiff and prone to cracking along folds. If you want a smoother, more premium finish, look for unused kraft paper bags, which offer a more consistent texture and greater durability.
Products mentioned in this guide
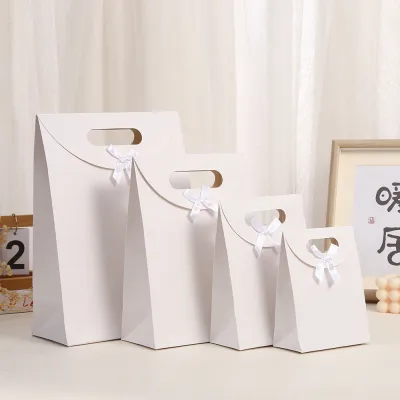
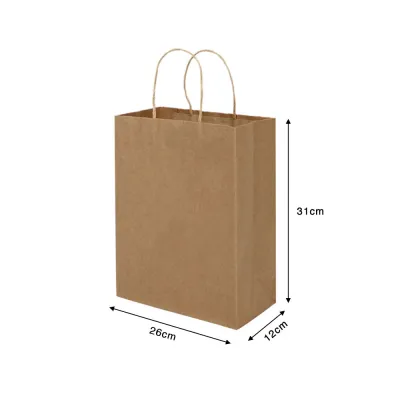
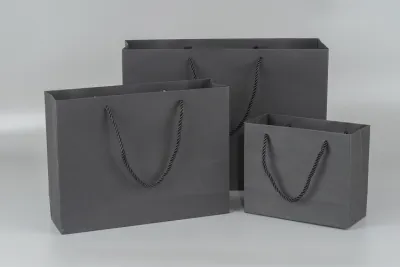
Prices are valid at publication and may change. Please refer to the product page for the latest price.
To keep your seams completely invisible, avoid standard glossy plastic tape, which stands out harshly against the matte surface of the paper. Instead, opt for high-quality double-sided tape or a heavy-duty glue stick. Double-sided tape is highly recommended because it provides a strong, immediate bond and remains hidden beneath the folds, ensuring a seamless exterior.
For cutting, standard household scissors can easily snag on thick paper, leaving jagged or frayed edges. A sharp utility knife or craft knife paired with a heavy metal ruler will yield much cleaner, perfectly straight lines. Always use a self-healing cutting mat or a thick piece of protective cardboard underneath your work area to protect your tabletop and ensure a smooth cut.
How to Prepare the Brown Paper Bag for Wrapping
Before you can wrap a gift, you must transform a three-dimensional shopping bag into a flat, workable sheet of paper. Start by carefully cutting down one of the vertical corner seams of the bag. If the bag has a glued seam down the back, cutting along this seam is often the neatest way to open the bag up without wasting usable paper.

Next, cut completely around the bottom panel of the bag to remove the bulky, multi-layered base. If the bag has paper or rope handles, gently peel away the inner reinforcement patches. If the adhesive is too strong, simply use your craft knife and metal ruler to slice off the top rim of the bag just below the handle attachments.
Once you have a flat sheet, you may notice deep creases from where the bag was folded flat. To achieve a smooth wrapping surface, lay the paper flat on an ironing board. Place a thin, dry cotton towel over the paper and run a dry iron on a low-to-medium heat setting over the towel. Avoid using steam, as moisture can warp the paper fibers and cause the sheet to ripple.
Inspect the flattened paper for any thin spots, small punctures, or printed logos. If you find a minor tear, patch it from the inside using a small piece of clear tape. If the bag has large printed logos, plan your cuts so that the printed side faces the inside of the gift, leaving the clean, unprinted side on the exterior.
Step-by-Step Guide to Wrapping a Standard Rectangular Gift
Wrapping with kraft paper requires a slightly different approach than using thin, glossy wrapping paper. Because the paper is thicker, tension control is critical. Pulling too hard can split the seams, while wrapping too loosely will result in bulky, sagging edges. The key is to make deliberate, firm creases and secure each step as you go.
Measuring and Cutting the Paper to Size
To determine the correct size of paper, place your gift box in the center of the sheet. Pull the paper up and over the sides of the box. The paper should overlap in the center by approximately 3 to 5 centimeters to allow for a secure seam. Cut the width of the paper to this measurement.
For the ends of the box, the paper should extend slightly more than half the height of the box on each side. If the paper is too long, it will create excess bulk when folded, making it impossible to get sharp, flat corners. Use your metal ruler and craft knife to trim away any excess paper, ensuring all cut edges are perfectly straight.
Folding and Securing the Main Body
Place your gift box face down in the center of the prepared paper. Pull one side of the paper tightly over the bottom of the box and secure it temporarily with a small piece of double-sided tape. This keeps the paper aligned and prevents it from shifting as you work.
Take the opposite edge of the paper and fold the raw cut edge under by 1 centimeter to create a clean, folded hem. Pull this side tightly over the box, overlapping the first side. Apply a strip of double-sided tape along the underside of the folded hem, then press it down firmly to create a clean, seamless center line.
Creating Clean Edges and Corners at the Ends
To fold the ends, start by pushing the top flap of paper straight down against the side of the box. Use your fingers to crease the paper sharply along the top edge of the box. This action will naturally create two diagonal, wing-like flaps on the left and right sides.
Press these side flaps inward tightly against the box, creasing the diagonal edges sharply. You will now have a single triangular flap remaining at the bottom. Fold the tip of this bottom flap inward by 1 centimeter to hide the raw edge, apply double-sided tape to the fold, pull it tightly upward, and press it firmly against the side of the box.
If you are wrapping a very thick box and the top and bottom flaps do not meet cleanly in the middle, you may need to trim the side flaps slightly before folding them inward. This prevents the paper from bunching up and ensures that the final seam sits perfectly flush against the side of the package.
Creative Ways to Decorate and Personalize Your Package
The neutral, matte finish of a brown paper bag provides the perfect canvas for creative embellishments. To complement the rustic aesthetic, wrap the package with natural jute twine, cotton baker’s twine, or a simple linen ribbon. Threading a handwritten wooden tag or a sprig of dried eucalyptus onto the twine adds a beautiful, organic touch.
If you prefer a more patterned look, you can use rubber stamps and ink pads to create custom designs. White ink looks exceptionally striking against brown paper, offering a clean, modern contrast. Alternatively, use metallic markers in gold, bronze, or silver to hand-draw simple geometric patterns, stars, or personalized holiday greetings directly onto the paper.
Before stamping or writing on your wrapped gift, always test your ink or markers on a scrap piece of the bag. Recycled paper fibers can be highly absorbent, which may cause certain inks to bleed or feather. Testing beforehand allows you to verify the drying speed and ensure the lines remain crisp and legible.
Troubleshooting Common Wrapping Mistakes
If your paper tears while you are folding it, the paper may be too thin or the tension may be too high. To prevent tears, avoid using your fingernails to score the creases; instead, use the smooth side of a bone folder or the plastic handle of your scissors to gently press the folds. If a tear does occur, you can cover it strategically with a piece of ribbon, a gift tag, or a decorative stamp.
Bulky, uneven corners are usually caused by having too much excess paper at the ends of the box. If you notice the paper bunching up as you fold the side flaps, unfold them and trim a few millimeters off the edges. Keeping the paper trimmed close to the dimensions of the box is the easiest way to ensure sharp, flat corners.
If your seams are lifting or the tape is not holding, the textured surface of the kraft paper may be resisting the adhesive. Ensure you are using a high-tack double-sided tape and press down firmly along the entire seam for several seconds to activate the bond. If you are using a glue stick, hold the seam in place with a paperclip or a light weight for a minute to allow the adhesive to dry completely.
Frequently Asked Questions (FAQ)
Can I use a brown paper bag to wrap irregularly shaped gifts?
Yes, but standard folding techniques will not work well on non-rectangular items. For cylindrical or soft objects, use the candy-wrapper method: roll the item in the paper, leave excess paper on both ends, and tie the ends tightly with twine to create a classic cracker shape. Alternatively, you can fold the bag into a simple flat-bottomed pouch, place the gift inside, fold the top over, and punch two holes to secure it with a ribbon.
Is brown paper from a grocery bag safe for wrapping food items?
Standard grocery bags are not certified food-safe and may contain chemical residues, recycled contaminants, or non-food-grade inks. If you are gifting baked goods or other edible items, always wrap them in food-safe parchment paper, wax paper, or place them inside a food-safe container before wrapping the exterior with your prepared brown paper bag.

Community discussion
Share your experience or ask a question. Comments are reviewed before publication.