
Wrapping a gift in a paper bunny bag combines whimsical charm with a clean, structured presentation. To achieve a neat look, the secret lies in selecting a bag that accommodates your gift’s dimensions without overstretching, stabilizing the base with filler, and carefully shaping the bunny ears at the top. Whether you are preparing a small piece of jewelry or a heavier book, understanding how to distribute weight and secure the opening ensures your presentation remains pristine.
By focusing on structural balance and using simple finishing techniques like ribbon ties, you can transform a simple paper bag into a professional-looking gift package. This guide walks you through the entire process, from selecting materials to troubleshooting floppy bunny ears, ensuring your gift looks intentional and delightful.
Preparing Your Materials and Paper Bunny Bag
Before placing your gift inside a paper bunny bag, you must assess both the bag’s physical limits and the supporting materials required to keep the package upright. Start by measuring your gift’s length, width, and height. Compare these dimensions directly against the flat and expanded measurements of your paper bunny bag. The gift should slide into the bag easily, leaving at least two centimeters of clearance on all sides so the paper retains its natural, smooth shape without stretching the seams.
Products mentioned in this guide
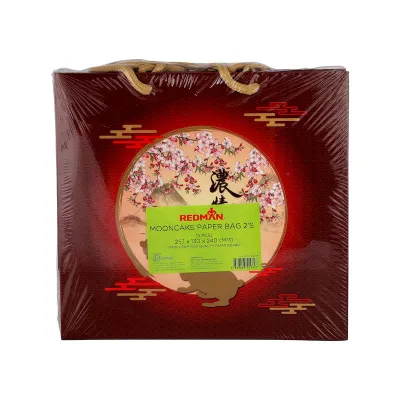
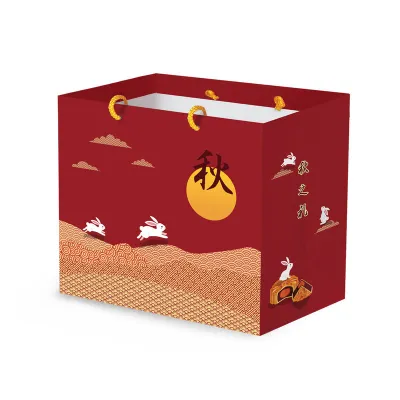
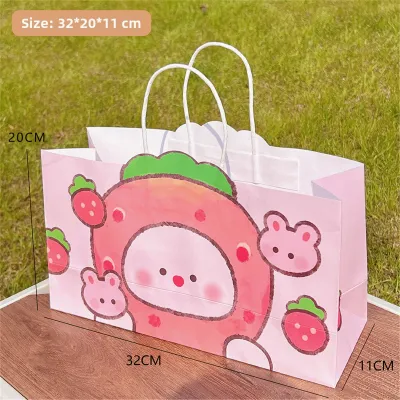
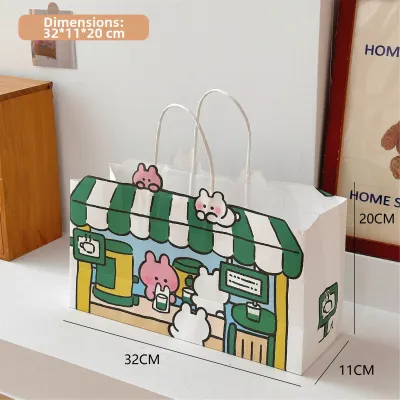
Prices are valid at publication and may change. Please refer to the product page for the latest price.
Next, gather your internal support and cushioning materials. Depending on the weight and fragility of the item, you may need tissue paper, crinkle cut paper filler, or lightweight bubble wrap. For gifts wrapped in Singapore’s humid climate, choosing high-quality, acid-free tissue paper is beneficial as it resists moisture absorption and maintains its crisp texture longer. These fillers do not just protect the item; they act as structural scaffolding, keeping the bag plump and preventing the paper from collapsing inward.
Finally, select your finishing accessories. Look for ribbons, twine, or gift tags that complement the specific color palette and design of your paper bunny bag. A simple satin ribbon or rustic jute twine can draw attention to the bunny ears without overwhelming the overall aesthetic. Ensure you have a pair of sharp scissors, some double-sided tape, and a clean workspace ready before you begin assembly.
Step-by-Step Guide to Placing and Securing the Gift
Achieving a neat presentation requires a systematic approach to loading the paper bunny bag. The first step is to establish a firm, level foundation at the very bottom of the bag. If you place a heavy or unevenly shaped gift directly onto the thin paper base, the bottom will sag, causing the entire bag to tilt and the sides to wrinkle. To prevent this, fold a few sheets of tissue paper into a flat, dense pad that matches the dimensions of the bag’s bottom panel, or spread a generous layer of compressed crinkle cut filler across the base. This layer absorbs the initial weight and distributes it evenly across the bottom seams.

Once your base layer is secure, gently lower the gift into the center of the bag. It is vital to keep the item perfectly centered to maintain the bag’s balance when it is lifted. If the gift is off-center, the bag will lean to one side, which ruins the symmetry of the bunny ears. After centering the item, pack additional crinkle cut filler or crumpled tissue paper into the empty spaces around the sides. Use your fingers to tuck the filler gently into the corners, ensuring there are no hollow pockets. This side support locks the gift in place, preventing it from shifting or sliding when the bag is moved.
As you fill the bag, monitor the height of the gift in relation to the top opening. For the best visual balance, the top of the gift should sit just below the bag’s main opening or right at the base where the bunny ear design begins. Leaving a clear space of about three to five centimeters at the top allows the paper to gather naturally, creating a clean transition from the structured body of the bag to the decorative bunny ears.
Adjusting for Small or Fragile Items
When wrapping a gift that is significantly smaller than the paper bunny bag, you must take extra steps to ensure it does not get lost in the filler or sink to the bottom. A small item, such as a delicate piece of jewelry, can easily slide under loose paper shreds and end up resting awkwardly against a corner. To solve this, place the small gift inside a nested, lightweight cardboard box first. This box acts as an anchor, giving the item a larger, more stable footprint that is much easier to position and secure within the bag’s main compartment.
For fragile items like glassware, wrap the item in a clean layer of tissue paper or soft bubble wrap before placing it into the bag. To keep the look polished, ensure the outer layer of wrapping matches the color of your internal filler. Once wrapped, nestle the fragile item deeply into a thick bed of crinkle cut paper, ensuring that no part of the object directly touches the outer paper walls of the bag, which offers a protective buffer against external bumps.
Adjusting for Large or Heavy Items
Gifts that are dense, heavy, or closely match the maximum capacity of your paper bunny bag require structural reinforcement to prevent embarrassing tears. A heavy book or a thick notebook can easily blow out the bottom seams of a standard paper bag. To reinforce the base, cut a piece of clean, rigid cardboard to the exact dimensions of the bag’s bottom panel. Slide this cardboard insert flat into the bottom of the bag before adding any filler or placing the gift. This simple addition transfers the weight away from the delicate paper seams and distributes it across the entire reinforced base.
When dealing with larger items, you must also minimize the amount of internal filler you use. Because the gift already occupies most of the bag’s volume, adding too much tissue paper or crinkle cut filler will overstretch the paper seams. Instead, use only a single, thin sheet of tissue paper to line the sides of the bag, keeping the presentation clean and preventing the paper from bulging. Ensure the top of the large item does not interfere with the folding mechanism of the bunny ears, allowing the bag to close smoothly without tension.
Finishing Techniques for a Polished Look
The defining feature of a paper bunny bag is its whimsical top closure, which typically mimics the shape of bunny ears. To make these ears stand up proudly and look neat, you must handle the paper with care. Start by gently gathering the paper just below the base of the ears. Use your thumbs and index fingers to pinch the paper into neat, accordion-style pleats rather than crushing it into a tight clump. Pleating allows the paper to fold along its natural lines, which keeps the front panel of the bag smooth and ensures the ears flare outward symmetrically.
Once you have gathered the neck of the bag, secure it using a high-quality ribbon or twine. Wrap the ribbon around the gathered section at least twice to create a secure collar. When tying the knot, apply just enough tension to hold the pleats in place without cutting into or tearing the paper fibers. If your bag has built-in handles, you can thread the ribbon through the handles and tie a decorative bow at the front. For a classic look, tie a neat double-knot and cut the ribbon ends at a clean 45-degree angle to prevent fraying.
To complete the presentation, consider adding a small gift tag or a minimalist embellishment. A simple, rectangular gift tag can be threaded onto the ribbon before you tie the final bow. Position the tag so it hangs slightly to the side, ensuring it does not block the printed bunny face or the shape of the ears. Keep these embellishments lightweight and minimal to ensure the focus remains on the unique bunny bag design.
Final Checks Before Gifting
Before you hand over your beautifully wrapped gift, take a moment to perform a few quick quality checks to ensure everything is secure and visually perfect. First, lift the bag gently by its handles or base to test its structural integrity. Feel for any sagging or shifting at the bottom; if the base feels unstable, support it from underneath and consider adding a thicker cardboard insert. This test ensures the recipient can carry the gift safely without the risk of the bottom giving way.
Next, gently tilt the bag from side to side and listen for any movement. If you hear the gift sliding around, open the top slightly and tuck a few more pinches of crinkle cut filler into the gaps to lock the item in place. Finally, inspect the exterior of the bag. Use your fingers to smooth out any minor creases on the front panel, and adjust the bunny ears so they point upward and frame the gift beautifully.
Frequently Asked Questions (FAQ)
Can I reuse a paper bunny bag after it has been used for a gift?
Yes, you can reuse a paper bunny bag if it has been handled carefully and remains structurally sound. Start by inspecting the bottom seams, corners, and handles for any signs of stress tears, deep creases, or weakened paper fibers. If the bag was used to hold a heavy item, the paper around the handles or base may have stretched or thinned, making it unsuitable for a second use. Additionally, check the exterior for any oil stains, adhesive residue, or loss of structural stiffness. If the bag is clean, dry, and holds its shape when empty, it is perfectly fine to fold it flat and store it in a cool, dry place for future gifting.
What should I do if the bunny ears lose their shape during wrapping?
If the bunny ears on your bag become bent, creased, or lose their stiffness during the wrapping process, you can easily restore their shape with a few gentle adjustments. Slide your hand inside the bag and use your fingers to gently press against the creased areas from the inside out, smoothing the paper against a flat surface if possible. Avoid using sharp tools that could puncture the paper; instead, use a smooth, blunt object like the rounded end of a clean bone folder or a plastic ruler to push out stubborn dents. If the paper has become too soft to stand upright on its own, you can discreetly apply a small piece of clear, double-sided tape or slide a tiny, color-matched paperclip behind the base of the ears to provide the necessary structural support.

Community discussion
Share your experience or ask a question. Comments are reviewed before publication.