
Using a kraft paper bag (牛皮纸袋) is one of the most versatile and eco-friendly ways to package a present, but it can easily look casual or unfinished without the right approach. Transforming a simple utility bag into a high-end, boutique-style gift presentation requires structured folding, proper internal support, and intentional styling. By mastering a few key techniques, you can achieve a crisp, tailored look that rivals professional gift-wrapping services.
In Singapore’s warm and humid climate, paper fibers can soften, making structural integrity and crisp folds even more critical. Whether you are preparing for a festive holiday, a wedding, or a corporate event, taking the time to reinforce and decorate your kraft packaging ensures your gift remains pristine and visually striking. This guide covers everything from selecting the right paper weight to executing flawless folds and adding personalized embellishments.
Materials and Tools You Will Need
Gathering the correct supplies before you start prevents interruptions and ensures a clean, polished finish. Using high-quality stationery tools and materials directly impacts the final look of your wrapped gift.
Products mentioned in this guide
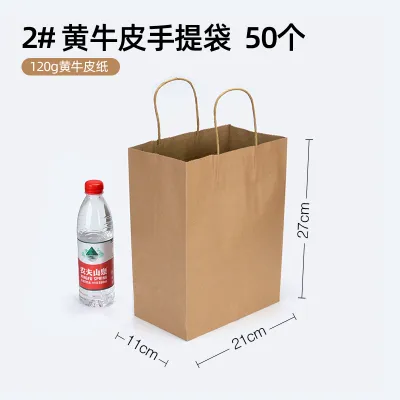
Prices are valid at publication and may change. Please refer to the product page for the latest price.
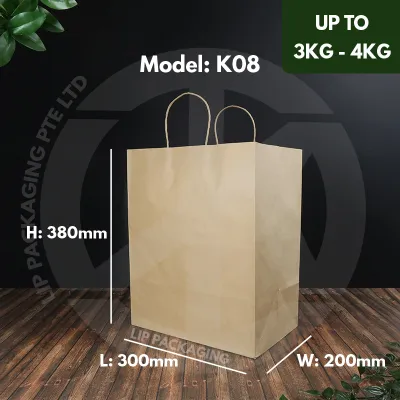
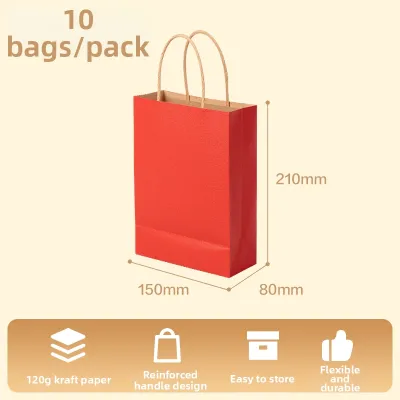
- Kraft Paper Bags: Select unbranded, plain bags made from a sturdy paper weight, ideally between 120 gsm and 150 gsm. Thinner bags crease too easily and sag under weight, while excessively thick bags are difficult to fold cleanly.
- Cushioning Fillers: Use acid-free tissue paper, shredded paper, or crinkle-cut paper filler. These materials provide structural volume and keep the gift from shifting.
- Adhesives: High-tack double-sided tape is essential for creating invisible, flat seals. Avoid standard liquid craft glue, as the moisture can warp the porous kraft paper and leave unsightly wet marks.
- Decorative Embellishments: Prepare cotton twine, jute cord, satin ribbon, or velvet ribbon. You can also use custom rubber stamps, wax seals, or heavy-cardstock blank gift tags to add character.
- Precision Tools: A pair of sharp craft scissors is necessary for clean cuts. A bone folder is highly recommended for scoring and flattening creases to achieve sharp, professional edges.
Step-by-Step Guide to Wrapping Gifts in Kraft Paper Bags
To elevate a standard shopping bag into a structured gift package, you must treat the paper more like wrapping paper and less like a simple container. Follow these steps to prepare, secure, and seal your gift.

Preparing the Bag and Base
Before placing anything inside, inspect the kraft paper bag for any pre-existing creases, tears, or weakened seams. If the bag has been folded flat for storage, gently open it and smooth out the base from the inside.
If your gift is heavy or has sharp corners, reinforce the bottom of the bag. Cut a piece of rigid cardboard or 300 gsm greyboard to the exact dimensions of the bag’s base and slide it inside. This extra layer distributes the weight evenly, preventing the paper from sagging or tearing when lifted.
Line the bottom and sides with a few sheets of tissue paper. Let the tissue paper flare slightly upward to create a soft, protective cushion that cradles the gift and prevents it from directly scraping against the bottom.
Securing the Gift Inside
Place your gift directly in the center of the reinforced base to maintain a balanced center of gravity. If the item is off-center, the bag will tilt when carried, which ruins the presentation and strains the paper handles.
For fragile items such as ceramics, glassware, or delicate stationery, wrap them in a protective layer of honeycomb wrap or tissue paper before placing them in the bag. This step provides essential shock absorption.
Fill the remaining empty space around the sides and top of the gift with crinkle-cut paper filler or additional crumpled tissue paper. Pack the filler firmly but gently; this prevents the gift from sliding around or rattling during transport while keeping the sides of the bag taut and upright.
Folding and Closing the Top
To achieve a clean, box-like appearance, you must fold the top of the bag closed rather than leaving it open. This technique completely hides the contents and gives the package a tailored finish.
First, decide whether to keep or remove the handles. If you choose to remove them, cut them off cleanly at the base with sharp scissors. Next, push the side gussets of the bag inward so they fold neatly along their natural creases, bringing the front and back panels of the bag together.
Using your fingers or a bone folder, press the top edges flat. Fold the top opening down by about 2 to 3 centimeters to create a clean hem. Crease this fold firmly. Fold it down a second time by the same width; this double-fold hides the raw paper edge and creates a thick, rigid band across the top.
To secure the fold invisibly, apply a strip of double-sided tape under the second fold and press it down firmly. Alternatively, you can keep the fold closed using decorative wooden pegs, brass binder clips, or by punching two holes through the folded band and threading a ribbon through them to tie a secure bow.
Elevating the Look for a Professional Finish
Once the bag is securely sealed, you can customize the exterior to match the occasion. Kraft paper acts as a neutral canvas, allowing contrasting textures and natural elements to stand out beautifully.
- Incorporate Natural Botanicals: Tuck a sprig of dried eucalyptus, a stem of lavender, or a cinnamon stick under the wrapping twine. These elements add a rustic, organic touch and a subtle fragrance.
- Apply Custom Stamps or Calligraphy: Personalize the front of the bag using rubber stamps with pigment-based ink, which sits on top of the paper fibers rather than bleeding into them. You can also write the recipient's name directly on the paper using a brush pen or calligraphy marker. Always test your ink on a spare piece of kraft paper first to check the drying speed and bleed resistance.
- Contrast Textures with Premium Ribbons: Pair the matte, rustic texture of kraft paper with contrasting ribbon materials. A deep forest green velvet ribbon or a sleek champagne satin ribbon instantly elevates the package. If you prefer a minimalist look, classic cotton twine or polished jute cord works exceptionally well.
- Attach a Heavyweight Gift Tag: Use a high-quality gift tag made from thick cardstock (at least 250 gsm). Write a neat, handwritten note on the tag and tie it to the ribbon or twine. The contrast between the heavy tag and the textured bag adds a tactile layer of quality.
Final Checks and Common Mistakes to Avoid
Before presenting your gift, perform a quick quality check to ensure the packaging is flawless and durable.
First, verify that there are no visible adhesive residues, stray pencil marks, or messy tape lines on the exterior of the bag. If you used double-sided tape, make sure it is completely hidden within the folds and is not lifting at the corners.
Next, check for any awkward bulging. If the gift is too large for the bag, it will push against the sides, causing the paper to warp or split at the seams. If you notice bulging, transfer the gift to a larger bag or remove some of the internal filler to relieve the pressure.
Finally, lift the package gently by its top fold or handles to ensure the weight is balanced. The bottom should remain perfectly flat without bowing downward, and the gift inside should not slide or tip over when moved.
Frequently Asked Questions (FAQ)
How do I make a flimsy kraft paper bag stand up straight?
To stabilize a flimsy or thin kraft paper bag, cut a piece of thick, rigid cardboard to fit the exact dimensions of the bottom of the bag and place it inside. Additionally, ensure you pack the sides of the bag tightly with crinkle-cut paper or tissue paper filler, which pushes outward against the paper walls and keeps them taut.
Should I cut off the handles of the paper bag?
If you want a highly structured, box-like presentation where the top is folded down and sealed, you should cut off the handles. However, if you are presenting gifts at a large gathering where guests will need to carry their packages easily, keep the handles intact and decorate them with tied ribbons or hanging tags instead.
Can I use a regular grocery kraft bag for gift wrapping?
Yes, you can reuse a grocery kraft bag as long as the paper is clean, unwrinkled, and free of large commercial logos. If the bag has printing on one side, you can carefully disassemble the seams, turn the bag inside out, and reassemble it using double-sided tape to expose the plain, unprinted side.

Community discussion
Share your experience or ask a question. Comments are reviewed before publication.