
Clear PVC bags offer a modern, structured, and highly visual way to present gifts. Unlike traditional wrapping paper that hides the contents, a transparent PVC bag showcases the curated items inside, making the arrangement itself part of the gift. Achieving a professional, boutique-style look requires careful planning of the layout, structural support, and decorative accents. By selecting the right materials and following a systematic arrangement process, you can transform ordinary items into an eye-catching, cohesive display that remains secure during transport.
Preparing Your Materials and Workspace
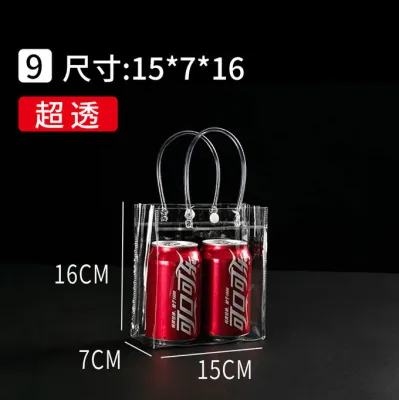
Creating a polished presentation begins with selecting the appropriate clear PVC bag. These bags come in various sizes, shapes, and plastic thicknesses. When choosing a bag, verify its dimensions against your largest gift item, ensuring there is at least a three-centimeter clearance on all sides. This prevents the plastic from stretching taut or splitting at the seams. Opt for a bag with a thickness that feels sturdy and holds its shape independently; thin, flimsy bags tend to wrinkle easily and sag under the weight of the contents.
Next, gather your structural and decorative fillers. Materials like paper crinkle shreds, tissue paper, or wood excelsior are essential for building a supportive base. These fillers prevent your gifts from shifting and elevate them to an optimal viewing height. You will also need finishing touches to secure and decorate the bag. Gather high-quality ribbons, rustic twine, personalized gift tags, and a pair of sharp scissors.
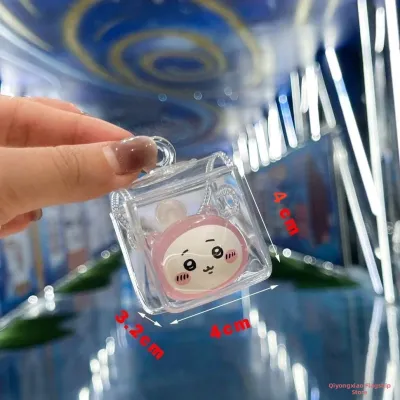
Products mentioned in this guide
![[SG Ready Stock]NS Labubu PVC Protective Bag Keychain Bags Thickened Doll Bag Double Zipper Labubu Doll Bags Transparent PVC Portable Organizer Box](https://img.lazcdn.com/g/p/08b61a2a20d6e1f1aec4dd23848fafad.jpg_400x400q80.jpg_.webp)
Prices are valid at publication and may change. Please refer to the product page for the latest price.
Before assembling your gift, prepare a clean, flat, and dust-free workspace. Clear PVC is highly reflective and easily highlights fingerprints, dust, or stray hairs. Wiping down your table and washing your hands before you begin will help keep the plastic pristine. Lay out all your items within arm’s reach so you can assemble the presentation efficiently without having to leave the workspace.
Step 1: Arranging the Base and Filler Materials
The base layer is the foundation of your entire presentation. Without a proper base, items will slide around, sink to the bottom, or bunch up awkwardly during transport. Start by taking your chosen filler material, such as paper crinkle shreds, and fluffing it thoroughly. Avoid grabbing a dense clump and dropping it straight into the bag, as this creates uneven density and flat spots that look unprofessional from the outside.

Gently tease the filler fibers apart with your fingers to build volume and loft. Place the fluffed filler into the bottom of the PVC bag, distributing it evenly into the corners. Paying attention to the corners is critical; if they are left empty, the bag will lose its structured shape and sag at the bottom. Press down lightly to ensure the filler is packed densely enough to support weight but still retains its springy, cushioned texture.
Adjust the height of this base layer according to the size of your main gift. A good rule of thumb is to fill the bottom quarter or third of the bag, ensuring the main gift will sit at an optimal viewing level. This cushioning is especially important for fragile items, protecting them from direct impact against the hard bottom edge of the PVC bag. Once the base is level and secure, you are ready to place your items.
Step 2: Positioning the Main Gift and Accent Items
With a stable base in place, you can begin arranging the actual gift items. The goal is to create a balanced, three-dimensional composition where every item is visible and secure. Start with the largest or heaviest item, which serves as the focal point of your presentation. Place this main gift in the center or slightly angled toward the front panel of the PVC bag.
If the item has a distinct front label or beautiful packaging, ensure it faces directly outward. Press it gently into the filler base so it is cradled securely and won’t tip backward. Next, introduce smaller accent items. Position these around the main gift, tucking them slightly into the filler to hold them in place. Use a tiered approach: taller items in the back, medium items in the middle, and the smallest items or decorative confetti in the front.
Avoid overcrowding the space. Leaving some open areas allows the transparent quality of the PVC to shine through, creating a clean and modern aesthetic. Regularly step back and look at the bag from the front at eye level to verify that no items have slipped behind others or become obscured by excessive filler. If an item seems unstable, tuck a small pinch of extra filler behind or beneath it to lock it into position.
Step 3: Securing the Bag and Adding Finishing Touches
Once you are satisfied with the internal arrangement, it is time to close the bag and add the final decorative elements. The method you use to secure the top depends on the style of your PVC bag. Some bags feature built-in drawstrings, zippers, or fold-over flaps, while others are open-topped and require manual gathering.
For open-topped bags, carefully gather the plastic at the neck, folding it in neat, accordion-style pleats to create a clean, symmetrical bunch. Hold the gathered neck firmly with one hand while wrapping a twist tie or a small piece of clear tape around it to lock the shape in place before applying your decorative ribbon. This temporary hold makes it much easier to tie a perfect bow without losing tension on the gathered plastic.
Select a ribbon that complements the color scheme of your gifts and fillers. Wrap the ribbon tightly over the temporary tie, securing it with a double knot. Tie a classic bow or a neat knot, allowing the tails to drape elegantly down the side of the bag. Thread a personalized gift tag onto the ribbon before tying the final bow. Use sharp scissors to cut the ribbon ends at a clean 45-degree angle to prevent fraying. Finally, inspect the bag for any stray filler strands or dust on the exterior, wiping them away for a pristine finish.
Troubleshooting Common Presentation Issues
Even with careful preparation, working with clear PVC can present a few challenges. A common issue is items shifting or sinking into the filler during transport. If this happens, do not shake the bag, as this will only worsen the displacement. Instead, use a long, thin tool like a clean ruler or a wooden dowel to gently lift and reposition the items from the top without dismantling the entire arrangement.
Creases, smudges, or static cling on the PVC surface can also detract from the overall look. To remove fingerprints or smudges, wipe the exterior gently with a soft microfiber cloth. If the bag becomes top-heavy or leans to one side, the weight distribution is uneven. This often happens when a heavy item is placed too high or too far to one side. To resolve this, lower the center of gravity by pushing the heaviest item deeper into the base filler, or add heavier items near the bottom center while keeping lighter decorative elements at the top.
Frequently Asked Questions (FAQ)
Can I use a clear PVC bag for heavy or sharp gifts?
Clear PVC bags are remarkably durable, but they do have weight and structural limits. Before wrapping, check the manufacturer’s specifications for weight capacity and material thickness. Heavy items can cause the bottom of the bag to sag or the handles to tear if the plastic is too thin. If you must wrap a heavy or sharp item, reinforce the base by placing a rigid piece of cardboard or a small wooden tray inside the bottom of the bag before adding the filler. For sharp edges, wrap the item in tissue paper or bubble wrap first, or place it inside a small inner box to prevent the sharp corners from puncturing or scratching the PVC walls. If the bag shows signs of stretching, stress marks, or tearing during assembly, stop immediately and choose a more robust packaging alternative.
How do I prevent static cling from ruining the presentation?
Static electricity is a common challenge when working with synthetic materials like PVC, causing lightweight fillers or dust to cling stubbornly to the inside walls. To minimize this issue, opt for natural filler materials such as paper crinkles or wood shreds, which naturally generate far less static than synthetic plastic grass or shredded metallic foil. Before you begin assembling the gift, you can wipe the exterior of the bag with a slightly damp, lint-free cloth to help dissipate any surface static charge. If static remains a persistent problem, apply a very light mist of anti-static spray to the outside of the bag. Always test the spray on a small, inconspicuous scrap of PVC first to ensure it does not cause clouding, discoloration, or chemical degradation of the plastic.

Community discussion
Share your experience or ask a question. Comments are reviewed before publication.