
Creating custom party favors allows you to match any event theme perfectly, whether you are hosting a birthday party in Singapore, organizing a corporate gathering, or preparing festive gifts. Crafting a custom goodie bag using wrapping paper and ribbon is an elegant, cost-effective way to elevate your presentation. By selecting the right paper weight, measuring accurately, and mastering a few simple folds, you can transform a flat sheet of gift wrap into a sturdy, professional-looking vessel.
This guide walks you through the entire process of assembling these bags, whether you choose to fold them entirely from scratch or wrap an existing plain paper bag. You will also learn how to attach secure ribbon handles and seal the tops neatly. With these techniques, your finished favors will not only look polished but will also safely hold your treats.
Essential Materials and Tools for Goodie Bags
To achieve a crisp, store-bought look, assembling the right crafting supplies is the first step. The choice of wrapping paper is critical for structural integrity. Standard thin gift wrap often tears under the weight of party favors or during the folding process. Instead, opt for thicker wrapping papers, such as heavy-weight kraft paper, matte wrapping paper, or papers with a weight of at least 80 to 100 gsm (grams per square meter). If you are wrapping a pre-made plain bag, a slightly thinner paper can work, but a robust medium is always easier to handle without wrinkling.
Products mentioned in this guide
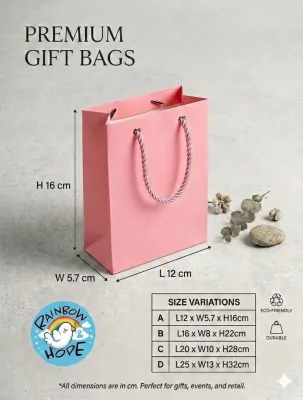
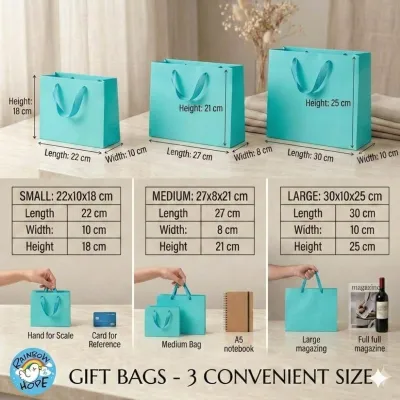
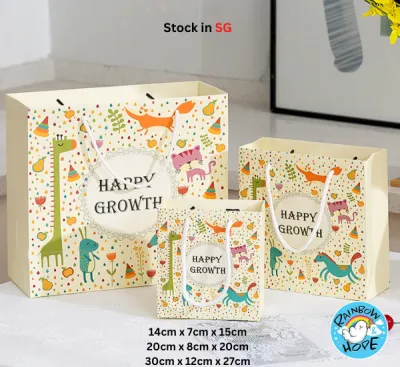

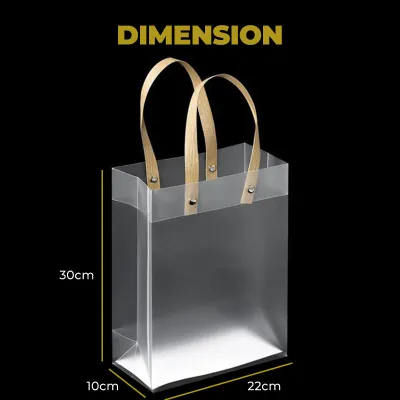
![[SG] BIG SIZE Pokemon Face gift goodie bag High Quality Thick birthday party childrens day present cute paperbag Pikachu Charizard Squirtle](https://img.lazcdn.com/g/ff/kf/Sd327f917f3dd4c969f37c1aed4855a41q.jpg_400x400q80.jpg_.webp)
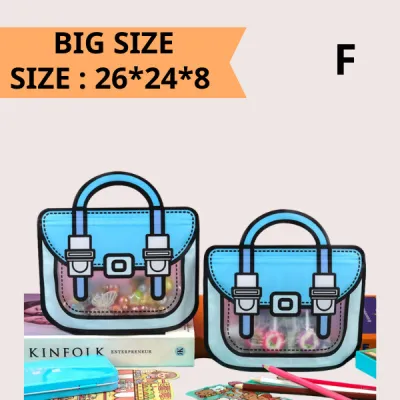

Prices are valid at publication and may change. Please refer to the product page for the latest price.
Ribbons add both functionality and aesthetic appeal to your goodie bag. Satin ribbons offer a smooth, glossy finish that looks highly elegant, while grosgrain ribbons provide a ribbed texture that holds knots exceptionally well. Organza ribbons offer a sheer, delicate look suitable for lighter favors. For standard-sized bags (around 15 to 20 cm in height), ribbons with a width of 1.5 cm to 2.5 cm are ideal. Smaller bags benefit from narrower ribbons (about 0.6 cm to 1 cm) to keep the proportions balanced.
Having the correct tools on hand prevents frustration and ensures clean lines. You will need:
- Sharp craft scissors or a utility knife: Essential for clean, fray-free cuts on both paper and ribbon.
- A bone folder: This traditional stationery tool is indispensable for creating sharp, flat creases without tearing the paper fibers.
- Double-sided tape: High-tack double-sided tape is preferred over liquid glue, as it provides an instant hold without warping or wrinkling the paper.
- Glue dots: Excellent for attaching decorative elements, bows, or gift tags securely.
- A heavy-duty hole punch: A single-hole punch is needed to create precise openings for the ribbon handles.
When using sharp utility knives, craft scissors, or strong adhesives, always work on a stable cutting mat. Keep sharp tools out of reach of young children if you are assembling these bags as a family project.
If you are short on time or want to guarantee a uniform shape, you can also use pre-made plain kraft or white paper bags as a base. Wrapping these pre-made structures allows you to enjoy the beautiful patterns of your favorite wrapping paper while skipping the structural folding steps.
Measuring and Cutting Wrapping Paper Accurately
Precise measurements are the secret to a symmetrical, well-proportioned goodie bag. Before cutting into your wrapping paper, you must calculate the exact dimensions required based on your desired finished bag size. To determine the width of the paper needed, multiply the desired bag width by two, add the desired depth of the side gusset multiplied by two, and then add an extra 3 to 5 cm (about 1.5 inches) for the side seam overlap. For example, if you want a bag that is 12 cm wide and 6 cm deep, your paper width should be 12 + 12 + 6 + 6 + 4 = 40 cm.

To calculate the required height of the paper, take your desired finished bag height, add the depth of the bottom gusset (usually equivalent to the side depth plus a few centimeters for folding), and add another 3 to 4 cm for a top fold reinforcement. This top fold is folded inside the bag to reinforce the rim where the handles will be attached. Using a clear mathematical formula ensures you do not end up with a bag that is too shallow or a base that cannot close properly.
When you are ready to cut, use a long metal ruler and a sharp utility knife on a cutting mat to ensure perfectly straight edges. If you do not have a utility knife, you can fold the paper precisely along your measured line, crease it firmly with a bone folder, and then carefully slide your scissors along the crease. Avoid rushing this step, as crooked edges will lead to a misaligned bag that stands unevenly.
If your wrapping paper features a directional print—such as upright trees, text, or characters—pay close attention to the orientation before cutting. The top of the pattern must align with the top fold of your bag. If you cut the paper sideways or upside down, your finished bag will display the pattern incorrectly, which can detract from the professional presentation.
Building the Bag: Folding from Scratch vs. Wrapping a Plain Bag
Depending on your time, skill level, and materials, you can choose between folding your bag entirely from a flat sheet of wrapping paper or wrapping a pre-made plain bag. Both methods yield beautiful results, but they require different techniques to ensure a clean, professional finish.
Folding a Bag from Scratch Using Wrapping Paper
Folding a bag from scratch is a rewarding DIY project that gives you complete control over the dimensions of your container.
Step 1: Create the Main Cylinder Lay your cut wrapping paper face down on a clean, flat surface. Fold the top edge down by about 3 cm to create a reinforced top rim, creasing it sharply with your bone folder. Next, fold the left and right sides of the paper inward so they overlap in the center by about 2 cm. Apply a strip of high-tack double-sided tape along the overlapping edge and press firmly to seal, creating a flat paper cylinder.
Step 2: Form the Bottom Gusset Determine the bottom of your bag (opposite the reinforced top rim). Fold the bottom edge upward by a distance that matches your desired bag depth plus 2 cm. For a 6 cm deep bag, fold it up by 8 cm. Crease this fold flat. Open this folded bottom flap and press the left and right outer corners inward, flattening them into neat triangular shapes. This action will create a diamond-like opening at the bottom of the bag.
Step 3: Seal the Base Fold the top and bottom horizontal flaps of this diamond shape inward toward the center, overlapping them slightly. Ensure the seam is tight and completely covers the opening. Apply double-sided tape to the overlapping flaps and press them down firmly. This creates a flat, stable base that allows the bag to stand upright.
Step 4: Sharp Creases and Side Gussets To give the bag its classic rectangular shape, gently tuck the sides inward to create side gussets. Use your bone folder to sharpen all vertical and horizontal creases. This step is crucial; crisp, well-defined folds are what differentiate a handmade bag from a messy, amateur craft project.
Wrapping a Pre-Made Plain Paper Bag
If you prefer a faster method that guarantees structural strength, wrapping a pre-made plain paper bag is an excellent alternative.
Step 1: Measure and Prep the Paper Select a plain kraft or white paper bag with handles removed (or fold the handles inside if they are flat). Cut a piece of wrapping paper that is long enough to wrap completely around the front, back, and sides of the bag, plus a 2 cm overlap. The height of the paper should match the height of the bag, plus an extra 3 cm at the top and 3 cm at the bottom for folding.
Step 2: Apply Tape and Smooth Place a few strips of double-sided tape on the front face of the plain bag. Carefully align your wrapping paper over the front, pressing it down smoothly from the center outward to prevent air bubbles or wrinkles. Wrap the paper around the sides and back, applying tape to each face of the bag as you go. Secure the final seam at the back with a neat line of double-sided tape.
Step 3: Fold the Top Rim At the top opening of the bag, fold the excess 3 cm of wrapping paper inward over the bag’s rim. Press it flat against the inside walls of the bag. This hides the raw cut edge of the wrapping paper and creates a clean, seamless interior transition.
Step 4: Secure the Bottom Turn the bag upside down. Fold the excess paper at the bottom inward, much like wrapping a gift box. Fold the short side flaps in first, followed by the top and bottom flaps. Secure them tightly with double-sided tape. Ensure the bottom is completely flat so the bag can stand upright on tables without wobbling or catching on surfaces.
Assembling Ribbon Handles and Sealing the Top
Once your bag structure is complete, adding ribbon handles and sealing the top transforms it into a functional, secure goodie bag.
Creating Handles To ensure your handles are symmetrical, use a pencil and ruler to mark hole placements on the reinforced top rim of the bag. Mark two points on the front panel and two matching points on the back panel, keeping them evenly spaced from the side edges (typically 3 to 4 cm from each side). Use a single-hole punch to create clean holes through both the wrapping paper and the reinforced inner fold.
Cut two equal lengths of ribbon, approximately 30 to 40 cm each, depending on how long you want the handles to be. Thread one end of the ribbon from the outside of the bag to the inside through one hole. Tie a secure double knot—such as a surgeon’s knot or a square knot—on the inside of the bag. Pull the ribbon taut to ensure the knot is large enough not to slip back through the hole. Repeat this process for the other end of the ribbon, and then repeat on the opposite side of the bag for the second handle.
Reinforcing Holes Because wrapping paper can tear under tension, reinforcing the punched holes is highly recommended. You can apply small, clear adhesive reinforcement rings around the holes on the inside of the bag. Alternatively, apply a tiny dab of clear craft glue or fabric glue around the knot and the hole on the interior. This adds a layer of flexibility and strength, preventing the ribbon from tearing through the paper when the bag is lifted.
Sealing the Bag If your bag does not require long handles, you can fold the top flap down and seal it shut. Punch two holes through the folded flap and the back of the bag, thread a thinner ribbon through, and tie a beautiful bow. If your bag has handles, you can add a decorative touch by tying a separate, contrasting ribbon into a classic bow and attaching it to the base of one of the handles using a glue dot. This adds a layer of sophistication to your presentation.
Verification Before filling all your bags for an event, perform a simple weight test. Place a few sample treats inside one completed bag and lift it gently by the ribbon handles. Shake it slightly to simulate transport. Verify that the knots hold securely, the paper around the holes does not stretch or tear, and the bottom remains flat and supportive. Adjust your knot size or reinforcement methods if you notice any slipping.
Pro Tips for a Polished, Professional Finish
To elevate your DIY packaging from simple crafts to boutique-quality favors, keep these professional tips in mind.
- Reinforce the Rim with Cardstock: If you must use thinner wrapping paper, slide a thin strip of cardstock (about 2 cm wide) inside the top fold of the bag before punching your holes. This hidden cardboard collar distributes the weight of the contents and completely prevents the handles from tearing the paper.
- Curling Ribbon Ends: If you are using curling ribbon or synthetic satin, slide the closed blades of your craft scissors gently along the ribbon's underside to create elegant curls. For woven ribbons like grosgrain, cut the ends at a sharp 45-degree angle or in a neat "V" shape (chevron cut) to prevent fraying and add a tailored look.
- Avoid Liquid Glue: In Singapore's humid climate, avoid using water-based liquid craft glues, which can saturate paper fibers and cause unsightly warping, wrinkling, or color bleeding. Always rely on high-quality double-sided tape and glue dots for a completely flat, clean bond.
- Smart Storage: If you are preparing your bags weeks before an event, store them flat to save space and prevent dust accumulation. If you have already assembled them with handles, store them upright in a sturdy cardboard box, lightly stuffed with clean tissue paper to maintain their shape and prevent accidental creasing.
Frequently Asked Questions (FAQ)
What is the best paper weight for making goodie bags from scratch?
For structural stability, use wrapping paper with a weight of at least 80 to 100 gsm (grams per square meter). Standard thin gift wrap is usually around 50 to 60 gsm, which easily tears at the folds and cannot support handles. Thicker options, such as kraft paper or heavy-weight matte wrap, ensure your bag maintains its rectangular shape and holds favors securely.
How do I stop the ribbon handles from fraying?
To prevent synthetic ribbons like satin, grosgrain, or organza from fraying, carefully run the cut edge near a flame (such as a lighter or match) for a split second to melt and seal the fibers. Alternatively, apply a tiny drop of clear nail polish or specialized fabric sealant to the cut ends and let it dry completely before threading.
How can I reinforce the bag bottom for heavier treats?
If your favors include heavier items like small glass jars, candles, or dense baked goods, reinforce the base of the bag. Cut a piece of stiff cardboard or heavy cardstock to the exact dimensions of the bag’s bottom. Slide this insert inside the bag so it rests flat against the floor, distributing weight evenly and preventing the paper base from sagging.

Community discussion
Share your experience or ask a question. Comments are reviewed before publication.