
Achieving a crisp, professional-looking wrapped present box is a skill that relies on technique, patience, and a few precise movements rather than expensive specialty tools. Whether you are preparing a gift for a festive holiday, a birthday, or a formal exchange, a neatly wrapped box shows care and attention to detail.
The process involves a logical sequence: preparing your workspace, measuring the paper to avoid bulky overlaps, securing the main body with consistent tension, and executing clean, envelope-style folds on the sides. Finishing the package with a beautifully tied ribbon elevates the presentation, turning a simple box into a work of art.
By mastering these fundamental steps, you can consistently produce sharp corners and seamless edges that rival professional gift-wrapping services.
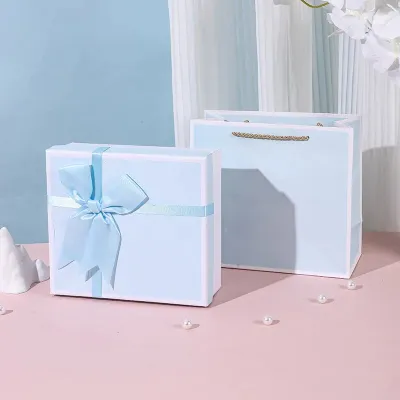
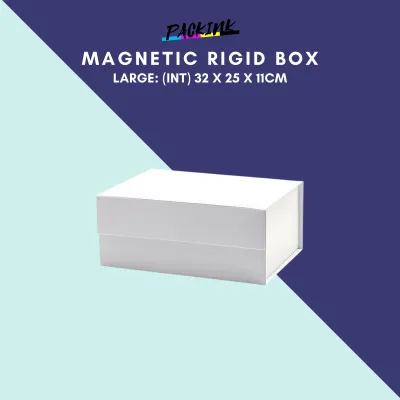
Products mentioned in this guide
![[SG Stock] 礼品盒Magnetic Gift Box | Solid Hard Large Gift Box with Ribbon For Mother s Day / Valentines Gift Packaging](https://img.lazcdn.com/g/p/d75b0490a7e725586f2575c31a3470fb.jpg_400x400q80.jpg_.webp)
![[SG]🧑🏻❤️🧑🏼💋Wedding Empty Box w/ Ribbon Wedding Souvenir Gift Box Candy Box Party Proposal](https://img.lazcdn.com/g/p/7e6c8abd2380eda8f874a24c79b1aa28.jpg_400x400q80.jpg_.webp)
Prices are valid at publication and may change. Please refer to the product page for the latest price.
Tools and Materials You Need Before You Start
Before cutting into your paper, gather all necessary supplies on a spacious, flat work surface. A clean dining table or a large desk provides the stability needed to keep your paper flat and prevent the present box from sliding during the wrapping process.
You will need high-quality wrapping paper, sharp scissors, and adhesive tape. For the neatest finish, double-sided tape is highly recommended because it remains completely hidden between the overlapping layers of paper. If you only have standard clear tape, look for a matte or satin finish that blends seamlessly with the paper surface.
When selecting your wrapping paper, consider its weight and texture. Standard paper weights offer a good balance of flexibility and strength, whereas very thin papers tear easily at the corners, and heavy foil or thick kraft papers require extra effort to crease.
To ensure compatibility, perform a quick test fold on a small scrap of your paper. This trial allows you to observe if the material cracks along the fold lines or if it resists holding a crease.
For the finishing touch, select a ribbon that complements both the size of your present box and the pattern of your paper. A wide satin or grosgrain ribbon works beautifully on larger boxes, while a delicate organza or thin metallic ribbon is better suited for smaller packages.
Keep a ruler or a bone folder nearby; these tools are incredibly helpful for scoring thick paper and pressing down folds to achieve razor-sharp edges. Finally, when using sharp scissors, always maintain a clear workspace and keep your fingers well away from the cutting path to ensure safety.
How to Measure and Cut the Wrapping Paper
Accurate measurement is the secret to a flawless wrap. Using too much paper results in bulky, uneven folds that make the box look messy, while using too little paper leaves gaps that are difficult to patch.

To measure the width, place your present box face down on the paper. Unroll the paper and wrap it entirely around the perimeter of the box. The paper should overlap by approximately three to five centimeters. This overlap provides a clean seam and gives you enough surface area to apply your tape securely.
To determine the correct length for the side flaps, look at the open ends of the paper while the box is centered. Pull the paper up against the side of the box; it should extend slightly more than half the height of the box on both the left and right sides.
If the paper extends all the way to the top edge of the side panel, it is too long and will bunch up when folded. Trim away any excess paper before proceeding.
When you are ready to cut, use the printed grid lines on the back of the wrapping paper as a guide to ensure a perfectly straight line. If your paper does not have a grid, use a long ruler and a pencil to draw a light guide line on the reverse side.
To make the cut, open your scissors wide and slide them smoothly through the paper in a continuous motion rather than making short, choppy cuts. This sliding technique prevents jagged edges and ensures a clean, professional border.
Step-by-Step Guide to Wrapping the Present Box
Wrapping a rigid present box requires a systematic approach where each fold builds upon the last. Maintaining consistent tension throughout the process is essential to prevent the paper from sagging or shifting.
If your wrapping paper features a directional pattern, such as stripes or holiday motifs, take a moment to align the design so it runs parallel to the edges of the box before making your first fold.
Securing the Main Body
Begin by placing your present box face down in the center of your pre-cut wrapping paper. Positioning the box face down ensures that the top surface of your gift remains completely smooth and free of visible seams or tape.
Pull one of the long edges of the paper up and over the bottom of the box, securing it temporarily with a small piece of tape to keep it centered.
Next, take the opposite long edge of the paper and fold it over by about one centimeter to create a clean, finished hem. This folded edge hides the raw, cut line of the paper and creates a much neater seam.
Pull this hemmed edge tightly over the first layer of paper, ensuring the sheet is taut across the top and sides of the box. Secure this seam with double-sided tape placed along the inside of the hem, or use clear tape applied flat across the seam.
The seam should ideally sit along one of the bottom edges of the box rather than directly in the middle of the bottom panel, making it less visible.
Folding the Side Edges for a Clean Finish
With the main cylinder of the box secured, turn your attention to the open side ends. Start on one side by pushing the top flap of paper straight down against the side panel of the box.
Use your fingers to crease the paper sharply along the top edge of the box, then smooth the paper flat against the side to create two distinct, triangular wings on the left and right.
Next, fold these side triangles inward tightly against the box. Press your thumb along the diagonal edges to create crisp, clean creases. The paper should now form a single, neat triangle pointing upward from the bottom of the box.
To finish the side, fold the bottom triangle upward against the box. Before taping it down, fold the raw top edge of this triangle inward by half a centimeter to create a clean, straight hem.
Pull the flap up tightly to eliminate any slack, and secure it with a piece of double-sided tape hidden underneath the flap. Repeat this entire folding process on the opposite side of the box, ensuring both ends look symmetrical and flat.
Adding the Ribbon for a Polished Presentation
A beautifully tied ribbon is the ultimate finishing touch that elevates your present box. To measure the correct amount of ribbon, wrap it loosely around the length and width of the box, then add about sixty centimeters of extra length to ensure you have plenty of slack to tie a generous bow.
Cutting the ribbon too short makes tying difficult and often results in a cramped, asymmetrical knot.
To apply the ribbon using the classic cross-method, place the ribbon face down on your workspace. Center the wrapped present box face down on top of the ribbon.
Bring both ends of the ribbon up over the bottom of the box, cross them over each other, and twist them ninety degrees so they run perpendicular to their original direction.
Pull the ribbon ends tight, flip the box over so it is face up, and bring the ribbon ends around to the top of the box. Thread the ends under the original loop to secure the center point.
Tie a basic, tight knot to keep the ribbon from slipping. Form two equal-sized loops with the ribbon ends and tie them into a classic bow, adjusting the loops and tails until they are symmetrical.
To prevent the ribbon from fraying and to add a professional touch, trim the ends of the tails at a sharp forty-five-degree angle or cut a small V-shape into the tips.
Common Wrapping Mistakes and How to Fix Them
Even with careful preparation, minor mistakes can happen. If you notice that the wrapping paper is loose or wrinkled after taping, do not try to pull it tighter from the outside.
Instead, carefully peel back the tape or cut along the seam, pull the paper taut across the flat surfaces of the box, and re-apply the tape. Ensuring the paper is tight before securing the sides prevents shifting later.
If you are working with thick, high-density paper that resists folding or springs back, avoid forcing the fold with your fingers alone. Use a bone folder or the smooth edge of a plastic ruler to score the fold lines gently.
This weakens the paper fibers slightly along the line, allowing for a clean, sharp crease without tearing the decorative surface.
If your ribbon slides around the box or the bow looks crooked, you can easily correct it without untying the entire package. Slide a small piece of double-sided tape underneath the ribbon on the bottom of the box to lock it in place.
If the bow is uneven, hold the central knot firmly with one hand while using your other hand to gently pull the loops and tails individually until they are balanced and proportional to the size of the box.
Frequently Asked Questions (FAQ)
How do I wrap an oddly shaped item without a box?
If you are wrapping an item that lacks flat sides or a rigid structure, the easiest solution is to place it inside a secondary container, such as a plain cardboard shoe box or a sturdy gift bag. Alternatively, you can create a custom gift pouch using thick wrapping paper.
Roll the paper around the object to form a cylinder, tape the seam, then fold and seal one end flat. Place the item inside, fold the open top end down several times, punch two holes through the folds, and thread a ribbon through to tie it shut.
For cylindrical items, you can also use the classic cracker wrap by rolling the paper around the object, leaving excess paper on both ends, and twisting those ends tightly before securing them with decorative ribbon.
What is the best way to hide tape on a present box?
A highly reliable way to hide adhesive is to use high-quality double-sided tape. Because this tape is sticky on both sides, it sits entirely between the overlapping layers of paper, leaving no visible shiny film on the exterior of your gift.
If you only have standard clear tape, you can strategically place it in areas that will naturally be covered by other elements.
For example, secure your paper seams directly along the path where your ribbon will run, or place the tape where a gift tag, decorative sticker, or dried flower sprig will be attached.
How can I prevent wrapping paper from tearing while folding?
To prevent tearing, always verify the weight and quality of your wrapping paper before you begin. Extremely thin, budget-grade papers tear easily when pulled over sharp corners, while overly stiff papers can crack and split.
When wrapping a box with sharp, rigid corners, avoid pulling the paper with excessive force. Instead, gently press the paper against the flat surfaces first, and use your fingers to soften the tension around the corners before making your final creases.
If you are working with delicate paper, you can also reinforce the inside corners of the paper with small pieces of clear tape before wrapping to provide extra durability.
Community discussion
Share your experience or ask a question. Comments are reviewed before publication.