
Wrapping a present box neatly is an art form that transforms a simple gesture into a memorable experience. When you hand someone a beautifully wrapped gift, the crisp edges and seamless folds signal that you invested time, care, and thought into their present. While professional-looking gift wrapping can seem intimidating, it relies on a few fundamental techniques that anyone can master with patience and practice.
The secret to a flawless finish lies in precision rather than speed. By focusing on accurate measurements, sharp creases, and hidden adhesives, you can eliminate the common pitfalls of bunched paper, exposed cardboard, and messy tape lines. Whether you are preparing a birthday surprise, a holiday token, or a formal corporate gift, mastering these steps will ensure your present stands out on any gift table.
Tools and Materials You Need
Before you begin, gathering the right stationery and wrapping supplies is essential for achieving a clean, professional finish. The foundation of any great wrap is the paper itself. When selecting wrapping paper, pay close attention to its weight and opacity. Paper that is too thin tears easily at the corners, while paper that is excessively thick resists folding and will not hold a sharp crease. A medium-weight paper, typically around 80 to 90 grams per square meter (gsm), offers an ideal balance of durability and flexibility.
Products mentioned in this guide
![[SG Stock] 礼品盒Magnetic Gift Box | Solid Hard Large Gift Box with Ribbon For Mother s Day / Valentines Gift Packaging](https://img.lazcdn.com/g/p/d75b0490a7e725586f2575c31a3470fb.jpg_400x400q80.jpg_.webp)
![[SG SELLER] Premium Black Ribbon Gift Box| Gift Boxes | Wedding Gift Box | Birthday Gift Box | Christmas Gift Box](https://img.lazcdn.com/g/p/4d2f8f70c1b6eec0c2ded203649151f3.jpg_400x400q80.jpg_.webp)
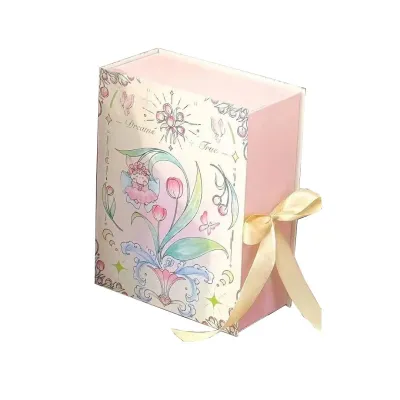
Prices are valid at publication and may change. Please refer to the product page for the latest price.
Opacity is equally important to ensure the design or branding on the underlying present box does not show through. If you choose a patterned paper, consider how the design will align across the seams. Geometric patterns like stripes or plaids require precise alignment, which can be challenging for beginners, whereas solid colors, textured kraft paper, or non-directional floral prints are much more forgiving.
Your choice of cutting and adhesive tools directly impacts the final look of your gift. Dull household scissors often chew or fray the edges of the paper, so always opt for a sharp pair of dedicated paper scissors or a craft knife. For adhesives, standard clear glossy tape is highly visible and can detract from a clean aesthetic. Instead, double-sided tape is highly recommended for a seamless finish because it remains completely hidden between the overlapping layers of paper. If double-sided tape is unavailable, a high-quality matte finish tape is an excellent alternative, as it diffuses light and blends smoothly into most paper surfaces.
Finally, select your decorative elements to complement the paper. High-quality fabric ribbons, such as satin, grosgrain, or organza, add a touch of luxury that plastic curling ribbons cannot match. You can also prepare simple embellishments like natural twine, dried botanicals, or personalized gift tags to elevate the overall presentation.
How to Measure and Cut the Wrapping Paper
One of the most common mistakes in gift wrapping is using too much paper, which leads to bulky, uneven folds and messy corners. To avoid this, you must measure your paper accurately before making any cuts. Begin by unrolling your wrapping paper on a clean, flat, and hard surface, such as a large dining table or a clean hardwood floor. Avoid working on carpeted surfaces, as they absorb pressure and make it difficult to achieve sharp, crisp creases.

Place your present box face down in the center of the unrolled paper. Positioning the box face down ensures that the main seam and any tape marks remain on the bottom of the package, leaving the top surface completely smooth and pristine. To measure the width of the paper, pull the paper up from the roll and over the sides of the box. The paper should wrap completely around the box with an overlap of approximately 3 to 5 centimeters. This overlap provides enough surface area to secure the seam neatly without creating unnecessary bulk.
Next, measure the length of the paper needed for the ends of the box. Pull the paper up against one side of the box; it should extend to a height that is slightly more than half the depth of the box. Repeat this check on the opposite side. If the paper extends too far, it will bunch up when you fold the side flaps, resulting in messy, protruding triangles. Use a pencil to lightly mark your cutting lines on the back of the paper.
To cut the paper, use a steady, continuous motion rather than short, choppy snips. Open your scissors wide, place the blade at your marked line, and gently glide the scissors forward through the paper. If your scissors are sufficiently sharp, they will slide effortlessly, producing a straight, clean edge without any fraying or jagged corners. If you prefer, you can use a metal ruler and a craft knife on a cutting mat to achieve an incredibly precise edge.
Step-by-Step Guide to Wrapping the Present Box
With your paper cut to the exact dimensions, you are ready to begin the wrapping process. Start by securing the main seam along the bottom of the box. Pull the paper tightly from one side over the bottom of the box and secure it temporarily in the center with a small piece of tape. Next, pull the opposite side of the paper over the box. To create an exceptionally neat seam, fold the raw cut edge of this top layer inward by about 1 centimeter to create a clean, folded hem. Pull this hemmed edge tightly over the secured side, aligning it down the center of the box, and secure it with double-sided tape placed underneath the fold.
Once the main seam is secured, it is time to crease the horizontal edges of the box. Run your thumb and forefinger firmly along all the long edges of the box. Pressing the paper tightly against the cardboard corners creates sharp, defined lines that instantly give the package a structured, professional appearance.
Now, move to one of the open ends of the box to fold the side flaps. Push the left and right sides of the paper inward against the side of the box. As you push the paper in, it will naturally form two neat triangular flaps at the top and bottom. Press these side folds flat against the box, creasing the diagonal edges sharply with your fingernail or a bone folder.
Next, fold the top triangular flap down against the end of the box, smoothing it flat and creasing the top edge. Then, fold the bottom triangular flap upward. To ensure a polished finish, fold the raw tip of this bottom triangle inward by about 1 centimeter to create a clean, straight hem. Apply a strip of double-sided tape to the inside of this bottom hemmed flap, pull it tightly up against the box, and press it firmly to secure.
Repeat this entire folding and taping process on the opposite end of the box. Ensure that you pull the paper tautly before making any folds to prevent sagging or air pockets. By using double-sided tape and folding the raw edges inward, you will achieve a clean, seamless exterior with no visible tape marks.
Adding Ribbon and Embellishments
A beautifully wrapped present box is elevated significantly by the addition of a ribbon. To ensure you have enough ribbon, wrap it around the box lengthwise once, then crosswise once, and leave an extra 30 to 40 centimeters on each end to tie the bow. Cut the ribbon at a 45-degree angle to prevent the fabric from fraying and to give the ends a polished look.
To tie a classic cross-ribbon, place the center of the ribbon on the top face of the box. Bring the two ends down the sides, cross them over each other underneath the box, turn them 90 degrees, and bring them back up the remaining two sides to the top. Thread the ends under the original center loop on top, pull them tight to secure the ribbon against the box, and tie a secure double knot.
To keep the ribbon flat and aligned with the edges of the box, place a small piece of double-sided tape underneath the ribbon where it crosses on the bottom and at the corners. This simple step prevents the ribbon from sliding or becoming loose when the gift is handled. Once the knot is secure, tie a neat bow, adjusting the loops and tails so they are symmetrical and proportional to the size of the box.
For a modern, minimalist look, you can slip a small sprig of dried eucalyptus, a stem of lavender, or a handwritten gift tag under the knot before tying the final bow. These small, thoughtful details add texture and personality to your presentation, making the gift feel even more special.
Common Wrapping Mistakes and How to Avoid Them
Even with careful preparation, beginners often encounter a few common wrapping challenges. The most frequent issue is managing excess paper, which causes the corners to look bulky and misshapen. If you realize your paper is too long after making your initial folds, do not try to force the excess paper down. Take a moment to trim the edges with your scissors before securing them with tape. Taking this extra step ensures your folds remain flat and crisp.
Another common problem is torn paper at the corners of the box. This usually happens when using thin paper or when pulling the paper too tightly over sharp cardboard edges. To prevent tears, always fold the paper gently and support the corners with your fingers as you crease them. If a small tear does occur, you do not need to discard the paper and start over. You can strategically place a ribbon, a gift tag, or a decorative sticker over the tear to conceal it neatly.
Visible tape marks can also detract from the overall presentation of your gift. If you must use standard clear tape on the outside of the package, use it sparingly and place it only on the underside of the flaps where it is less noticeable. Transitioning to double-sided tape is the easiest way to eliminate this issue entirely, as it keeps all adhesive completely hidden from view.
Frequently Asked Questions (FAQ)
How do I wrap an oddly shaped present box?
Wrapping non-rectangular or irregular items can be challenging with standard folding techniques. If your gift does not have flat sides, consider placing it inside a sturdy cardboard present box first to create a uniform shape. Alternatively, you can use flexible materials like tissue paper or fabric wraps, or create a custom paper pouch by folding the wrapping paper into a bag shape and securing the bottom. For cylindrical items, the twist method works well, where you roll the item in paper and tie both ends with ribbon like a traditional cracker.
What is the best tape to use for a seamless finish?
For a truly seamless and professional finish, double-sided tape is highly recommended because it remains completely hidden between the overlapping layers of paper. If you prefer standard tape, choose a matte finish tape (often labeled as invisible tape) for matte, kraft, or textured wrapping papers, as it blends into the surface without reflecting light. Glossy clear tape should only be used on highly glossy or metallic wrapping papers where a matte tape would stand out.
Community discussion
Share your experience or ask a question. Comments are reviewed before publication.