
Wrapping a mooncake gift box beautifully requires selecting sturdy materials that can support the weight of dense pastries, measuring precisely to avoid bulky seams, and applying clean folding techniques. Mid-Autumn Festival is a time of reunion and appreciation, making the presentation of your gift as meaningful as the treats inside. By choosing the right paper weight, securing crisp edges, and adding thoughtful festive accents, you can transform a standard box into an elegant, personalized token of respect and affection.
The art of presentation reflects the care you put into choosing the gift itself. A well-wrapped box not only protects the delicate pastries inside but also builds anticipation for the recipient. Whether you are preparing a premium S$80 box for family members or assembling corporate gifts for valued clients, mastering a few fundamental stationery and wrapping techniques ensures your offering stands out on the festive table.
Choosing the Right Wrapping Paper and Ribbon
Selecting the appropriate wrapping paper is the foundation of a beautiful presentation. Mooncake gift boxes are notoriously heavy, often containing dense lotus paste, salted egg yolks, and sturdy internal dividers. Standard, lightweight wrapping papers can easily puncture or tear at the sharp corners of these heavy boxes. To prevent this, opt for medium-to-heavyweight papers, ideally between 80 gsm and 120 gsm. Textured papers, such as premium kraft paper, embossed specialty sheets, or heavy matte paper, offer excellent tensile strength and a luxurious tactile feel that elevates the gifting experience.
Products mentioned in this guide
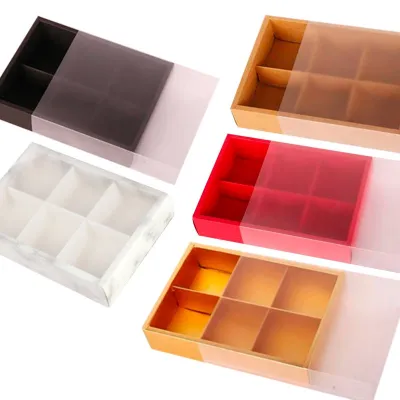
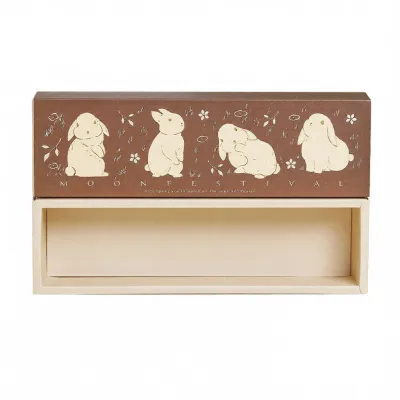
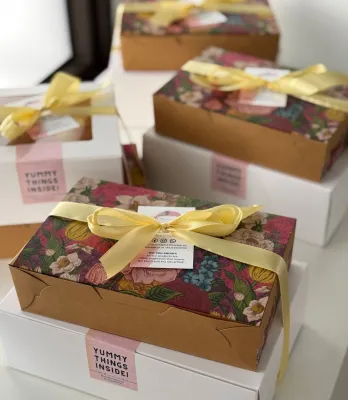
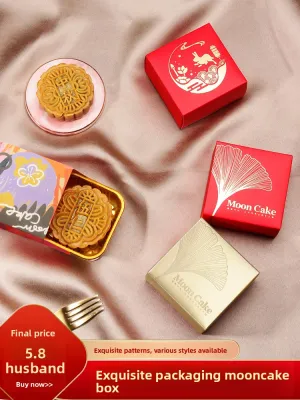
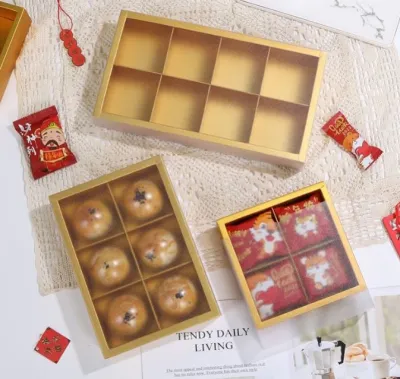
Prices are valid at publication and may change. Please refer to the product page for the latest price.
The ribbon you choose must provide both structural support and visual contrast. A heavy box requires a ribbon that can hold its tension without slipping or stretching. Satin ribbons offer a classic, high-gloss finish that looks incredibly elegant, though they can be slippery to knot. Grosgrain ribbons, with their ribbed texture, provide excellent grip and hold knots securely. For large or dramatic bows, wired-edge ribbons are highly effective because they allow you to shape and fluff the loops, ensuring they do not flatten during transport. Choose a ribbon width that matches the scale of your box; a 25mm to 38mm ribbon is ideal for standard four-piece boxes, while wider ribbons suit larger, multi-tiered packages.
Before cutting your paper, calculate the exact dimensions required to avoid wasting material or creating bulky, uneven seams. To find the correct length, wrap a flexible measuring tape around the perimeter of the box (covering the top, bottom, and two sides) and add an extra 3 to 5 cm to allow for a clean, overlapping seam. To find the correct width, measure the length of the box and add roughly three-quarters of the box’s depth to each side. This ensures you have enough paper to cover the ends completely without creating excess bulk that would prevent the box from sitting flat.
Preparing Your Workspace and Tools
A clean, organized workspace is essential for achieving professional wrapping results. Clear a large, flat table and lay down a self-healing cutting mat. This mat protects your tabletop from scratches and provides helpful grid lines to ensure your paper cuts are perfectly straight. Gather your essential stationery tools before you begin: a pair of sharp craft scissors or a utility knife, high-quality double-sided tape, and a bone folder. When using sharp blades, always cut away from your body and keep your fingers clear of the cutting path to ensure safety.

Preparing the mooncake gift box itself is a crucial step that is often overlooked. Inspect the box for structural integrity, ensuring the lid fits snugly and any magnetic closures or drawers function correctly. If the corners of the box feel soft or weak, reinforce them from the inside with a small piece of clear packing tape before wrapping. Carefully peel off any price tags or retail labels. If a label is stubborn and cannot be removed without tearing the cardboard, cover it with a small piece of plain white paper so it does not show through your wrapping paper.
Environmental factors can significantly affect your wrapping materials, especially in warm, humid climates. High humidity can cause paper to absorb moisture, leading to warping, wrinkling, or a loss of crispness. It can also weaken the adhesive on standard tapes, causing seams to pop open over time. To prevent this, work in a cool, air-conditioned room if possible. Store your wrapping paper in its protective roll until you are ready to cut it. When applying double-sided tape, press down firmly along the entire length of the strip with your thumb or a bone folder to activate the adhesive and create a strong, lasting bond.
Step-by-Step Wrapping Techniques for a Gift Box
To begin the wrapping process, place your pre-cut wrapping paper design-side down on your cutting mat. Position the mooncake gift box face down in the center of the paper. Pull one of the long edges of the paper up and over the bottom of the box, securing it temporarily with a small piece of tape. Next, pull the opposite long edge over the box. To create a professional, seamless finish, fold the raw edge of this top layer under by about 1 cm to create a clean, straight fold line. Pull the paper taut across the box and secure this folded edge using double-sided tape, ensuring the seam runs neatly along the center or edge of the box.
Once the main body of the box is wrapped, turn your attention to the open ends. Start on one side by pushing the top flap of paper downward against the side of the box. This action will naturally create two neat, diagonal wings of paper on the left and right sides. Use your bone folder to crease these diagonal folds sharply against the corners of the box. Creasing is the secret to a professional look; sharp, defined edges prevent the paper from looking loose or bulky.
Next, fold the left and right diagonal wings inward one at a time, pressing them flat against the side of the box. Keep the paper pulled tight as you work to ensure a snug fit. Finally, fold the bottom flap upward to cover the side. Before securing it, fold the raw edge of this bottom flap inward by 1 cm to hide any uneven cuts. Pull the flap firmly upward and secure it to the box using a strip of double-sided tape hidden beneath the fold. Repeat this entire process on the opposite end of the box, ensuring both sides are symmetrical and flat.
Adding Ribbons, Bows, and Festive Embellishments
A beautifully tied ribbon adds the perfect finishing touch to your mooncake gift box while providing extra security during transport. To tie a classic cross ribbon, cut a length of ribbon approximately five times the length of your box. Place the center of the ribbon across the top face of the box. Bring the two ends down the sides, cross them over each other on the bottom of the box, and bring them back up the remaining two sides to the top. Pull the ribbon taut so it sits snugly against the paper, but be careful not to pull so hard that you crush the cardboard corners of the box. Tie a secure half-knot at the center point on top.
With the base ribbon secured, you can now craft a classic bow. Create a loop with one end of the ribbon, wrap the other end around the base of the loop, and pull it through to form a second loop. Adjust the size of the loops and the length of the tails until the bow is perfectly symmetrical and balanced. If you are using a slippery satin ribbon, apply a tiny dot of clear craft glue or a small piece of double-sided tape directly under the central knot to prevent the bow from sliding off-center. Trim the ribbon tails at a sharp 45-degree angle, or fold them in half and cut diagonally to create a clean swallowtail finish that prevents the fabric from fraying.
To celebrate the Mid-Autumn Festival, consider incorporating traditional themed accents into your ribbon design. You can thread the string of a small paper lantern charm, a wooden rabbit ornament, or a decorative tassel through the central knot before tying your final bow. Alternatively, tuck a small sprig of dried osmanthus flowers or a gold-painted leaf behind the knot for a rustic, elegant touch. Ensure these embellishments are lightweight and securely attached so they do not fall off when the gift is carried.
Final Inspection and Gifting Preparation
Before presenting your wrapped mooncake gift box, conduct a thorough final inspection to ensure everything is perfect. Place the box on a flat surface and look at it from all angles. Check for any loose paper edges, lifting tape, or visible adhesive residue. If you notice any minor air bubbles or wrinkles in the paper, gently smooth them out toward the nearest seam using the flat edge of your bone folder. Verify that the box sits completely flat and does not wobble, which indicates that your end folds are neat and free of excess bulk.
Safe transport is essential to preserve your hard work, especially if you are traveling to a family gathering or dinner. To protect the delicate paper and ribbon from sudden tropical downpours or high humidity, place the wrapped box inside a sturdy, flat-bottomed paper gift bag. Avoid stacking other heavy items on top of the wrapped box, as this can crush the ribbon bow or dent the corners of the paper. Keep the gift in a cool, dry place away from direct sunlight until the moment you present it to your recipient.
A personalized gift tag completes the presentation and conveys your warm wishes for the festival. Choose a tag made from heavy cardstock that coordinates with the colors of your wrapping paper. Write your message using a high-quality gel pen or calligraphy marker. To prevent smudging, always test your pen on a scrap piece of the tag material first to verify its drying speed, and allow the ink to dry completely before attaching the tag. Tie the tag to your ribbon bow using a short piece of matching twine or a thin ribbon offcut, positioning it so it lies flat and is easy to read.
Frequently Asked Questions (FAQ)
Can I wrap a mooncake box with an irregular shape or a built-in handle?
Many modern mooncake boxes feature unique shapes, such as octagons, cylinders, or structures with integrated carrying handles. For round or octagonal boxes, standard paper wrapping can be incredibly difficult and often results in messy, bunched edges. Instead, consider using a fabric wrap, such as a traditional furoshiki cloth or a reusable organza wrap, which conforms beautifully to irregular shapes without tearing. If the box has a beautiful built-in handle, wrap only the main body of the box, leaving the handle exposed for easy carrying, and decorate the base of the handle with a coordinated ribbon and a festive tag.
How do I prevent the wrapping paper from tearing under the weight of the box?
Heavy mooncake boxes exert significant pressure on the corners of wrapping paper. To prevent tearing, always choose a paper with a higher weight, such as 100 gsm or thicker kraft paper. If you must use a thinner, highly decorative paper, line the inside of the paper with a layer of plain white tissue paper or thin backing paper to distribute the tension. You can also apply small pieces of clear tape directly to the sharp corners of the box itself before wrapping to dull the edges. Finally, ensure your folds are snug but not pulled to their absolute breaking point, and support the bottom of the box with your hand whenever carrying it.

Community discussion
Share your experience or ask a question. Comments are reviewed before publication.