
Presenting a gift in a package bag is one of the most convenient yet elegant ways to celebrate an occasion. However, simply dropping an item into a bag often results in a slumped, messy presentation that lacks the polished touch of a traditional wrapped box. Achieving a professional, boutique-worthy look requires a systematic approach to structural support, balanced proportions, and deliberate tissue paper styling. By selecting the right materials, reinforcing the base, and mastering the art of folding tissue paper, you can transform a simple paper carrier into a stunning, high-end gift presentation. This guide walks you through the exact steps to select, prepare, and assemble a beautifully wrapped package bag, ensuring your gift remains secure and looks immaculate from the moment it is received.
Choosing the Right Package Bag and Supplies
The foundation of an immaculate gift presentation lies in selecting a bag that matches the physical requirements of your gift. A bag that is too small will bulge or tear, while an excessively large bag makes the gift look sparse. To determine the ideal bag size, measure the length, width, and height of your gift box. The bag should be at least two inches wider than the gift box on all sides, and the height of the bag should exceed the gift by at least three inches. This extra vertical space provides the necessary clearance for the tissue paper to bloom elegantly without being crushed by the handles.
Material selection plays a significant role in both the structural integrity and the visual appeal of your presentation. Heavyweight paper bags with a matte or textured finish offer a classic, sophisticated look suitable for weddings and formal celebrations. Laminated paper bags provide a glossy, vibrant finish that resists moisture and minor scuffs, making them excellent for birthday parties. For a premium, sustainable option, reusable fabric bags made from cotton, canvas, or linen offer a tactile warmth and double as a functional secondary gift. High-quality paper bags are widely available in local stationery shops, ranging from budget-friendly options under S$2 to premium, heavy-duty textured bags around S$5 to S$10.
Products mentioned in this guide

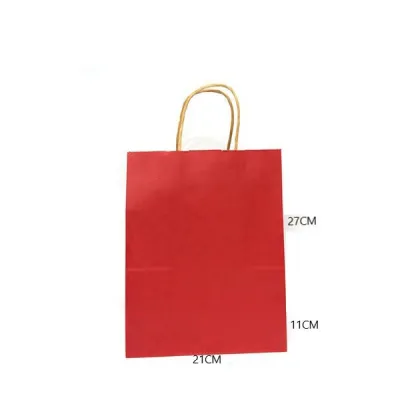
Prices are valid at publication and may change. Please refer to the product page for the latest price.
Beyond the bag itself, gather a curated selection of coordinating supplies. You will need high-quality tissue paper that is thick enough to hold its shape without tearing easily. Standard tissue paper sheets measuring 20 by 30 inches are highly versatile. Because tissue paper quality varies, perform a quick rub test on a scrap piece before assembling to ensure the dye does not transfer to your hands or the gift box, especially in humid climates where ambient moisture can cause ink bleeding. Additionally, keep a roll of clear double-sided tape on hand to secure loose edges discreetly. A sharp pair of craft scissors is essential for trimming ribbons and tags cleanly. When using craft scissors, always cut away from your body on a flat, stable surface, and keep sharp tools out of reach of children. Finally, select a coordinating ribbon—such as satin, grosgrain, or natural twine—and a high-quality cardstock gift tag to personalize the presentation.
Preparing the Gift and the Bag Base
Before placing anything inside the bag, you must prepare the structure to ensure the gift sits flat and does not cause the bottom of the bag to sag. Many commercial paper bags feature a thin cardboard insert at the base, but these are often insufficient for heavier items like books, candles, or ceramic mugs. To reinforce the base, cut a piece of thick cardstock or corrugated cardboard to match the exact dimensions of the bag’s bottom panel. Slide this reinforcement piece into the bottom of the bag, ensuring it lies completely flat. This simple step distributes the weight of the gift evenly across the entire base, preventing the unsightly bowing that often occurs when a heavy item is placed inside.

Next, prepare the gift item itself to protect it and keep it stable. If you are gifting multiple small, loose items—such as cosmetics, stationery accessories, or gourmet treats—do not place them directly into the bag individually. Instead, group them together inside a smaller inner box or a structured pouch. This keeps the items organized, prevents them from shifting during transit, and creates a clean, uniform shape that sits securely at the bottom of the bag. For fragile items, wrap them in a protective base layer of neutral-colored tissue paper before placing them in the inner box.
The secret to professional-looking tissue paper peaks lies in pre-folding the sheets before they ever enter the bag. Rather than crumpling the paper into a ball—which creates messy, chaotic wrinkles—use a structured folding technique. Lay a sheet of tissue paper flat on a clean surface. Pinch the sheet directly in the center, lift it upward, and give it a gentle downward flick to let the corners drape naturally. Alternatively, you can create a fan or accordion pleat by folding the paper back and forth in two-inch increments, then pinching the bottom edge. These methods build internal volume and structure, allowing the top edges of the paper to stand upright and elegant.
Step-by-Step Wrapping and Tissue Paper Styling
Step 1: Placing the gift securely. Gently lower your pre-wrapped gift or inner box into the center of the package bag. It is vital to center the item precisely to maintain the bag’s physical balance. If the gift is placed too far to one side, the bag will tilt when lifted by the handles, which can cause the contents to shift and ruin the arrangement. If you are placing multiple items, arrange the heaviest items at the bottom and center, with lighter items resting securely on top.
Step 2: Inserting and arranging the tissue paper. Take your pre-folded tissue paper sheets by their pinched bases and insert them into the bag, placing them around the sides of the gift box. The pinched points should point downward into the bag, while the open, flared corners should point upward, rising approximately two to three inches above the bag’s rim. For a standard medium-sized bag, use three to four sheets of tissue paper: one for the front, one for the back, and one for each side. This surrounding arrangement creates a full, symmetrical frame that completely conceals the gift inside.
Step 3: Tucking and securing the edges. Once the tissue paper is in place, gently fluff the visible peaks with your fingertips to ensure they look voluminous and even. If you notice any loose edges or corners falling outward over the sides of the bag in an untidy manner, use a small piece of double-sided tape to secure them. Apply the tape to the inner rim of the bag and press the tissue paper lightly against it. This keeps the paper anchored in place, ensuring the presentation remains intact even if the bag is carried through windy conditions or transported in a vehicle.
Step 4: Adding the final embellishments. Align the bag’s handles symmetrically so they stand upright. Thread your personalized gift tag through one of the handle loops, ensuring the written message faces outward. To add a luxurious touch, tie a coordinated satin or grosgrain ribbon around the base of one handle, finishing it with a neat, symmetrical bow. Trim the ribbon tails at a clean 45-degree angle or a sharp V-shape using your craft scissors to prevent fraying and complete the professional aesthetic.
Troubleshooting Common Package Bag Mistakes
A sagging bag base is one of the most common issues, typically caused by a gift that is too heavy for the bag’s paper weight. If you notice the bottom of the bag bowing downward when lifted, do not ignore it, as this can lead to the paper tearing. Remove the gift and insert a thicker, more rigid piece of cardboard at the base. If the bag still sags, consider redistributing the weight by splitting the gift into two smaller bags, or transition the gift into a sturdy decorative gift box wrapped with a ribbon instead.
Oversized or tall gifts present another challenge, often sticking out of the top of the bag and preventing the tissue paper from framing the presentation properly. If more than a third of the gift box extends past the rim of the bag, the bag is too small. Forcing an oversized item into a small bag looks cramped and unprofessional. In this scenario, switch to a larger bag size that fully accommodates the height of the item, or wrap the gift box directly in high-quality wrapping paper, using the package bag solely for smaller coordinating items.
If your tissue paper keeps slipping down into the bag or collapsing flat, it usually means there is too much empty space inside or the paper lacks structural folds. To fix this, add a few crumpled sheets of plain tissue paper at the very bottom of the bag, underneath the gift, to act as a filler lift. This raises the gift slightly and provides a solid foundation for the decorative tissue paper to rest upon. Additionally, ensure you are pinching and lifting the tissue sheets from the center to create those structural pleats, rather than simply stuffing flat sheets into the sides.
Customizing the Presentation for Different Occasions
For corporate events, professional milestones, or formal occasions, opt for a minimalist and sophisticated aesthetic. Choose a solid-colored bag in a neutral tone, such as matte black, navy blue, or crisp white. Pair it with matching solid-colored tissue paper, keeping the folds exceptionally clean and uniform. Instead of a large, flashy bow, secure the handles with a simple band of high-quality satin ribbon or a neat wrap of natural jute twine, finished with a clean, understated business card or minimalist gift tag.
When wrapping for festive holidays, birthdays, or baby showers, embrace vibrant colors and playful textures. Layer two contrasting colors of tissue paper—such as metallic gold paired with deep forest green for the holidays, or bright pastel pink paired with soft yellow for a baby shower—to create a dynamic, multi-dimensional look. You can also select patterned package bags featuring subtle geometric prints, foil accents, or seasonal illustrations, coordinating the tissue paper colors with the accents on the bag for a cohesive design.
For an eco-friendly approach that appeals to environmentally conscious recipients, focus on reusable and recyclable materials. Seek out high-quality paper bags made from 100% post-consumer recycled content, which can be easily recycled again after use. Instead of standard plastic-coated ribbons, use natural cotton ribbons, raffia, or hemp twine. You can also substitute traditional tissue paper with shredded kraft paper or wrap the inner gift in a beautiful fabric wrap, such as a reusable cotton tea towel or a Furoshiki cloth, which serves as an extra, thoughtful gift.
Frequently Asked Questions (FAQ)
How do I wrap an oddly shaped gift in a package bag?
Oddly shaped items—such as plush toys, round bottles, or sculpted home decor—can easily stretch or puncture a package bag if placed inside directly. To wrap these items neatly, first group them or wrap them tightly in a thick layer of tissue paper to smooth out any sharp or irregular protrusions. Alternatively, place the irregular item inside a simple, sturdy cardboard box filled with shredded paper or tissue filler. This creates a uniform, flat-bottomed shape that sits securely at the base of the bag, preventing the bag from tilting or tearing while maintaining a clean, professional exterior.
Can I reuse a package bag without it looking worn out?
Yes, high-quality package bags can easily be reused if they are inspected and refreshed properly. Before reusing a bag, check for deep creases, scuffed corners, weakened handles, or visible oil and adhesive stains. If the bag passes inspection, gently smooth out any minor folds with your hands. To keep your collection of bags in pristine condition between uses, store them completely flat in a dry, cool drawer, or hang them neatly on a hanger in a closet. Avoid folding or cramming them into tight spaces, which can cause permanent creases that ruin their structural integrity for future gifting.

Community discussion
Share your experience or ask a question. Comments are reviewed before publication.