
Wrapping a gift neatly is an art that transforms a simple gesture into a memorable presentation. A crisp, professionally wrapped package shows the recipient that you cared enough to focus on every detail, from the neatly aligned seams to the symmetrical bow. Achieving this clean look does not require professional training; instead, it relies on a few fundamental techniques: precise measurement, consistent tension, and hidden adhesives. By mastering these basic steps, you can eliminate bulky folds, messy tape lines, and wrinkled corners entirely.
The secret to a flawless finish lies in preparation and patience. Before you cut your first piece of paper, taking a moment to organize your workspace and select the right materials will make the entire process seamless. Whether you are preparing a birthday present, a holiday surprise, or a corporate token, this step-by-step guide will walk you through the exact methods used by professional gift wrappers to achieve sharp, clean lines every single time.
Gather Your Tools and Materials
To achieve a clean and professional finish, you must start with the correct supplies. Select a medium-weight wrapping paper that offers a balance between flexibility and durability; paper that is too thin tears easily, while paper that is too thick resists folding and creates bulky seams. When choosing a ribbon, select a width proportional to the size of your gift box—narrow ribbons work best for small jewelry boxes, while wider, structured ribbons complement larger packages.
Products mentioned in this guide
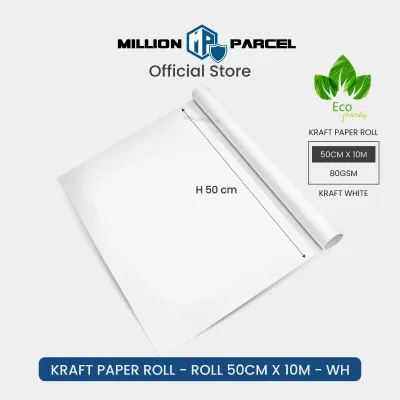
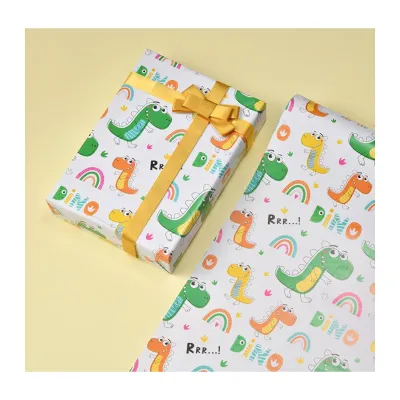

Prices are valid at publication and may change. Please refer to the product page for the latest price.
Your cutting and fastening tools are just as critical. Prepare a pair of exceptionally sharp scissors to ensure clean, continuous cuts without snagging. For the cleanest aesthetic, skip standard clear tape and opt for high-quality double-sided tape, which allows you to secure the paper from the underside and completely eliminates visible adhesive marks.
Finally, verify that the gift box is fully closed and structurally sound. Inspect the box for any sharp protruding edges or loose price tags. If the item did not come in a box, placing it inside a sturdy, square, or rectangular cardboard box is the single best way to guarantee a neat, crisp final presentation.
Measure and Cut the Wrapping Paper
Determining the exact amount of paper needed is the most crucial step in avoiding excess bulk. Start by unrolling your wrapping paper on a flat, clean work surface. Place your gift box on the paper to estimate the width required. To measure accurately, roll the box along the paper to cover all four sides, allowing for a slight overlap of about two to three centimeters where the edges meet. Any more than this will create thick, unsightly ridges along the back of the box.

Next, measure the length of the paper needed to cover the short ends of the box. Pull the paper up along one side of the box; it should reach just past the halfway point of the box’s height. Repeat this check on the opposite side. If the paper extends all the way to the top of the box side, it is too long and will bunch up when you try to fold the ends. Trim any excess paper before proceeding to ensure your end folds remain flat and sharp.
To guarantee precise, parallel lines, never rush the cutting process. If your wrapping paper features a grid pattern on the reverse side, use these lines as a guide to slide your scissors smoothly. If you are using plain paper, use a long ruler or a straight edge to lightly mark a cutting line with a pencil. Straight cuts ensure that all your seams align beautifully without exposing raw, diagonal edges.
Wrap and Secure the Main Body
With your paper cut to the correct dimensions, you are ready to wrap the main body of the box. Begin by placing the gift box face down in the center of the unrolled paper. Positioning the box face down ensures that the top of your gift remains completely smooth, seamless, and free of any tape lines. Align the box so that the margins of paper on the left and right sides are equal, which helps maintain balanced tension as you fold.
Take one of the long edges of the paper and fold it over the bottom of the box, pulling it snug against the side. Holding this side in place, grab the opposite long edge of the paper and pull it over the box so it overlaps the first edge. It is vital to pull the paper taut—but not so tight that it tears—to prevent any loose, sagging, or wrinkled sections from forming along the main body of the package.
To secure the main seam invisibly, apply a strip of double-sided tape along the inner edge of the overlapping flap. Press the taped edge firmly down onto the underlying paper, smoothing it out with your fingers from the center outward. This creates a completely flat, secure, and invisible seam along the bottom or back of the box, keeping the exterior of your gift clean and uninterrupted.
Fold the Ends for a Crisp Finish
Creating neat, sharp corners on the short ends of the gift box is where the true technique of a professional wrapper comes into play. Start on one open end of the box. Gently push the left and right side edges of the paper inward toward the center of the box side. As you push the sides in, use your thumb and forefinger to pinch and crease the resulting top and bottom flaps, creating sharp, vertical creases that align with the vertical corners of the box.
Once the sides are pushed in, you will be left with a top triangular flap and a bottom triangular flap. Fold the top flap down flat against the side of the box, running your finger along the top edge of the box to create a crisp, horizontal crease. The sides of this flap should form clean, symmetrical diagonal lines pointing toward the center. Next, fold the bottom flap upward so it overlaps the top flap, ensuring that the point of the bottom flap aligns with the vertical center of the box side.
To secure this end, apply a small piece of double-sided tape to the inside of the bottom flap’s edge before pressing it firmly against the top flap. Check that the fold is tight against the box and that no raw paper edges or tape strips are exposed. Repeat this exact process on the opposite end of the box, maintaining consistent tension so that both ends look identical, symmetrical, and flat.
Add the Ribbon and Tie a Bow
Adding a ribbon is the final touch that elevates your gift presentation from neat to a polished presentation. To begin, measure and cut a length of ribbon that is roughly five times the length of your gift box. Position the ribbon evenly across the top face of the box, checking for straight alignment. Wrap the ribbon around the box, crossing the ends over each other on the bottom side, and turn them ninety degrees to wrap around the remaining two sides of the box.
Bring the ribbon ends back to the top face of the box, threading them under the original central strand to lock them in place. Pull the ribbon ends to establish equal tension on all sides, ensuring the ribbon sits flat against the paper without twisting or warping the box. Tie a simple, secure knot at the center point to create a stable foundation for your bow.
Now, tie a symmetrical bow using the two loose ends. Take your time to adjust the size of the loops and the length of the tails, pulling them gently until they are well-balanced and proportional to the size of the gift. Once the bow is secure and the center knot is neat, finish the presentation by trimming the ribbon tails. Cut the ends at a sharp diagonal angle, or fold the ribbon in half vertically and cut upward at an angle to create a classic V-notch. This detail prevents the ribbon from fraying and adds a highly refined, professional touch.
Troubleshooting Common Wrapping Mistakes
Even with careful preparation, minor issues can arise during the wrapping process. If you experience paper tearing, it is usually caused by sharp box corners or using paper that is too thin. You can prevent this by placing small pieces of clear tape over the sharp corners of the box before wrapping, or by switching to a slightly thicker paper grade that offers better puncture resistance. If a tear does occur on an outer fold, it is best to start fresh with a new piece of paper rather than attempting to patch it with visible tape.
If your finished wrap looks loose or saggy, the paper was not pulled taut enough during the initial steps. To fix this, carefully peel back the double-sided tape—or cut the seam open cleanly if the tape is too strong—and re-pull the paper snug against the box before re-securing the seams. Taking the time to pull the paper tight before taping saves you from a wrinkled final product.
Uneven ribbon placement can also detract from an otherwise neat wrap. If your ribbon keeps sliding off-center while you are trying to tie the bow, measure the exact center point of the box and mark it lightly with a pencil. You can use a tiny piece of double-sided tape on the underside of the ribbon to hold it temporarily in place against the paper while you focus on tying and adjusting the final knot and loops.
Frequently Asked Questions (FAQ)
How much extra wrapping paper should I leave for overlap?
For a clean, bulk-free seam, you should aim for an overlap of approximately two to three centimeters. This margin is wide enough to apply a strip of double-sided tape securely, yet narrow enough to prevent the paper from bunching up or creating a thick, raised ridge. When measuring, the paper should wrap around the box and meet just past the center line of the side or bottom face. If the paper extends past this point, trim the excess off before taping to maintain a flat, professional profile.
What is the best tape to use for invisible seams?
Double-sided tape is an ideal choice for achieving invisible seams, as it hides completely beneath the overlapping paper. If you are working with textured, metallic, or exceptionally thick paper, a strong double-sided adhesive is necessary to hold the tension. For standard matte or glossy paper, standard double-sided tape works beautifully. Avoid using standard clear glossy tape on matte paper, as the shiny plastic strip will stand out and disrupt the clean, seamless look of your presentation.
How do I wrap an oddly shaped gift without a box?
If your gift is oddly shaped and cannot be placed in a box, you can create a sturdy base by cutting a piece of thick cardboard to match the item’s footprint. Place the item on the cardboard base, then wrap the paper around it, gathering the excess paper neatly at the top to tie it off with a ribbon like a sack. Alternatively, you can place the item inside a high-quality, structured gift bag, using tissue paper to conceal the gift and add a decorative, professional touch.

Community discussion
Share your experience or ask a question. Comments are reviewed before publication.