
A beautifully wrapped gift box does more than just conceal a present; it builds anticipation and shows the recipient that you cared enough to invest time in the presentation. Achieving a crisp, store-quality finish does not require professional training, but it does demand a methodical approach to measuring, folding, and securing your materials. By mastering a few fundamental techniques, you can transform ordinary paper and ribbon into a striking work of art.
The key to a flawless wrap lies in eliminating excess bulk, creating sharp creases, and hiding your adhesive. Whether you are preparing for a festive holiday, a wedding, or a birthday celebration in Singapore, this step-by-step guide will walk you through the precise actions needed to wrap any rectangular gift box with professional neatness.
Essential Tools and Materials for Professional Gift Wrapping
Before cutting into your paper, gather all your supplies to ensure a seamless workflow. Having the correct tools on hand prevents interruptions and protects your materials from accidental tears or creases during the wrapping process.
Products mentioned in this guide
![[SG Stock] 礼品盒Magnetic Gift Box | Solid Hard Large Gift Box with Ribbon For Mother s Day / Valentines Gift Packaging](https://img.lazcdn.com/g/p/5e5003d632dce3e647372c2e54605522.png_400x400q80.png_.webp)
![[SG SELLER] Premium Black Ribbon Gift Box| Gift Boxes | Wedding Gift Box | Birthday Gift Box | Christmas Gift Box](https://img.lazcdn.com/g/p/bd8b7a9a3d3c0ff631f62618658bb278.png_400x400q80.png_.webp)
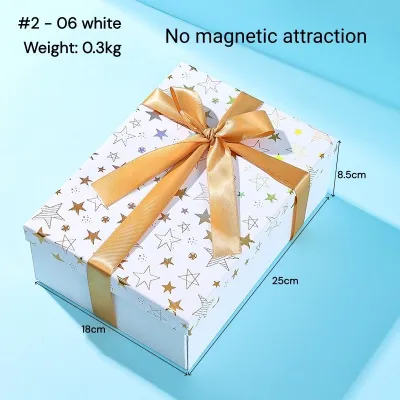
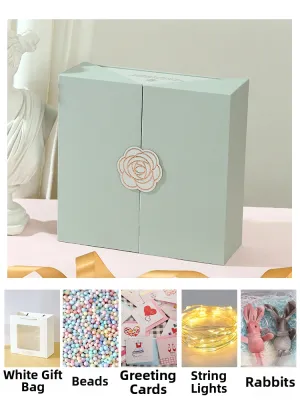
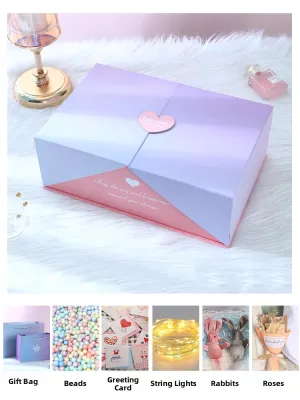
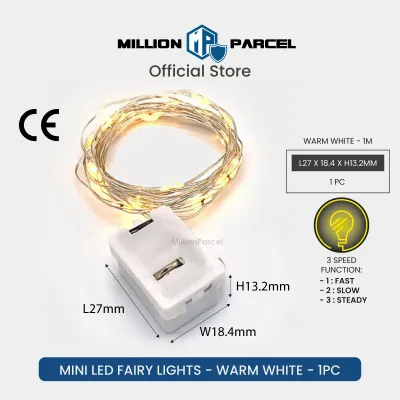
Prices are valid at publication and may change. Please refer to the product page for the latest price.
The foundation of your presentation consists of three core components: a structurally sound gift box, high-quality wrapping paper, and a complementary ribbon. The gift box provides the rigid framework that supports your paper, so ensure it is fully intact and securely closed. For the wrapping paper, look for options that offer a balance of flexibility and strength. The ribbon should match the scale of the box, with satin, grosgrain, or organza being excellent choices for creating elegant bows.
To achieve a truly professional finish, standard office supplies are often inadequate. You will need the following specialized tools:
- Sharp scissors: Dull blades will chew or snag the paper, leaving jagged edges that ruin the clean lines of your gift. Dedicated craft shears or long-bladed paper scissors ensure smooth, continuous cuts.
- Double-sided tape: This is the secret weapon of professional wrappers. Unlike standard clear tape, which sits on top of the paper and catches the light, double-sided tape remains completely hidden beneath the seams, creating an invisible bond.
- Standard clear tape: Keep a roll of high-quality clear tape nearby for securing internal folds where visibility is not an issue.
- A crease tool: A bone folder is ideal, but a plastic ruler or the edge of a clean, stiff plastic card works perfectly to press down folds and create razor-sharp creases.
Step 1: Measuring and Cutting the Wrapping Paper Accurately
One of the most common mistakes in gift wrapping is using too much paper. Excessive paper creates bulky, uneven folds that make the final presentation look messy, while too little paper leaves unsightly gaps. Accurately measuring your paper before cutting is the most critical step in ensuring a neat finish.

Begin by unrolling your wrapping paper on a clean, flat, and hard surface, such as a large dining table or a clean floor. Place your gift box face down in the center of the unrolled sheet. Placing the box face down ensures that any seams or tape marks will ultimately end up on the bottom of the box, leaving the top surface completely smooth and pristine.
To measure the width of the paper, pull the paper up from the roll and over the top of the box. The paper should wrap entirely around the box, covering the top and bottom surfaces, with an additional 2 to 3 centimeters of overlap. This extra overlap provides a clean margin for creating a folded hem later. Mark this point lightly with a pencil or make a tiny nick in the paper.
To measure the length of the paper for the ends, look at the sides of the box. The paper extending from the left and right sides should reach approximately two-thirds of the height of the box when folded upward. If the paper is longer than this, it will bunch up and create awkward bulk when you fold the end flaps. Trim away any excess length on both sides.
Once your measurements are marked, cut the paper in a straight line. To ensure a perfectly straight cut, use the edge of a long ruler as a guide, or gently slide your sharp scissors through the paper along a straight grid line, which is often printed on the reverse side of high-quality wrapping papers.
Step 2: Securing the Main Body of the Gift Box
With your paper cut to the exact dimensions, you can now begin wrapping the main body of the gift box. The goal of this step is to pull the paper as tightly as possible around the box to eliminate any slack, ensuring a smooth, wrinkle-free surface.
Start by pulling one long edge of the paper up and over the bottom of the box, aligning it so that it covers slightly more than half of the box’s surface. Secure this edge temporarily to the center of the box with a small piece of clear tape. This anchor point keeps the paper from shifting as you work on the opposite side.
Next, grasp the opposite long edge of the paper and pull it tightly across the box. It is important to apply firm, even tension as you pull, but be careful not to pull so hard that you tear the paper at the corners. The paper must hug the contours of the box snugly.
Before taping this second edge down, create a finished hem to hide the raw, cut edge of the paper. Fold the raw edge inward by approximately 1 centimeter, pressing along the fold with your crease tool or fingernail to create a sharp, clean line. This simple step elevates your wrapping from amateur to professional by hiding any minor cutting imperfections.
Apply a strip of double-sided tape along the underside of this folded hem. Carefully press the hemmed edge down onto the wrapped paper, smoothing it out from the center outward. The result is a perfectly straight, secure, and completely invisible seam running along the bottom or side of your box.
Step 3: Creating Crisp, Envelope-Style Folds on the Ends
Folding the ends of the paper is often considered the most challenging part of gift wrapping, but breaking it down into distinct, symmetrical folds makes the process straightforward. This technique creates a clean, professional envelope-style finish on the sides of your box.
Turn the box so that one of the open ends is facing you. Start by pushing the top flap of the paper straight down against the side of the box. As you push the paper down, use your fingers to smooth it flat against the box’s vertical surface. This action will naturally force the left and right sides of the paper to flare outward, creating two distinct triangular flaps.
Next, use your bone folder, ruler, or fingernail to crease the edges of these triangular side flaps sharply. Run your tool along the top edge of the box and down the diagonal folds of the side flaps. Creating sharp, defined creases at this stage is the secret to preventing the paper from buckling or sagging later.
Now, fold the left and right triangular flaps inward, pressing them flat against the side of the box. Again, crease the vertical edges sharply. You should now have a single remaining bottom flap that points downward like a triangle.
To secure the end, fold the bottom flap upward tightly against the box. This flap should cover the previous folds, creating an envelope-style triangle. For a flawless finish, fold the raw tip of this bottom flap inward by about half a centimeter to create a clean hem. Apply a small piece of double-sided tape to the inside of this hem, and press it firmly against the box to lock the fold in place. Repeat this exact sequence on the opposite end of the box, ensuring the folds are symmetrical.
Step 4: Positioning and Tying the Ribbon for a Polished Finish
A beautiful ribbon acts as the crowning touch for your wrapped gift box. Tying a classic cross pattern with a symmetrical bow adds height, texture, and a sense of luxury to the presentation.
To estimate the required length of your ribbon without wasting material, wrap the ribbon around the length of the box once, then around the width of the box once. Add roughly 60 centimeters to this total to ensure you have plenty of tail length to tie a comfortable, full bow. It is always better to have slightly too much ribbon than to struggle with ends that are too short to tie.
To begin the cross-tying method, place your wrapped box face down on top of the midpoint of your ribbon. Bring the two ends of the ribbon up over the bottom of the box and cross them over each other, twisting them 90 degrees so they run perpendicular to their original direction.
While holding the twist secure with one finger, flip the box face up. Bring the two ribbon ends around the sides of the box and meet in the center of the top face. Thread one end of the ribbon under the central crossed loop and pull both ends tight. This locks the ribbon structure in place, ensuring it will not slide off the corners of the box.
To tie a secure, symmetrical bow that sits flat and upright, avoid a standard shoelace knot, which often causes the bow to twist sideways. Instead, make two neat loops (often called “bunny ears”) of equal size. Cross the left loop over the right loop, tuck it through the central opening, and pull both loops firmly to tighten. Adjust the size of the loops and the length of the tails until the bow is perfectly balanced and centered on the box.
Finally, finish the ribbon tails to prevent fraying and add a tailored look. Fold the end of a ribbon tail in half vertically, then use your sharp scissors to cut diagonally upward from the fold to the outer edge. Unfold the ribbon to reveal a perfect chevron “V” shape. Alternatively, a simple diagonal cut at a 45-degree angle provides an equally elegant, modern finish.
Pro Tips for a Flawless and Wrinkle-Free Presentation
Even with careful planning, minor imperfections can occasionally occur. These professional troubleshooting tips will help you resolve common issues and elevate your wrapping technique.
If you notice minor wrinkles or tension lines in your paper after wrapping, you can use a hairdryer to smooth them out. Set the hairdryer to its lowest, coolest setting and hold it at least 15 centimeters away from the box. Gently sweep the cool air over the wrinkled areas while smoothing the paper with your hand. The air flow helps relax the paper fibers. Always avoid high heat settings, as excessive heat can melt delicate wrapping papers, scorch specialized finishes, or degrade the adhesive on your tape.
When working with exceptionally thick, metallic, or heavily textured papers, you may find that the paper resists folding or cracks along the seams. To prevent this, use a ruler and a bone folder to lightly score the fold lines on the reverse side of the paper before making your actual folds. Scoring compresses the paper fibers along the intended line, allowing for a clean, sharp crease without any surface cracking.
Finally, always inspect the structural integrity of the gift box itself before you begin wrapping. A flimsy, overfilled, or partially crushed box will warp under the tension of the wrapping paper, causing the paper to sag and lose its crisp shape. If your box is weak, reinforce the inner corners with standard clear tape, or place a piece of rigid cardboard at the bottom of the box to distribute the weight of the contents evenly.
Frequently Asked Questions (FAQ)
What is the best type of wrapping paper for beginners?
For those new to gift wrapping, choosing a forgiving material is key to a stress-free experience. A medium-weight, matte, or slightly textured paper is highly recommended. This type of paper is sturdy enough to resist accidental tearing when pulled tight, holds sharp creases exceptionally well, and is highly receptive to both standard and double-sided tapes.
Avoid very thin, glossy, or slippery papers, such as glassine, cheap cellophane, or lightweight metallic foil. These materials are incredibly difficult to fold precisely, show every finger smudge and wrinkle, and often repel standard adhesives, making it frustrating to achieve a clean finish.
How can I wrap a gift box neatly if I run out of tape?
If you find yourself without tape, you can still achieve a neat finish using alternative methods. For lightweight wrapping paper, a standard craft glue stick can be applied sparingly along the inner folded hems. Press and hold the seams for a few seconds to allow the adhesive to bond securely.
For a completely tape-free and eco-friendly approach, consider switching to a traditional fabric wrap, known as Furoshiki. This method uses a square piece of beautiful cloth to wrap the gift box, securing it with elegant knots rather than adhesives. Furoshiki is highly reusable and adds a unique, premium touch to your presentation, though it requires a suitable piece of fabric rather than traditional paper.
Community discussion
Share your experience or ask a question. Comments are reviewed before publication.