
To wrap a gift basket with transparent plastic cellophane so it looks like it came from a high-end boutique, you must master the “pull-and-pleat” method. This technique relies on using heavy-duty cellophane wrap, securing the base with hidden double-sided tape, and gathering the plastic at the top to create a crisp, voluminous crown. By avoiding common pitfalls like kitchen cling wrap and visible adhesive lines, you can transform a simple collection of items into an elegant, professional-grade hamper perfect for housewarmings, weddings, or festive holiday gifting.
Achieving this polished look does not require professional training, but it does require the right materials and a methodical approach. From preparing the base to securing the final bow, each step plays a crucial role in ensuring the plastic remains taut, clear, and wrinkle-free. This guide will walk you through the entire process, sharing the exact techniques used by professional florists and gift designers.
Materials and Tools You Will Need
Having the correct supplies on hand is the first step toward achieving a store-bought finish. Standard household wrap will not work for this project; you need materials specifically designed to provide structural support and crystal-clear visibility.
Products mentioned in this guide
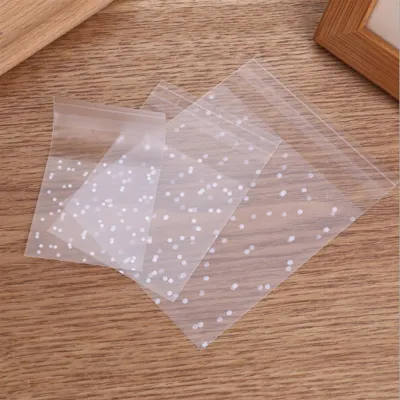
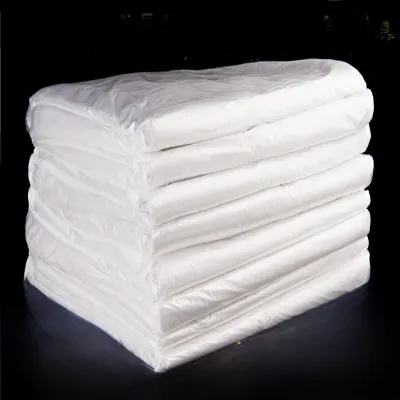
Prices are valid at publication and may change. Please refer to the product page for the latest price.
- Gift Cellophane Roll: Opt for a high-clarity polypropylene or cellophane film with a thickness of 30 to 40 microns. This thickness provides the perfect balance between flexibility and strength, ensuring the plastic does not tear easily while still allowing you to fold crisp, clean pleats. Avoid standard kitchen cling wrap, which is too thin, clings to itself uncontrollably, and lacks the structural stiffness needed to create a beautiful flared top.
- Clear Double-Sided Tape: This is the secret weapon for a professional finish. It allows you to secure folds and flaps underneath the basket or along the seams without leaving visible adhesive marks on the outside of the plastic.
- Transparent Scotch Tape: Choose a high-gloss, crystal-clear tape rather than a matte or "magic" tape. Matte tape looks cloudy and distracting against the shiny surface of the cellophane wrap.
- Sharp Scissors: Use heavy-duty shears to ensure clean, straight cuts. Dull scissors will snag and tear the edges of the cellophane, making it difficult to create neat folds.
- Decorative Elements: Gather a selection of wired fabric ribbons, pre-made bows, or curling ribbons. Wired ribbon is particularly useful because it holds its shape beautifully and resists sagging, even in humid climates.
Before starting, perform a quick tape test on a small scrap of your cellophane. Press a piece of tape firmly onto the plastic and pull it gently to ensure it bonds instantly without slipping or leaving a messy residue under tension.
Preparing the Gift Basket Before Wrapping
A beautiful exterior cannot hide a messy interior. Before you even unroll your transparent plastic, you must ensure the contents of your basket are stable, balanced, and visually appealing.

First, address the depth of your basket. If your items sit too low, they will disappear below the rim, making the basket look sparse. Use filler materials like shredded paper, wood wool, or crinkle-cut paper to build a firm foundation. Pack the filler tightly into the bottom of the basket to create a stable, even platform that elevates your items so they sit level with or slightly above the rim.
Next, arrange your items using a tiered approach. Place the tallest and heaviest items, such as bottles or large boxes, at the back of the basket. Position medium-sized items in the center, and place the smallest, most visually appealing items at the front. To prevent items from shifting or tipping over during transport, use small pieces of double-sided tape or adhesive dots to secure them to one another and to the inside of the basket.
Finally, consider the basket’s handle. If the basket has a tall, decorative handle, you will want to wrap the plastic over the entire handle to protect it and create a grand, tall silhouette. If the basket has no handle or has low side handles, you will gather the plastic directly above the tallest item in the basket. Decide on this layout beforehand so you can measure your plastic accurately.
Step-by-Step Wrapping Technique
Once your basket is prepared and your tools are ready, you can begin the wrapping process. This sequence is designed to minimize wrinkles and ensure a tight, secure fit.
Measuring and Cutting the Transparent Plastic
Accurate measurement is critical to avoid running short of plastic or dealing with excessive, bulky folds that ruin the clean lines of your basket.
To measure the correct amount of cellophane, unroll the plastic on a large, clean, flat surface. Place your prepared gift basket in the exact center of the unrolled sheet. Pull the front edge of the cellophane up to the top of the basket, then do the same with the back edge. The two sheets should meet at the top and extend at least 15 to 20 centimeters (6 to 8 inches) beyond the tallest point of your basket or handle. This excess is necessary to create the gathered crown at the top.
Once you have determined the correct length, make a clean, straight cut across the roll. If your basket is exceptionally wide, you may need to lay two overlapping sheets of cellophane perpendicular to each other to form a cross shape, placing the basket at the intersection. This ensures complete coverage on all four sides.
Gathering and Securing the Wrap
The gathering step is where the difference between an amateur and a professional wrap becomes obvious. The goal is to pull the plastic taut against the sides of the basket while creating neat, deliberate pleats.
Start by bringing the front and back sheets of the cellophane together directly above the center of the basket. Hold them firmly in one hand. With your free hand, begin gathering the loose plastic from the left and right sides. Instead of bunching the plastic randomly, fold it into neat, uniform, accordion-style pleats. Work your way from the outer edges toward the center, pulling the plastic tight against the sides of the basket as you go.
Once all the plastic is gathered at the neck, secure it temporarily. You can use a sturdy rubber band, a twist tie, or a piece of clear tape wrapped tightly around the gathered neck. This temporary hold maintains the tension on the sides of the basket, freeing up both of your hands to finish the base and add decorative elements.
Smoothing and Sealing the Base
A clean base ensures your gift basket sits flat on a table without wobbling or looking messy from the side.
With the top of the basket secured, look at the excess plastic at the bottom corners. Gently tilt the basket to one side. Fold the open side edges of the plastic inward toward the center of the basket’s base, creating neat, triangular envelope flaps. Pull these flaps tightly against the bottom of the basket to remove any remaining slack from the sides.
Apply a strip of clear double-sided tape to the inside edge of each flap, then press them firmly against the underside of the basket. If the plastic layers at the bottom are too thick and bulky, use your scissors to carefully trim away the excess before taping. This ensures the basket has a flat, stable bottom and a seamless, professional appearance from every angle.
Adding Professional Finishing Touches
Now that the structural wrapping is complete, you can focus on the decorative elements that elevate the presentation and hide the temporary fasteners at the neck.
Select a wide, high-quality ribbon that complements the theme and colors of your gift. Wrap the ribbon tightly around the gathered neck, directly over the rubber band or twist tie, and tie a secure double knot. Using wired ribbon, tie a voluminous bow with multiple loops. Fluff the loops of the bow to give it a three-dimensional, luxurious appearance.
Next, turn your attention to the excess cellophane rising above the bow. Use your fingers to gently spread and flare out the gathered plastic, creating a beautiful, symmetrical “crown” effect. If the top edge is uneven, use your sharp scissors to trim it into a neat, rounded shape or a clean diagonal cut.
To complete the look, tuck a personalized gift tag, a sprig of dried eucalyptus, or a decorative floral pick into the knot of the bow. These small details add a thoughtful, bespoke touch that makes the gift feel truly special.
Common Wrapping Mistakes and How to Fix Them
Even with careful preparation, mistakes can happen. Understanding how to troubleshoot these common issues will help you maintain a flawless finish.
- Too Little Plastic: If you cut your cellophane too short and it cannot reach the top to gather, do not try to stretch it, as this will cause tears. Instead, wrap a separate, wide band of cellophane horizontally around the middle of the basket, secure it at the back with double-sided tape, and then gather the top as usual. This creates a neat, layered look while saving your materials.
- Visible or Messy Tape: Using opaque, colored, or low-quality tape on the outside of the plastic looks highly unprofessional. Always use clear double-sided tape hidden beneath folds, or high-gloss transparent tape. If you accidentally place a piece of tape in a visible spot, do not rip it off, as this can tear the cellophane. Instead, place a decorative sticker, a small bow, or a gift tag directly over the mistake to conceal it.
- Wrinkled or Saggy Sides: If the plastic looks loose or wrinkled along the sides of the basket, it means you did not pull it taut enough before securing the base. To fix this, gently peel back the tape on the bottom flaps, pull the plastic down firmly to smooth out the wrinkles, and re-secure the flaps with fresh double-sided tape.
Frequently Asked Questions (FAQ)
Can I use standard kitchen cling wrap instead of cellophane?
No, standard kitchen cling wrap is not suitable for professional gift wrapping. Kitchen wrap is designed to be thin and clingy, which causes it to stick to itself, stretch out of shape, and wrinkle easily. It also lacks the structural stiffness required to stand upright and create a neat, flared crown at the top of the basket. For a polished, professional finish, always use high-clarity gift cellophane rolls.
How do I prevent the plastic from tearing at the basket handles?
Rigid or sharp basket handles can easily pierce transparent plastic when it is pulled taut. To prevent tearing, reinforce the contact points on the handle with a small piece of clear tape before you begin wrapping. Alternatively, if the handle is very sharp, you can carefully cut a tiny slit in the plastic to allow the handle to pass through, then secure and conceal the edges of the slit with a small piece of clear tape or a decorative ribbon.

Community discussion
Share your experience or ask a question. Comments are reviewed before publication.