
Tailor chalk is an essential tool for transferring patterns, marking seam allowances, and plotting embroidery designs onto fabric. To use it effectively, you must select a chalk type compatible with your fabric, prepare a stable workspace, apply the chalk with light and consistent pressure, and remove the marks safely before applying heat. Mastering these techniques ensures your sewing and embroidery projects remain precise and free of permanent stains.
Preparing Your Fabric and Workspace for Marking
Before drawing any lines, prepare the fabric surface. Wrinkles and creases distort the fabric’s natural drape, causing marked lines to warp once the material is flattened. Press the fabric thoroughly with an iron, adhering to the temperature guidelines suitable for the specific fiber content. This ensures a smooth, predictable surface.
Once pressed, lay the fabric on a flat, clean, and hard work surface. A cutting mat or a dedicated sewing table provides the necessary resistance for clean marking. Soft or uneven surfaces can cause the chalk to skip or press too deeply into the weave, leading to inconsistent lines.
Products mentioned in this guide
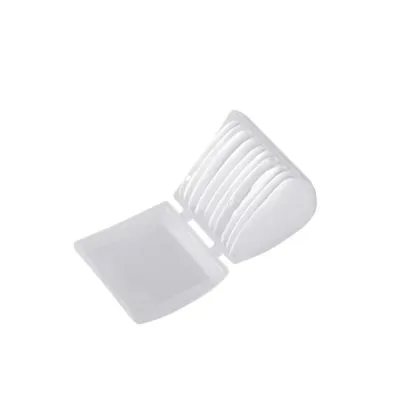
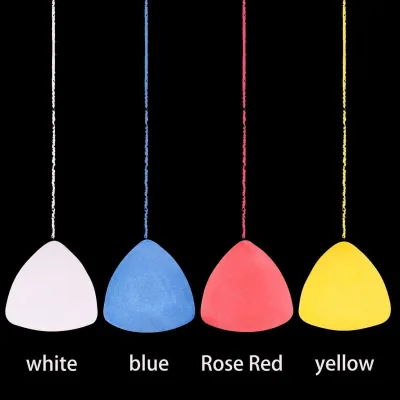
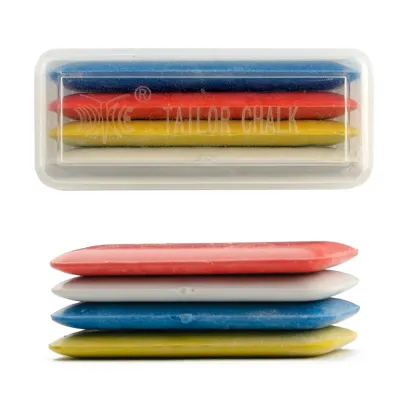
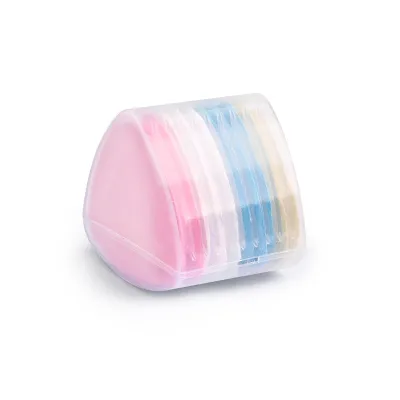
Prices are valid at publication and may change. Please refer to the product page for the latest price.
Secure the fabric to prevent shifting during the marking process. Use pattern weights for delicate or slippery fabrics, or secure the edges with sewing clips or fine pins. Any movement during marking can lead to misaligned seams or distorted embroidery motifs.
Inspect the edge of your tailor chalk before touching it to the fabric. A dull, rounded edge produces thick, imprecise lines that can throw off your measurements. Adjust the edge sharpness depending on whether you need a razor-thin line for cutting or a slightly broader guide for placement.
Choosing the Right Tailor Chalk for Your Fabric
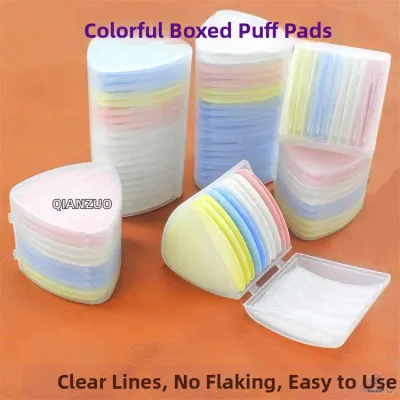
Tailor chalk comes in several formulations, each suited to specific fabric textures and weaves. Traditional clay-based chalk is the most common variety, offering a dry, powdery texture that brushes away easily. It works exceptionally well on medium to heavy woven fabrics like cotton, linen, and wool, sitting on top of the fibers without sinking deep into the weave.

Wax-based chalk is formulated for synthetic fabrics and woolens where clay chalk might not adhere well. It glides smoothly over textured surfaces and leaves highly visible lines. However, wax chalk requires careful handling because heat can melt the wax into the fibers, making the marks incredibly difficult to remove.
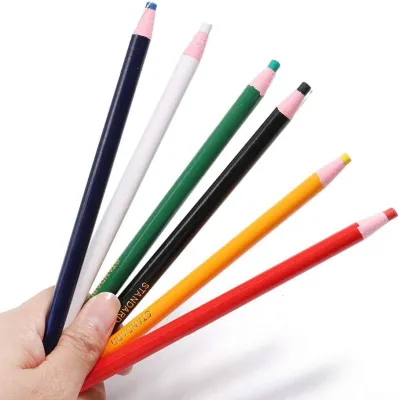
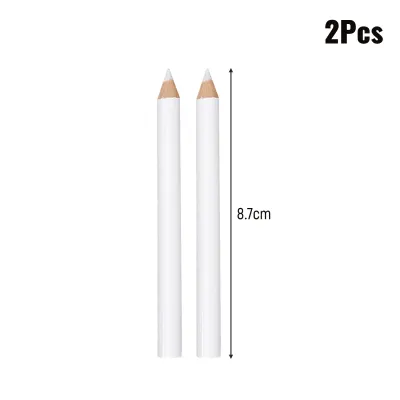
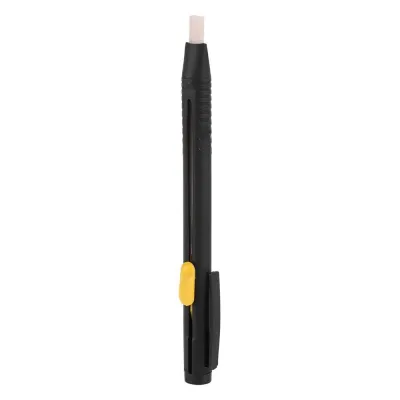
Chalk pencils and mechanical chalk pens offer the precision of a standard writing instrument. These are ideal for fine details, intricate embroidery patterns, and marking small construction points like buttonholes. They often feature fine, replaceable chalk leads in various colors, making them highly versatile.
Color selection is critical for visibility and safety. Choose a chalk color that provides clear contrast against your fabric—such as white chalk on dark navy wool, or blue chalk on light cream linen. Avoid using highly saturated colors on light fabrics unless you have verified they will wash out completely.
Always perform a patch test on a hidden scrap of the exact same fabric before marking your main project. Apply the chalk using the same pressure you plan to use, let it sit, and then attempt to remove it. This simple step prevents permanent staining on your final garment or embroidery piece.
Core Techniques for Marking Fabric
Holding your tailor chalk correctly is the first step toward achieving clean, consistent lines. Grip a flat, triangular piece of chalk between your thumb and index finger, keeping your hand relaxed. Hold it at a slight angle—approximately 45 degrees—to the fabric surface rather than perfectly upright.
This angled grip allows the edge of the chalk to glide smoothly across the weave without digging in. It also helps maintain a consistent line weight and prevents the thin edge of the chalk from snapping under pressure. Rotate the chalk slightly in your hand between strokes to keep the edge wearing down evenly.
Always use physical guides to ensure accuracy when marking straight lines or complex curves. Align a heavy acrylic quilting ruler, a flexible French curve, or your paper pattern template directly over the marking line. Hold the guide firmly with your non-dominant hand to prevent it from sliding.
Draw the chalk along the edge of the guide using light, even pressure. Pressing too hard can cause the chalk to crumble, leaving excess dust that can smudge your fabric. Heavy pressure also embeds the chalk particles deep into the fabric fibers, making subsequent removal much more difficult.
Marking for Sewing and Cutting
In garment construction, precise markings dictate the fit and structure of the finished piece. Use dashed lines or small dots to mark seam allowances, darts, and pleats. For darts, mark the apex with a small dot and draw straight lines connecting it to the legs of the dart at the seam line.
Transfer pattern notches, fold lines, and grainlines using standardized symbols. A short, perpendicular tick mark is ideal for indicating notches, while long, continuous lines help align the fabric grain. Ensure these marks are clear enough to guide your shears or rotary cutter without confusion.
When marking cutting lines, keep the chalk line positioned just inside the intended waste area of the fabric. This placement ensures that any remaining chalk residue is naturally trimmed away during cutting. It also prevents the thickness of the chalk line from adding unwanted millimeters to your pattern pieces.
For double-layered fabric cutting, use tailor’s tacks or carbon transfer paper in conjunction with your chalk to mirror the markings on the bottom layer. This maintains perfect symmetry between the left and right sides of your garment without needing to flip and re-measure.
Marking for Embroidery
Embroidery requires a high level of precision, especially when working on delicate fabrics like silk, organza, or fine linen. Use a freshly sharpened chalk pencil or the razor-thin edge of a traditional clay chalk block. This allows you to trace intricate floral motifs, geometric patterns, or monogram outlines with minimal distortion.
Mark essential placement guides before mounting your fabric into an embroidery hoop. Draw a horizontal and vertical axis to locate the exact center of your design. These centering lines help you align the fabric perfectly with the hoop’s registration marks, preventing the design from warping under tension.
If you are using stabilizers, mark their boundaries on the wrong side of the fabric to ensure complete coverage beneath the stitching area. Keep these lines light and thin so they do not show through sheer fabrics or interfere with the adhesive properties of temporary spray stabilizers.
Avoid applying heavy layers of chalk in areas that will be densely stitched, such as satin-stitched fills or thick French knots. Thick chalk buildup can become trapped beneath the embroidery threads. Once stitched over, this trapped chalk is incredibly difficult to brush out or wash away, potentially dulling the color of your embroidery floss.
Removing Tailor Chalk Marks Safely
Removing tailor chalk requires a systematic approach to prevent setting the pigment permanently into the fabric. Always begin by dry-brushing the fabric before introducing any water or cleaning agents. Use a soft-bristled clothes brush, a clean lint roller, or a dry microfiber cloth to sweep away loose chalk dust.
Once the excess dust is removed, consult the fabric care label to determine the safest washing parameters. Note the recommended water temperature, detergent type, and drying instructions for your specific textile to prevent accidental shrinkage or fiber damage.
For washable fabrics, a gentle cycle in cool water with a mild detergent is usually sufficient to dissolve clay-based chalk marks. If you are working with dry-clean-only fabrics, inform your dry cleaner about the presence of tailor chalk so they can treat the areas with appropriate professional solvents.
Never apply high heat to marked fabric. Keep irons, garment steamers, and hot clothes dryers away from the fabric until you are absolutely certain all chalk marks have been completely removed. High temperatures can melt the binders in wax-based chalks or bake clay pigments into the fibers, creating permanent stains.
Troubleshooting Common Tailor Chalk Mistakes
One common frustration is chalk lines rubbing off too quickly during handling, especially on smooth or slippery fabrics like satin or polyester. If your marks are fading before you can stitch them, try switching to a slightly softer clay chalk or re-marking the lines in small sections as you work.
If your chalk lines become blurred, thick, or fuzzy, they can compromise the accuracy of your cutting or stitching. Stop immediately and refine the edge of your chalk. A thick line can introduce a variance of several millimeters, which can accumulate and ruin the fit of a tailored garment.
There are times when tailor chalk is simply not the right tool for the job. If you are working with highly textured fabrics like deep-pile velvet, chunky knits, or extremely slippery silks, chalk may fail to adhere or may distort the fabric during application.
In these cases, switch to alternative marking methods. Water-soluble fabric pens, air-erasing markers, or traditional tailor’s tacks made with contrast thread are excellent alternatives that mark the fabric without applying physical pressure or leaving chemical residues.
Frequently Asked Questions (FAQ)
Can I use regular sidewalk or classroom chalk instead of tailor chalk?
It is highly recommended to avoid using standard classroom or sidewalk chalk on sewing and embroidery projects. Classroom chalk is formulated with different binders, plaster of Paris, and aggressive color pigments designed for blackboards or concrete, not delicate textiles.
These non-textile chalks are often much harder and more abrasive, which can scratch or damage delicate fabric fibers. Furthermore, the pigments used in sidewalk chalk are not formulated to wash out of fabric and are highly likely to leave permanent stains on your project.
How do I sharpen a traditional flat piece of tailor chalk?
Maintaining a sharp edge on a flat piece of tailor chalk is essential for precise marking. You can use a dedicated plastic chalk sharpener, which features small internal blades that shave the edge of the chalk when you slide it through the slot.
Alternatively, use a craft knife to carefully shave down the flat sides of the chalk at an angle. Always handle craft knives with extreme care, cutting away from your body on a stable surface, and keep blades out of reach of children.
For a safer alternative, rub the dull edge of the chalk against a piece of fine-grit sandpaper, an emery board, or a nail file. This gently grinds down the excess chalk, leaving a crisp, clean edge perfect for fine line work.
Community discussion
Share your experience or ask a question. Comments are reviewed before publication.