
Organza bags offer a versatile, elegant, and reusable solution for packaging small gifts, party favors, and delicate accessories. By selecting the correct bag size, preparing the contents carefully, and securing the drawstring with a polished knot, you can transform simple items into beautifully presented gifts. The sheer, shimmering mesh fabric allows the contents to peek through, creating anticipation while maintaining a neat, structured presentation. Mastering a few simple styling and packing techniques ensures your gifts look professional, secure, and ready for any occasion.
Using these bags is also an excellent way to add a touch of sophistication without the need for complex wrapping paper folds or tape. Whether you are preparing favors for a wedding, packaging handmade jewelry, or putting together corporate gifts, understanding how to handle this delicate material will elevate your presentation. With the right approach, these lightweight pouches become more than just packaging—they become a memorable part of the gifting experience.
Selecting the Right Organza Bag Size and Style
Choosing the correct bag size is essential for a clean, professional presentation. Because organza is a woven synthetic fabric with no natural stretch, the bag must be significantly larger than the flat dimensions of your gift. To find the right fit, measure the item’s height, width, and depth. A reliable rule of thumb is to select a bag that is at least 3 centimeters wider and 5 centimeters taller than the gift itself. This extra space accounts for the three-dimensional volume of the item and leaves enough fabric at the top to gather neatly when the drawstring is pulled.
Products mentioned in this guide
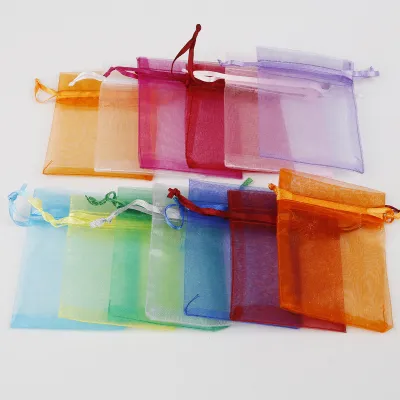
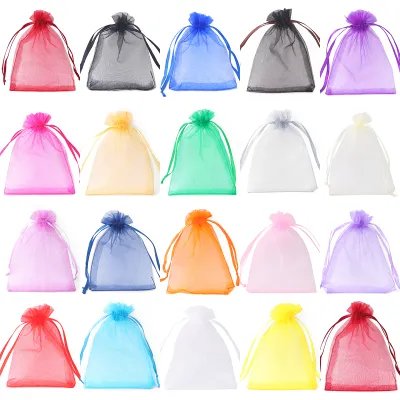
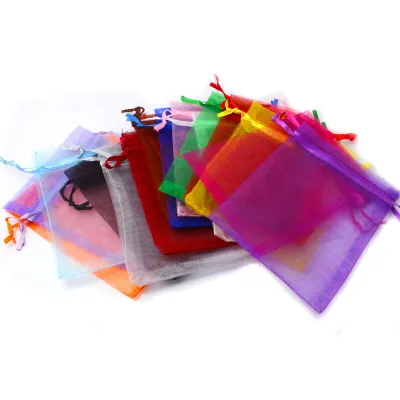
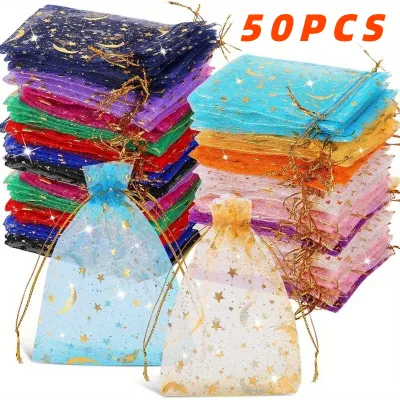
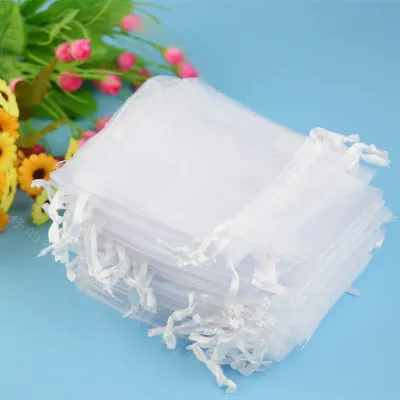
Prices are valid at publication and may change. Please refer to the product page for the latest price.
Standard sizes often range from small 7×9 centimeter pouches—ideal for rings, dainty earrings, or single gemstones—to medium 10×15 centimeter bags suitable for cosmetics, and larger 15×20 centimeter options for notebooks or larger stationery items. If you are packaging multiple small items together, lay them out on a flat surface in the arrangement you want before measuring the overall footprint.
Beyond size, consider the opacity and color of the fabric to match the occasion. Sheer organza bags with a loose weave offer high transparency, making them ideal for colorful items like scented potpourri, decorative soaps, or bright candies. Semi-sheer or metallic-threaded bags provide more coverage, which is excellent for building suspense or holding delicate jewelry. For events in Singapore, pastel shades work beautifully for baby showers, while deep red, gold, or emerald tones are highly suitable for festive celebrations and local wedding favors. Always inspect the side seams and the drawstring channel before purchasing; look for tight, even stitching that can support the weight of your items without fraying.
Gathering Tools and Embellishments
To elevate a basic organza bag into a premium gift package, gather a few supplementary tools and decorative elements before you begin. Adding custom cardstock gift tags, rustic jute twine, or satin ribbons allows you to personalize the presentation. When writing on cardstock gift tags with gel pens or calligraphy markers, test the ink on a scrap piece of paper first to verify the drying speed and bleed resistance, ensuring the ink does not smudge when handled.

For instance, pairing a sheer organza bag with a matte cotton twine creates an appealing contrast between rustic and delicate textures, while a satin ribbon enhances the bag’s natural shimmer. You can also match the ribbon color to the theme of your event or the branding of your products for a cohesive look.
If your gift is fragile or has sharp edges, prepare protective inner packaging. Delicate items like glass vials, ceramic ornaments, or fine jewelry can easily snag the delicate mesh of the bag. Having acid-free tissue paper, small bubble wrap sleeves, or sturdy cardstock backing cards on hand will keep the items secure and pristine. For attaching lightweight embellishments like paper flowers or small bows, keep adhesive dots or a low-temperature glue gun nearby. When using a hot glue gun, always use a low-temperature setting to prevent accidental burns and to avoid melting the synthetic organza fibers.
Step-by-Step Guide to Packing and Styling
Packaging a gift in an organza bag is a straightforward process, but following a structured sequence ensures the final presentation looks balanced, neat, and secure. Here is the step-by-step workflow to achieve a professional finish.
Preparing the Gift and the Bag
Start by preparing the gift item to ensure it is clean, dry, and ready for presentation. If you are wrapping jewelry, mount the pieces securely on a sturdy cardstock backing card to prevent chains from tangling or shifting inside the bag. For items with sharp corners, exposed pins, or delicate protrusions, wrap them in a neat layer of color-coordinated tissue paper. This protective barrier prevents the item from snagging the delicate organza fibers and adds an elegant layer of mystery to the sheer packaging.
Next, inspect the organza bag itself. Turn the bag inside out briefly to check for loose threads, stray fibers, or manufacturing defects along the seams. Use sharp scissors to trim any excess threads near the drawstring channel, as these can easily catch and jam the ribbon when you pull it closed. Ensure the drawstring ribbon is threaded correctly through both sides of the casing and slides smoothly without resistance.
Arranging Items Inside the Bag
Gently slide the prepared gift into the center of the organza bag. Position the item so its most attractive side faces forward, away from any back seams. Ensure the item sits flat and balanced at the bottom of the bag so the package can stand upright on a table or lie neatly on a flat surface.
If the bag is slightly too large for the gift, or if the item looks sparse inside the sheer fabric, add decorative filler to fill the empty space. Shredded crinkle paper, metallic tinsel, or dried flower petals like lavender buds provide excellent visual texture and extra cushioning. Choose a filler color that complements both the gift and the bag to create a cohesive, intentional look.
Securing and Finishing the Drawstring
To close the bag, hold it upright and gently pull both ends of the drawstring ribbon outward simultaneously. Pulling both sides evenly ensures a symmetrical gather at the neck of the bag and prevents the fabric from bunching awkwardly on one side. Avoid pulling too forcefully, which can strain the delicate stitching around the drawstring channel.
Once the bag is fully closed, tie the drawstrings into a neat double knot to secure the opening. For a more polished look, tie a classic bow over the knot. If the drawstring ribbons are excessively long, trim the ends at a clean 45-degree angle using fabric scissors to prevent fraying. Finally, gently pull and fluff the gathered fabric above the drawstring line to create a beautiful, ruffled collar effect that frames the top of the bag.
Creative Personalization and Layering Techniques
For special occasions, you can use advanced styling techniques to make your organza packaging stand out. One highly effective method is double-bagging with contrasting colors. By nesting a smaller gold or silver organza bag inside a slightly larger sheer white or cream bag, you create a beautiful layered shimmer that softens the overall color palette and adds depth to the presentation.
Another way to personalize the gift is by attaching custom embellishments directly to the drawstring. Thread a personalized gift tag, a miniature wax seal, or a small sprig of dried herbs like rosemary or eucalyptus onto the ribbon before tying the final bow. This adds a tactile, handcrafted feel and a pleasant aroma to the package.
Using the organza bag as an elegant inner layer inside a rigid cardboard gift box or a wooden crate is also a popular option. When the recipient opens the outer box, they are greeted by the soft, textured bag, which elevates the unboxing experience and keeps small items organized. This technique is particularly popular for high-end stationery sets, handmade soaps, and artisanal accessories.
Common Mistakes and How to Avoid Them
Avoiding a few common pitfalls will ensure your organza bags look professional and remain intact. The most frequent mistake is overstuffing the bag. Trying to squeeze an oversized item into a small bag stretches the mesh fabric, distorts the shape of the package, and puts immense strain on the seams, often leading to tears. Always leave at least 3 centimeters of breathing room below the drawstring line to allow for a natural gather.
Another common error is using sharp embellishments or placing unprotected sharp items inside the bag. The delicate woven fibers of organza can easily snag, pull, or run like a pair of stockings. Always buffer sharp edges with tissue paper or cardstock backing cards before placing them inside.
Lastly, do not ignore the weight limits of the fabric and drawstring. Organza is designed for lightweight gifts. Heavy items like large stones, heavy metal tools, or filled glass jars can cause the bottom seams to split or the drawstring to slip open during transport. For heavier gifts, reinforce the bottom of the bag with a sturdy piece of cardstock cut to fit, or choose a bag with reinforced double-stitched seams.
Frequently Asked Questions (FAQ)
Can I wash and reuse organza bags?
Yes, organza bags are highly reusable and can be cleaned to extend their lifespan. To clean them safely, hand-wash the bags in cool water using a small drop of mild liquid detergent. Gently swirl the fabric without scrubbing or wringing, which can distort the delicate mesh. Rinse thoroughly in cold water, reshape the bags, and lay them flat on a clean towel to air-dry. Avoid using a hot dryer or a direct iron, as synthetic organza fibers can easily melt or shrink under high heat.
How do I keep small items from slipping out of the gathered top?
Very small items like loose beads, tiny earrings, or delicate rings can sometimes slip through the small gaps created when the drawstring is gathered. To prevent this, wrap the items in a small piece of color-coordinated tissue paper or place them inside a tiny self-sealing glassine envelope before putting them into the organza bag. Alternatively, after pulling the drawstrings tight, wrap an extra piece of thin satin ribbon or decorative twine tightly around the gathered neck several times and tie it securely to seal any remaining gaps completely.

Community discussion
Share your experience or ask a question. Comments are reviewed before publication.