
Using motivational stickers is a highly tactile and visual way to transform abstract daily goals into concrete achievements. By integrating these small, colorful markers into your existing productivity system, you create an immediate feedback loop that rewards task completion and reinforces positive habits. Whether you use a structured paper planner, a bullet journal, or a simple desk calendar, stickers serve as visual anchors that draw your eye to priorities and celebrate small wins throughout the day. This approach turns routine tracking into an engaging, active process that keeps you accountable to your personal and professional milestones.
Selecting the Right Stickers for Your Planner and Tools
Choosing the right stickers requires matching their physical properties to the paper and layout of your planning tools. The material of the sticker dictates how it behaves when written on and how it looks on the page. Matte paper stickers are highly versatile because they accept almost any ink, from gel pens to ballpoints, without smudging. Vinyl stickers offer excellent durability and vibrant colors, but their glossy, non-porous surface usually requires a permanent marker to write on and can add bulk to your planner. Washi tape stickers provide a semi-transparent, delicate texture that blends beautifully with paper, allowing you to layer designs or write over them with fine-liner pens.
Size and scale are equally critical when selecting stickers to ensure they do not overwhelm your layout. Standard planner grids, such as 5mm dot grids or specific vertical column layouts, require stickers that fit comfortably within these boundaries. Before purchasing, measure the column widths and margins of your planner to avoid overlapping text or blocking out adjacent days. Small icon stickers work best for compact daily grids, while larger decorative or quote stickers are better suited for weekly headers, sidebars, or dedicated reflection spaces.
Products mentioned in this guide
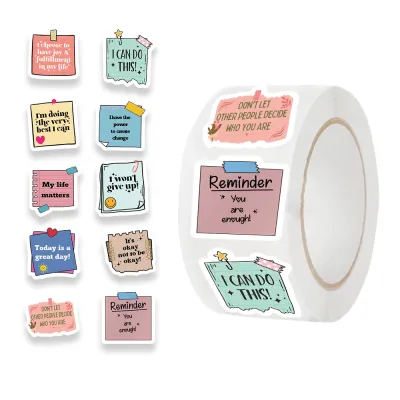
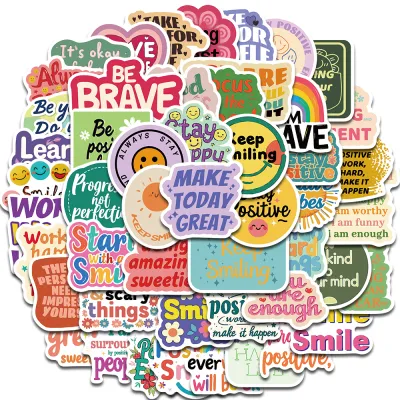
Prices are valid at publication and may change. Please refer to the product page for the latest price.
The adhesive backing determines how flexible your tracking system can be. Repositionable or removable adhesives are ideal if your schedule changes frequently, as they allow you to peel and move tasks without tearing the paper. Permanent adhesives are best reserved for finalized milestones, completed habits, or decorative elements that you want to remain securely in place. In humid climates, such as Singapore, some low-tack adhesives may lift at the corners over time, so testing a small sample on a back page of your planner helps verify how well the adhesive bonds with your specific paper weight.
Designing Layouts for Daily Tasks and Habit Trackers
An effective sticker-based productivity system relies on clear spatial organization to prevent your pages from becoming cluttered and overwhelming. Designating specific zones in your planner ensures that decorative elements do not compete with your actual to-do lists. You can allocate the top of your daily page for primary goals, the center columns for scheduled tasks, and the margins or bottom sections for habit tracking and weekly reflections. Establishing a consistent visual legend or key at the front of your planner helps you assign specific meanings to different sticker shapes, colors, and symbols, making your progress instantly readable at a glance.

Structuring Daily Task Lists
Integrating stickers into your daily task lists turns a standard checklist into a dynamic priority map. Color-coded stickers are highly effective for categorizing tasks by urgency, project type, or energy level. For example, you might use a bright yellow sticker for high-priority professional tasks, a soft blue sticker for personal errands, and a green sticker for health and wellness activities. This visual separation allows you to assess your daily workload in seconds and ensures you do not overlook critical deadlines.
Placing stickers directly next to your task descriptions serves as an interactive visual checkbox. Instead of simply crossing out a line with a pen, applying a vibrant star, checkmark, or motivational quote sticker upon completion provides a satisfying physical action that marks your progress. You can also use functional flag stickers to indicate time-blocking intervals or to highlight tasks that require external follow-up, keeping your daily workflow organized and actionable.
Building Visual Habit Trackers
Habit tracking thrives on consistency, and stickers offer a highly visual way to document your daily progress over weeks or months. To build a sticker-based habit tracker, draw or print a simple grid where each row represents a specific habit—such as drinking water, exercising, or reading—and each column represents a day of the month. Every day you successfully complete the habit, place a small sticker in the corresponding cell.
Using thematic stickers can significantly reinforce your commitment to specific goals. For instance, a small water droplet sticker for hydration tracking or a tiny sneaker sticker for workouts adds a playful, relevant element to your grid. As the month progresses, the growing chain of colorful stickers provides a powerful visual representation of your dedication, making you less likely to break the pattern as the empty spaces fill up.
Step-by-Step Routine for Applying Stickers to Your Goals
To make sticker tracking a sustainable habit, integrate it into a structured daily and weekly routine.
Step 1: Define and Prepare. At the start of each day or the evening before, write down your core objectives in your planner. Select the specific stickers you plan to use for the day and place them nearby. Assigning a particular sticker type or color to each goal beforehand sets a clear intention and establishes what success looks like for that day.
Step 2: Apply and Celebrate. Keep your stickers easily accessible on your desk or tucked inside your planner pocket. The moment you complete a targeted task or habit, immediately apply the corresponding sticker to your page. This immediate physical action pairs the completion of a difficult task with a tangible, positive reward, reinforcing the neurological loop of action and satisfaction.
Step 3: Review and Adjust. At the end of each week, spend ten minutes reviewing your planner pages. Look at the accumulation of stickers to identify patterns in your productivity. A high concentration of stickers indicates successful focus areas, while empty spaces highlight habits or tasks that may need adjustment, smaller steps, or a change in approach for the upcoming week.
Advanced Strategies for Long-Term Habit Building
Once you are comfortable with daily tracking, you can scale your sticker system to support complex, long-term personal or professional milestones. Streak tracking is an excellent method for building momentum; by placing identical stickers consecutively along a timeline, you create an unbroken visual chain. The psychological desire to “not break the chain” becomes a powerful motivator on days when your energy levels are low.
You can also design a milestone reward system within your planner to celebrate sustained effort. For example, set a goal to accumulate twenty workout stickers within a month, and draw a special “reward box” at the bottom of the page. Once the target is met, place a large, unique holographic or metallic sticker in that box to unlock a predefined personal reward, such as a relaxing spa treatment, a new book, or a special meal out.
To deepen the impact of your tracking, combine your stickers with brief journaling prompts. When you apply a major milestone sticker, write two or three sentences next to it reflecting on how you felt completing the task or what challenges you overcame. This practice transforms your planner from a simple logbook into a meaningful record of personal growth and resilience.
Common Pitfalls to Avoid in Sticker-Based Tracking
While stickers are excellent tools for motivation, overcomplicating your system can quickly lead to decision fatigue. Using too many different sticker categories, colors, or rules makes updating your planner feel like a chore, which often leads to abandoning the system entirely. Keep your legend simple, focusing on no more than three to five core categories or habits at any given time.
Another common trap is prioritizing the aesthetic appeal of your pages over actual task completion. Spending hours arranging stickers, color-coordinating layouts, and drawing elaborate borders can become a form of creative procrastination. Remember that stickers are meant to support your productivity, not replace it; a messy page with completed tasks is always more valuable than a pristine, beautifully decorated page with no actual progress.
Finally, pay attention to physical compatibility between your writing instruments, stickers, and planner paper. Writing on glossy vinyl stickers with water-based gel pens often results in severe ink smudging, while heavy-handed sticker application on thin paper can cause page warping or tearing. Always verify pen compatibility by testing your writing tools on a spare sticker first, and choose paper weights of at least 100gsm to ensure your planner can handle the added weight and adhesive of multiple stickers.
Frequently Asked Questions (FAQ)
Can I use motivational stickers in digital planners?
Yes, you can easily adapt sticker-based tracking to digital planning applications on tablets and mobile devices. Many digital planners support the import of digital sticker packs, which are typically cropped, transparent PNG files that you can drag, drop, and resize on your digital pages. While you lose the physical sensation of peeling and pasting, digital stamping with a stylus still provides a satisfying visual reward. Many users find that the ability to reuse digital stickers infinitely and adjust their placement without damaging the page offers a highly flexible and clutter-free alternative to traditional paper planning.
How do I remove stickers without damaging my planner pages?
To remove or reposition a sticker without tearing your planner pages, patience and gentle technique are essential. Start by slowly peeling the sticker from one corner, keeping it as flat and close to the page surface as possible rather than pulling straight up. If the adhesive is stubborn or the paper is thin, applying gentle heat from a hairdryer on its lowest setting for a few seconds can help soften the glue, making it easier to lift. Always test removal on a scrap page or an inconspicuous corner first, and consider using low-tack, repositionable washi or paper stickers if you anticipate needing to move your trackers frequently.
Community discussion
Share your experience or ask a question. Comments are reviewed before publication.