
To use an unpicker safely, you must control the angle of the blade, maintain proper fabric tension, and choose the correct technique for your specific fabric type. A seam ripper is designed to slice through thread, but a single slip can slice through the warp or weft of your fabric, leaving a permanent hole. By mastering the physical mechanics of the tool and adjusting your approach based on the weave of your material, you can cleanly reverse any sewing mistake.
The ease of stitch removal, risk of fabric damage, and fiber recovery depend on the exact combination of fabric weave and thread type. Before unpicking an entire seam, always perform an observable trial on a scrap piece of the same fabric sewn with the same thread. Verify how easily the thread cuts, whether the red ball snags the fibers, and if the needle holes can be successfully closed using steam or gentle manipulation. This trial establishes a safe baseline before you touch your actual project.
Understanding Your Unpicker Anatomy and Fabric Compatibility
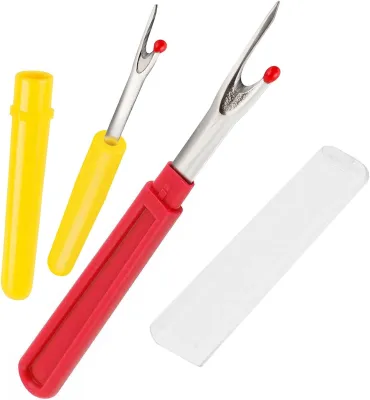
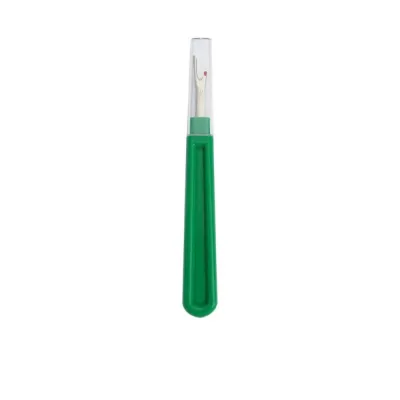
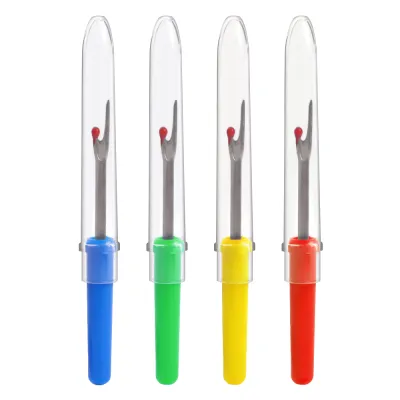
An unpicker consists of four primary structural components, each designed for a specific role in stitch removal. The long, sharp point is engineered to slip under tight stitches and lift them away from the fabric surface. Opposite this point is a shorter prong capped with a small red plastic ball, which serves as a safety guard to prevent the sharp blade from digging into the base fabric when sliding along a seam. Connecting these two prongs is the U-shaped valley, which houses the actual cutting blade. Understanding how these parts interact is the first step toward damage-free unpicking.
Products mentioned in this guide
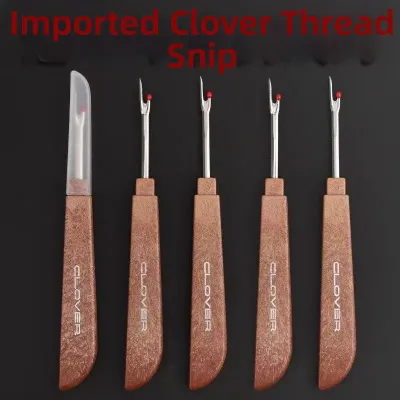
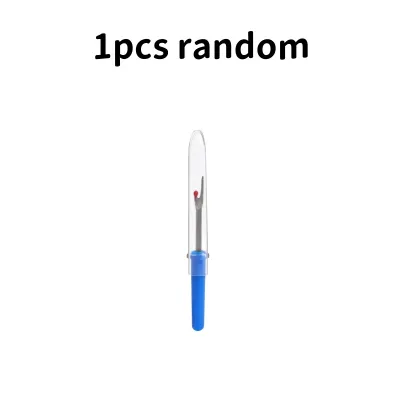
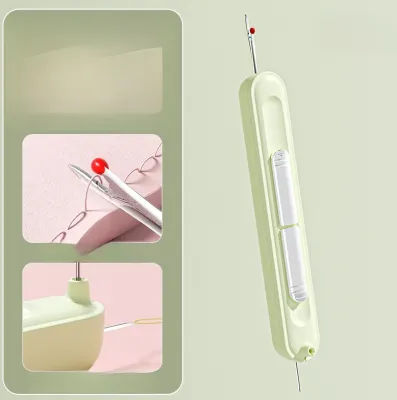
Prices are valid at publication and may change. Please refer to the product page for the latest price.
Matching the size of your unpicker to your project is critical for preventing fabric damage. Fine-tipped unpickers, which typically feature a very narrow point and a small cutting valley, are essential for lightweight cottons, silks, and tight machine stitches. Using a large tool on delicate fabric can stretch the weave and force the needle holes open permanently. Conversely, heavy-duty unpickers have wider prongs and thicker blades, providing the necessary leverage to cut through thick upholstery thread, denim, and canvas without bending or snapping.
Before starting any project, you must inspect the physical condition of your unpicker. Run a careful visual check to ensure the red safety ball is securely attached and smooth; a loose, cracked, or missing ball will snag fabric fibers instantly. Additionally, verify that the cutting blade in the U-shaped valley is sharp. A dull blade will not slice the thread cleanly; instead, it will push, stretch, and bunch the thread, requiring you to apply excessive force which often leads to sudden slips and torn fabric.
Step-by-Step Technique for Safe Stitch Removal
Safe stitch removal requires a stable environment and a controlled, systematic approach. Begin by preparing your workspace. Lay the fabric completely flat on a hard, level surface, such as a wooden table or a self-healing cutting mat. Soft surfaces like your lap or an ironing board allow the fabric to sink under pressure, which significantly increases the risk of the sharp point piercing the fabric. Ensure you have bright, direct lighting positioned over your work area. Before making any cuts, separate the fabric layers to verify that no hidden folds, pockets, or linings are caught underneath the seam you intend to open.

For long, straight seams with loose or medium stitches, the sliding method is highly efficient. First, use the long point of the unpicker to cut the first three or four stitches individually to create an opening. Once you have opened a small gap, insert the short prong with the red safety ball into the seam space. The red ball must rest against the bottom fabric layer, pushing the fabric away from the cutting blade. Slide the tool forward gently in a continuous motion, keeping the fabric flat and slightly taut with your non-dominant hand. Do not pull or stretch the fabric excessively, as this distorts the weave and makes it easier to cut the fabric yarns.
For tight stitches, lockstitches, or complex areas, the sliding method is too risky and can easily tear the fabric. Instead, use the picking method to lift and snap individual threads. Insert the long sharp point under a single stitch, lift it upward and away from the fabric surface, and let the cutting blade slice it. Work from the bobbin side of the seam whenever possible, as bobbin threads are generally easier to loop and lift than the top needle threads. Repeat this process every few stitches along the seam line.
Regardless of the method you choose, maintain a steady pace and clear your work area frequently. Stop every few inches to pull away the severed threads and clear the debris. This ensures you always have an unobstructed view of the next stitch and the path of the blade. Allowing loose threads to bunch up hides the seam line, which is a primary cause of accidental fabric cuts.
Adjusting Your Technique for Delicate and Heavy Fabrics
Delicate or easily snagged fabrics, such as silk, chiffon, satin, and organza, require a highly specialized approach. You should avoid the sliding method entirely on these materials, as the friction of the red safety ball can leave permanent track marks or snag fine silk filaments. Instead, use only the picking method, working exclusively from the wrong side of the garment. To isolate the seam and prevent the sharp point from piercing the underlying layer, slide a piece of stiff cardstock or a thin plastic ruler between the fabric layers directly beneath the seam you are unpicking.
Thick or multi-layered fabrics, such as denim, canvas, and heavy wool, present a different challenge. These materials require a larger, sturdier unpicker to handle the tension of heavy-duty polyester or topstitching thread. Fine tips can easily bend or snap under this pressure. When working on multi-layered seams, work slowly and check the underside of the fabric frequently. Ensure the point of the tool is not piercing the base fabric as you apply the extra force needed to cut thick threads.
Knits and looped fabrics, including jersey, rib-knit, and sweater knits, are highly vulnerable to runs and unravelling. If you cut a yarn of the fabric itself, the entire garment can begin to unravel. Always work in the direction of the yarn loops rather than against them. Cut the sewing thread at regular intervals—every three or four stitches—using the picking method, then gently pull the cut threads out with your fingers or tweezers. Never yank or pull a thread hard, as this can snag the knit loops and create a run.
Clearing Thread Debris and Inspecting the Fabric
Once all the stitches are cut, you must remove the remaining thread remnants before re-sewing. Do not rub the fabric vigorously with your hands, as this friction can grind the loose fibers into the weave or distort the fabric grain. Instead, press a strip of low-tack masking tape or a lint roller gently over the area to lift the debris. For delicate or textured fabrics, a soft-bristled brush, such as a clean toothbrush, can be used to gently sweep away stubborn thread fragments.
After clearing the debris, conduct a thorough visual inspection of the fabric. Hold the unpicked area up to a bright light source and examine the seam line closely. Check for any micro-cuts, broken fabric yarns, or severely stretched needle holes. This inspection helps you determine if the fabric needs reinforcement, interfacing, or a slightly wider seam allowance when you re-sew the project.
Sewing needles inevitably leave physical holes in the fabric weave, especially in tightly woven natural fibers like cotton or linen. For reversible and natural fabrics, you can often encourage these holes to close. Gently scratch the surface of the fabric with a clean fingernail in a crosswise motion to slide the displaced threads back into their original positions. Alternatively, apply a light mist of steam from an iron, holding the iron a few centimeters above the fabric without touching it directly, to relax the fibers and allow them to shrink back into place.
Common Unpicking Mistakes and How to Avoid Them
One of the most common beginner mistakes is forcing the red safety ball through thick seam intersections or bulky areas. If the tool resists or catches, stop immediately. Forcing the unpicker will cause the blade to jump, which almost always results in a deep slice through the fabric. When you encounter bulk, switch to the picking method and cut the stitches one by one until you clear the intersection.
Another frequent error is cutting the threads from the right side of the fabric. Slicing threads on the visible, outer surface of the garment increases the risk of leaving visible scars, cuts, or scuffs on the fabric face. Always turn the project inside out and work from the bobbin side, where any minor cosmetic marks will remain hidden on the inside of the finished item.
Finally, avoid the temptation to yank long, uncut threads through a seam to save time. Pulling a continuous thread through a long seam can distort the fabric grain, warp the seam line, or cause the thread to snap and bunch up inside the weave. Always cut the thread at regular intervals before attempting to pull it out.
Frequently Asked Questions (FAQ)
Can I use an unpicker to open buttonholes?
Yes, an unpicker is an excellent tool for opening machine-stitched buttonholes, but you must use a physical barrier to prevent over-cutting. Place a straight sewing pin horizontally across the end of the buttonhole, just inside the bartack stitches. Insert the point of the unpicker at the opposite end, slide it forward, and let the pin act as a physical stop to block the blade from slicing through the end stitches. Always place a firm, flat cutting mat underneath to protect your work surface.
How do I clean and maintain my seam ripper?
To maintain your unpicker, keep the U-shaped cutting edge free of lint and thread dust by brushing it out regularly with a small, dry brush or using compressed air. Check the red safety ball periodically to ensure it is not loose or wobbly; if the guard is damaged, replace the tool immediately to prevent fabric snags. Always store the unpicker with its protective cap securely in place to prevent the sharp point from dulling or accidentally piercing other items in your sewing kit.
Community discussion
Share your experience or ask a question. Comments are reviewed before publication.