
An LED writing board—often referred to as an LED light pad or light box—is an invaluable tool for artists, designers, and hobbyists looking to refine their drawing skills. By projecting a consistent, adjustable light source through layers of paper, this device allows you to trace reference images with high precision, study complex anatomical structures, and practice line control. Using one effectively involves setting up a stable workspace, choosing the right paper weight, securing your materials, and adjusting the brightness to protect your eyes. Whether you are a beginner learning basic shapes or an experienced illustrator working on multi-layered animations, mastering this tool can significantly accelerate your drawing practice and improve your muscle memory.
Setting Up Your LED Writing Board for Optimal Use
Before you begin drawing, preparing your workspace ensures both safety and comfort during long creative sessions. Start by unboxing your LED writing board and inspecting the acrylic surface. Many manufacturers apply a thin, transparent protective film to the screen to prevent scratches during shipping. Look closely at the corners and gently peel this film off before turning the device on, as leaving it in place can distort the light and cause unwanted glare.
Next, consider your power connection and cable management. Most modern light pads use a USB connection, allowing you to power them via a wall adapter, a computer port, or a portable power bank. Ensure the cable is long enough to reach your power source without being stretched tight. Route the cable behind your desk or secure it with a cable clip to prevent accidental trips, which could pull the board off your desk and crack the acrylic surface.
Products mentioned in this guide
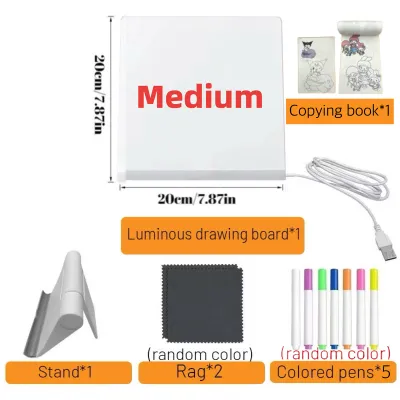
![[SG STOCK] Reusable LED Drawing Board DIY Luminous Acrylic Message Memo Note Pad Night Light Kids Writing Gift发光画板](https://img.lazcdn.com/g/p/4f49319070b36c6e7ba9cbce60944690.jpg_400x400q80.jpg_.webp)
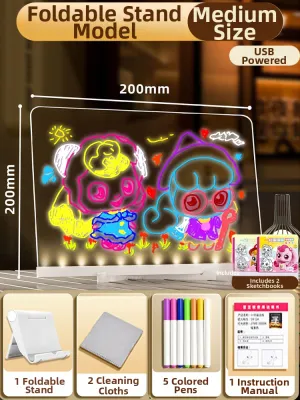

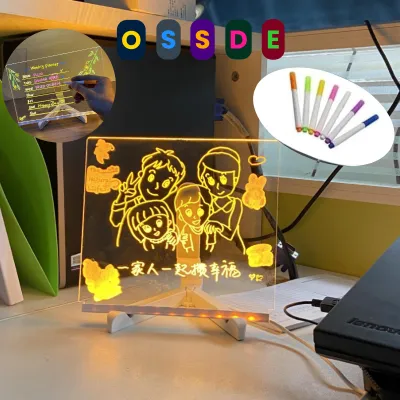
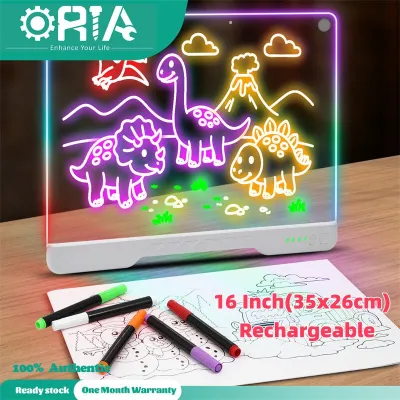
Prices are valid at publication and may change. Please refer to the product page for the latest price.
Your physical posture plays a major role in preventing fatigue while drawing. Position the LED board flat on a clean, level desk if you prefer working from a bird’s-eye perspective. Alternatively, if you experience neck strain, place the board on a sturdy, adjustable desktop easel. Some light pads come with built-in tilt stands or rubber feet that prevent the device from sliding around while you apply pressure with your pencil.
Step-by-Step Process for Tracing References
Tracing is a highly effective way to build muscle memory, but achieving a clean transfer requires understanding how your materials interact with light. The thickness and texture of your paper directly influence how much light passes through. Instead of relying on rigid paper weight guidelines, perform a quick manual test. Place your reference image on the board, overlay your drawing paper, and turn on the light. If the reference lines appear faint or blurry, you may need a thinner paper or a higher brightness setting.

Once you have selected your papers, securing them is crucial to prevent shifting while you draw. Even a millimeter of movement can ruin the alignment of your sketch. Use low-tack artist tape or drafting tape to secure the corners of your reference image directly to the acrylic surface. Then, align your blank drawing paper over the reference and tape it down as well. If your board features built-in magnetic clips, you can use those instead of tape, provided they do not obstruct your hand movements.
With your papers secured, turn on the LED board and adjust the brightness. The goal is to make the reference lines clearly visible without washing out the marks you make with your pencil or pen. If the backlight is too intense, your eyes will struggle to see the graphite lines you are drawing on the top sheet. Start at the lowest brightness setting and gradually increase it until the reference image is sharp, but your drawing tool remains easily visible.
When you begin tracing, focus on capturing the core structural lines first rather than getting bogged down in fine details. Use light, fluid strokes with a hard pencil, such as an H or 2H grade, which leaves clean lines that are easy to erase or ink over later. Keep your hand relaxed and try to draw from your shoulder or elbow rather than just your wrist to achieve smoother, more confident lines.
Drawing Techniques and Skill-Building Exercises
An LED writing board is not just for copying existing images; it is a powerful tool for active skill-building and transitioning to freehand drawing. One excellent exercise is using the backlight to analyze your own freehand sketches. Draw a subject freehand on a sheet of paper, then place it on the light board with a clean sheet on top. Use the illumination to trace over your sketch, correcting proportions, checking anatomical symmetry, and refining messy lines. This comparative process helps you identify recurring mistakes in your freehand work.
You can also use the illuminated surface to practice line weight control and shading. When tracing a reference, try varying the pressure of your pen or pencil based on the light source in the original image. Use thicker, darker lines for areas in shadow or where objects overlap, and thinner, lighter lines where the light hits. The backlight allows you to see these subtle variations in line weight with extreme clarity, helping you understand how line thickness creates a sense of depth.
For those interested in sequential art, comic design, or traditional animation, the light board is indispensable for layering. You can place your previous drawing underneath your current sheet to maintain consistent character proportions and placement across multiple frames. This technique, known as onion skinning, allows you to see the relationship between consecutive actions, making it much easier to plan smooth transitions and dynamic poses in your artwork.
Managing Brightness Levels and Eye Comfort
Working with a backlit surface for extended periods can lead to eye strain and fatigue if you do not manage your environment properly. Most modern LED boards feature touch-sensitive controls or physical dimmers that allow you to adjust the light intensity. Always match the board’s brightness to your ambient environment. Drawing in a pitch-black room with a bright light pad creates a harsh contrast that forces your eyes to work harder, leading to headaches and dry eyes.
To maintain optimal eye comfort, keep your workspace well-lit with soft, indirect ambient light. Avoid placing desk lamps in a position where they reflect directly off the acrylic surface of your board, as this creates distracting glare. If your eyes begin to feel tired or dry, lower the brightness of the board slightly or switch to a thinner paper that requires less illumination to shine through.
Incorporate regular visual breaks into your drawing routine to give your eyes a chance to rest. A widely recommended practice is the 20-20-20 rule: every 20 minutes, look away from your drawing board at an object at least 20 feet (about 6 meters) away for at least 20 seconds. This simple habit allows your eye muscles to relax and prevents the focusing fatigue associated with close-up, backlit work.
Cleaning, Maintenance, and Storage
To keep your LED writing board functioning well and free from distracting marks, regular maintenance is essential. Over time, the acrylic surface will accumulate graphite dust, ink smudges, and natural oils from your hands. To clean it, turn off and unplug the device, then wipe the surface gently with a dry or slightly damp microfiber cloth. Microfiber is ideal because it traps dust particles without scratching the sensitive acrylic.
Avoid using harsh chemical solvents, glass cleaners, or abrasive sponges, as these can permanently cloud or scratch the acrylic surface. Never spray water or cleaning solutions directly onto the board; moisture can easily seep into the seams or USB ports, causing short circuits or damaging the internal LED strips. If a stubborn smudge requires moisture, apply a tiny amount of water to the cloth first, wipe the area, and dry it immediately with a dry section of the microfiber cloth.
When you are finished drawing, store your LED board flat or upright in a protective sleeve or padded case. Avoid stacking heavy books or other heavy equipment on top of the board, as excessive pressure can warp the acrylic or damage the internal light guide plate. Keep the USB ports clear of dust and lint by storing the board in a clean drawer or cabinet when it is not in use.
Frequently Asked Questions (FAQ)
Can I use thick watercolor paper on an LED writing board?
Thick or heavily textured papers, such as 300 gsm cold-pressed watercolor paper, block a significant amount of light, making direct tracing difficult even at the highest brightness settings. To work around this limitation, you can trace your reference image onto a thinner sheet of layout or tracing paper first. Once you have refined the sketch, transfer it to your watercolor paper using graphite transfer paper, or use a light box in a very dark room to see if enough light penetrates the fibers for a basic outline. Always check your specific board’s specifications to see if it has a high-lux rating designed for heavier media.
Is it safe to leave the LED board plugged in overnight?
While most modern LED writing boards operate on low-voltage USB power and generate minimal heat, it is best practice to unplug the device when it is not in use. Leaving any electronic device plugged in indefinitely exposes it to potential power surges and can gradually wear down the internal components. To prolong the lifespan of the LEDs and ensure electrical safety in your home, disconnect the power cable from the board or turn off the power outlet once you finish your drawing session.
How do I fix uneven lighting or dark spots on the board?
If you notice flickering, uneven lighting, or dark spots on your board, start by checking your power source and cable connections. A loose USB cable or an underpowered wall adapter can cause the LEDs to flicker or dim. Try using a different cable and a high-quality power adapter that matches the voltage requirements listed in your product manual. If the dark spots persist after verifying the power supply, the internal LED strip or light guide plate may be damaged. In this case, stop using the device and contact the manufacturer or a qualified professional for repair options, as attempting to open the sealed acrylic frame yourself can cause further damage.
Community discussion
Share your experience or ask a question. Comments are reviewed before publication.