
Using an led light drawing board is one of the most efficient ways to transfer sketches, refine rough drafts, and replicate intricate designs with high precision. By projecting a consistent light source through layers of paper, this tool allows you to see underlying lines clearly, eliminating the guesswork from manual copying. Whether you are a beginner learning the basics of illustration or an experienced hobbyist working on detailed calligraphy, mastering the setup and execution of tracing will elevate your final artwork.
To achieve clean, professional results, you must understand how to balance light intensity, secure your mediums, and execute your strokes systematically. Proper technique not only ensures accurate line transfers but also protects your materials from damage and prevents physical strain during long drawing sessions. Setting up your workspace correctly is the first step toward a seamless tracing experience.
Essential Tools and Paper Selection for Tracing
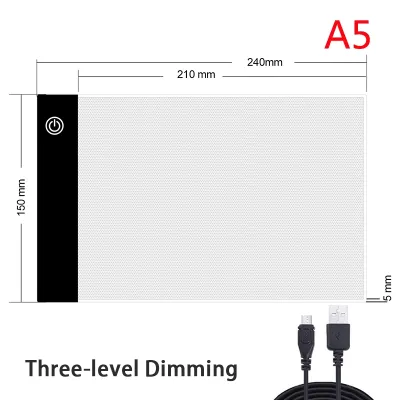
Before plugging in your led light drawing board, take a moment to inspect and prepare the physical device. Ensure the power cable is securely connected to a stable power source, such as a USB wall adapter or a laptop port. Wipe down the acrylic surface with a dry microfiber cloth to remove any dust, lint, or fingerprints, as minor debris can cast distracting shadows once the board is illuminated.
Products mentioned in this guide
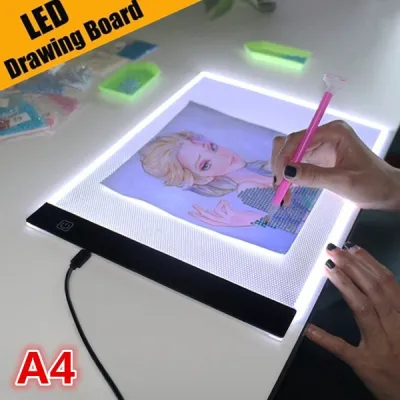
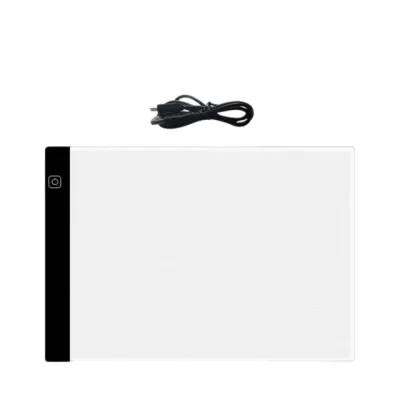
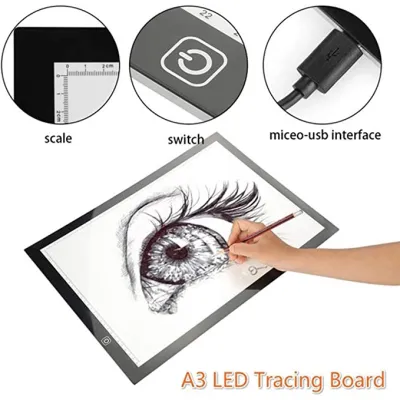
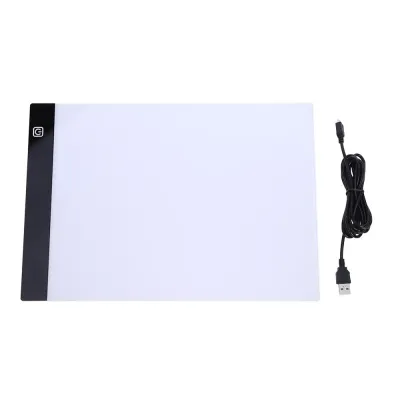
Prices are valid at publication and may change. Please refer to the product page for the latest price.
Your reference material serves as the foundation for your trace, meaning its visual clarity directly impacts your success. Use a high-contrast original artwork, a clean pencil sketch, or a crisp digital printout with dark, well-defined outlines. If your original image is too faint, consider tracing over the lines with a dark fine-liner pen on the reference sheet first to make them more visible under the backlighting.
Selecting the right blank paper for your top layer requires balancing thickness with translucency. Instead of relying solely on paper weight or GSM (grams per square meter) ratings, perform a quick visual light-test by holding your blank sheet over the illuminated board on top of your reference. If the lines of the reference image are clearly visible through the paper, the medium is suitable. Standard sketching paper, layout paper, and specialized tracing paper work exceptionally well, whereas heavy mixed-media cardstock or thick watercolor papers will block too much light for accurate tracing.
In humid environments like Singapore, paper can absorb ambient moisture rapidly, making it prone to warping, buckling, or sliding during use. To prevent this, secure your sheets firmly using low-tack masking tape, drafting dots, or sturdy binder clips along the borders. For your drawing tools, select sharp graphite pencils in the HB to 2B range, or fine-liner pens that dry quickly to prevent smudging as your hand moves across the surface.
Step-by-Step Workflow for Accurate Tracing
Setting Up Your Board and Reference Image
Begin by placing your light board on a flat, stable desk that offers ample room for your arms to move freely. Position the board away from the very edge of the table to prevent accidental bumps or falls. Route the power cable flat along the desk surface, ensuring it is not pulled taut or dangling where it could catch on your chair or legs.

Lay your original reference artwork flat in the center of the illuminated acrylic panel. Take time to smooth out any creases or folds in the reference paper, as uneven areas will distort the light and alter the proportions of your traced lines. If your board features integrated ruler markings or a printed alignment grid, use these guides to align the top and side edges of your reference sheet perfectly straight.
For projects that require precise geometric alignment, such as architectural sketches or typography, align a plastic T-square or ruler with the board’s grid. This step ensures that your final drawing remains perfectly square and does not slowly tilt as you work. Once you are satisfied with the positioning, place a small piece of low-tack tape on the corners of the reference image to lock it onto the board.
Securing the Paper and Executing the Trace
Place your blank drawing paper directly over the secured reference image, aligning the edges carefully. Secure the top border of both sheets together using low-tack masking tape or drafting dots to create a reliable hinge. Avoid using heavy-duty packaging tapes or high-tack adhesives, as these can tear your paper fibers or leave a sticky, difficult-to-clean residue on the acrylic surface of your board.
Turn on the LED board and set the brightness to a moderate level to establish a comfortable working contrast. Starting with a medium setting allows your eyes to adjust gradually without being overwhelmed by intense glare. You can always increase the brightness later if you find that specific fine details in the reference image are difficult to distinguish.
When you begin drawing, apply light, continuous pressure with your pencil or pen rather than pressing hard down into the paper and acrylic surface. Heavy pressure can dent the paper, scratch the protective coating of the board, or cause your hand to tire quickly. Keep your drawing hand steady by resting the side of your palm flat on the paper, using your wrist and elbow to guide your movements.
Work systematically from the top-left corner to the bottom-right if you are right-handed, or from top-right to bottom-left if you are left-handed. This directional workflow prevents your hand from resting on freshly drawn graphite or wet ink, minimizing smudges on your new sheet. Periodically lift the bottom corners of your drawing paper while keeping the top taped hinge intact to check your progress and verify that you have not missed any lines.
Optimizing Brightness and Protecting Your Eyes
Finding the correct brightness level on your led light drawing board is essential for both tracing accuracy and visual comfort. Modern boards typically feature step-less touch sensors or multi-level buttons to adjust the light output. Set the illumination to a level where the reference lines are sharp and distinct, but not so bright that the light washes out the texture of your drawing paper or causes you to squint.
Never use an illuminated drawing board in a completely dark or pitch-black room. The extreme contrast between a bright screen and dark surroundings forces your pupils to constrict and dilate repeatedly, leading to rapid eye strain, headaches, and dry eyes. Always keep a soft, warm ambient light on in your workspace to balance the illumination and create a comfortable environment for your eyes.
To maintain long-term eye health during detailed tracing sessions, practice the 20-20-20 rule. Every 20 minutes, take a brief break to look at an object at least 20 feet (about 6 meters) away for at least 20 seconds to allow your eye muscles to relax. Additionally, remember to blink consciously and take short physical breaks to stretch your neck, shoulders, and wrists.
Troubleshooting Common Tracing Mistakes
If you find that the lines of your reference image are faint or completely invisible, the blank paper you selected is likely too thick or opaque. To resolve this issue, try switching to a lighter weight paper or increasing the brightness of your board to its maximum setting. If you must use thick paper, try darkening the lines of your original reference image with a black marker before tracing.
When your traced lines appear doubled, blurry, or misaligned, the paper layers have shifted during the drawing process. Prevent this image shifting by adding extra pieces of low-tack tape to the bottom and side edges of your paper, or clamp the sheets down with heavy-duty binder clips. Always double-check that your tape is secure before applying any downward pressure with your hand.
Shaky, jagged, or uneven strokes are common when you try to trace long lines in a single, continuous motion without proper physical support. To achieve smoother lines, ensure the side of your drawing hand is fully supported by the flat surface of the board rather than hovering in the air. Work in shorter, controlled segments, rotating the light board or your paper slightly if a different angle feels more natural for your wrist.
Refining Your Technique for Cleaner Transfers
For highly complex or detailed illustrations, utilize a layered tracing approach to keep your final piece clean. Use your first pass to sketch a very light, simplified outline of the primary shapes and proportions using a hard pencil grade like 2H or H. Once the basic framework is established, go over the lines a second time with a softer pencil or fine-liner to add refined details and confident contours.
Incorporate line weight variation to add depth, dimension, and visual interest to your traced artwork. Use a lighter touch or a thinner pen tip for background elements, fine textures, and light sources, while applying slightly more pressure or a thicker pen for foreground subjects and heavy shadow areas. This technique prevents your traced drawing from looking flat or mechanical.
If you plan to transfer a design onto a surface that cannot be placed on a light board, such as a thick canvas or wood panel, use the digital reversal method. Flip your digital artwork horizontally on your computer or tablet before printing it out. Trace the reversed image onto thin paper, coat the back of the traced lines with soft graphite, flip the paper back over onto your final canvas, and trace over the lines again to transfer the graphite clean onto your target surface.
Frequently Asked Questions (FAQ)
Can I use regular printer paper on an LED light drawing board?
Yes, standard office printer paper is generally thin and translucent enough to allow light to pass through, making it an excellent and affordable option for basic tracing projects. However, because printer paper quality and thickness can vary between brands, you should always perform a quick visual light-test before starting your project. If you find that a premium, heavy-weight printer paper blocks too much light, switching to standard utility paper or dedicated tracing paper will yield better visibility.
Will the LED light board damage my original reference photo?
Modern LED drawing boards utilize cool-light technology that generates very little heat, making them safe for temporary use with original photographs, delicate sketches, and printed documents. However, to preserve irreplaceable originals, you should avoid leaving them on an illuminated board under high brightness settings for extended, unattended periods, as prolonged exposure to light can cause certain inks to fade over time. For maximum safety, print a photocopy or a digital duplicate of your original photo to use as your working reference sheet.
Community discussion
Share your experience or ask a question. Comments are reviewed before publication.