
Presenting a bottle of wine is a timeless gesture of appreciation, whether you are attending a housewarming party in a newly completed BTO flat, celebrating a wedding at a local hotel, or bringing a token of thanks to a dinner host. However, simply dropping a bottle into a generic paper sack can make the gesture feel like an afterthought. An elegant presentation relies on selecting a structurally sound bag, preparing the bottle to withstand local environmental factors, and applying deliberate wrapping techniques that elevate the unboxing experience.
To achieve a professional finish, you must consider the physical dimensions of the bottle, the structural integrity of the bag, and the finishing accents that tie the presentation together. By mastering a few straightforward steps—such as stabilizing the base, managing tissue paper folds, and securing the handles—you can transform a standard bottle of wine into a beautifully styled, memorable gift.
Selecting the Ideal Wine Bag and Wrapping Accessories
Choosing the right packaging requires a balance of aesthetics and structural physics. A standard 750ml wine bottle weighs approximately 1.2 to 1.4 kilograms including the liquid and the glass. This weight exerts significant downward pressure on the bottom of any bag, meaning your choice of materials and dimensions will directly affect how safely the bottle travels to its destination.
Products mentioned in this guide
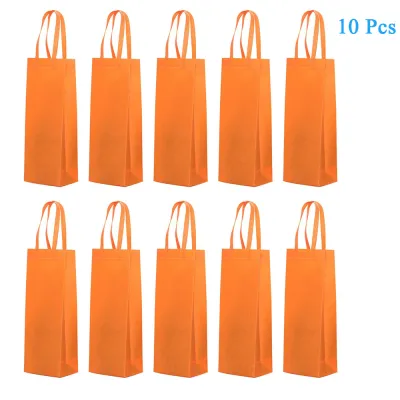
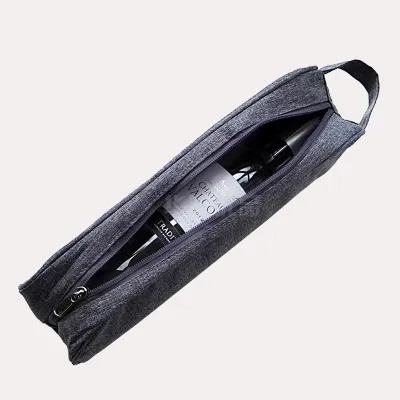
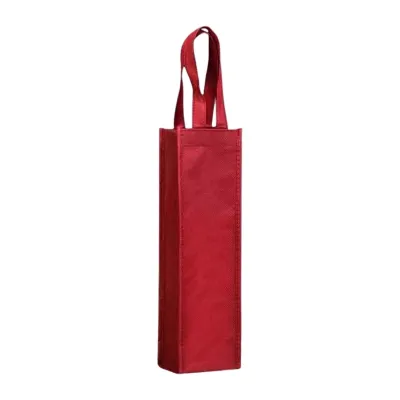
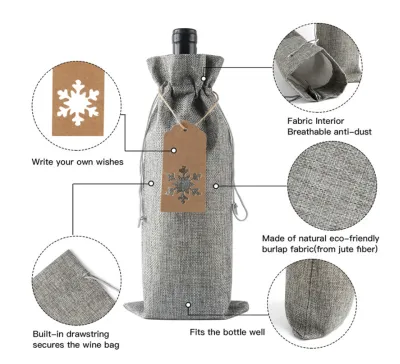
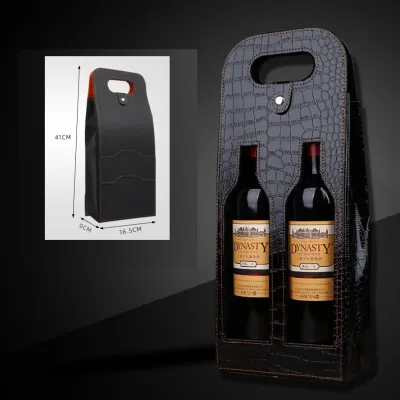
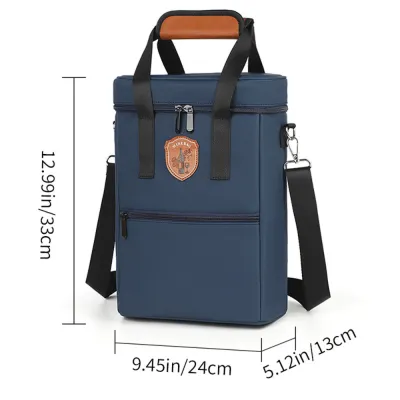
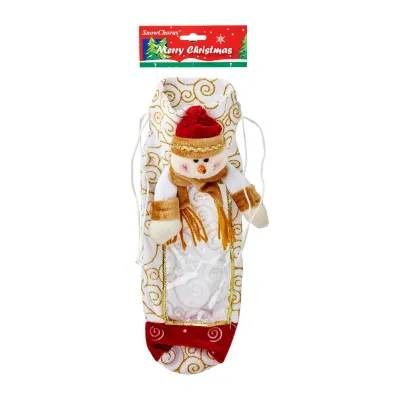
Prices are valid at publication and may change. Please refer to the product page for the latest price.
Sizing the Bag for a Perfect Fit
Before purchasing a wine bag, measure or identify the shape of the bottle you intend to gift. Standard Bordeaux and Cabernet bottles are tall and slender, typically measuring 7.5 cm to 8 cm in diameter. Burgundy, Pinot Noir, and Chardonnay bottles feature sloping shoulders and a slightly wider base, often reaching 8.5 cm in diameter. Champagne and sparkling wine bottles are wider still, usually requiring a base clearance of at least 9 cm to 10 cm.
For a standard bottle, look for a wine bag with minimum base dimensions of 9 cm by 9 cm and a height of 35 cm. This height ensures the neck of the bottle is fully enclosed, leaving roughly 3 cm to 5 cm of space at the top for decorative tissue paper or closures. If you are gifting a champagne bottle or a 1.5-litre magnum, look for specialty wide-base bags that measure at least 11 cm by 11 cm at the bottom to prevent the glass from stretching or tearing the sides of the bag.
Material Selection and Formality
The material of the bag sets the tone for your gift and dictates how much weight the package can safely support:
- Kraft Paper (150 to 200 GSM): Excellent for casual gatherings, rustic themes, and eco-friendly presentations. Ensure the paper is thick enough (ideally 150 GSM or higher) to prevent sagging. Kraft paper pairs beautifully with natural twine and matte gift tags.
- Art Paper with Laminated Finishes: Ideal for formal events, corporate gifts, and weddings. These bags often feature a glossy or matte plastic coating that adds water resistance and structural stiffness, which is particularly useful in humid climates.
- Canvas and Cotton: A premium, reusable option that conveys thoughtfulness. Fabric bags drape naturally around the bottle and can be repurposed by the recipient, making them a sustainable choice.
- Jute and Burlap: Highly textured and durable, these materials are perfect for outdoor events, casual dinners, or rustic-themed gifts. They offer excellent natural grip and structural strength.
Essential Accessories for a Polished Look
To elevate the presentation from basic to bespoke, gather a few key stationery and wrapping accessories. You will need high-quality, acid-free tissue paper (two to three sheets per bottle), coordinating ribbons (satin, grosgrain, or organza), and sturdy gift tags. For a botanical touch, consider incorporating dried elements like a sprig of preserved eucalyptus, a dried lavender stem, or a small cinnamon stick.
When choosing your writing instruments for the gift tag, opt for quick-drying gel pens or high-quality calligraphy ink. In warm, humid environments, slow-drying inks can easily smudge on coated or metallic gift tag surfaces. Always perform a quick test write on a scrap piece of matching cardstock to verify the ink’s drying speed and bleed resistance before signing the final tag.
Step-by-Step Instructions for Placing the Bottle Safely
Placing the bottle in the bag is more than just dropping it in. Taking a systematic approach protects the bottle’s label, ensures structural stability, and guarantees the bag stands upright without tipping over during transport.

Prepping the Bottle
Start by inspecting the bottle itself. If the wine has been stored in a wine chiller or refrigerator, it will rapidly develop condensation when brought into room temperature. This moisture can quickly soften paper bags, ruin tissue paper, and cause ink on your gift tag to run. Wipe the bottle completely dry with a clean, lint-free microfiber cloth. Allow the bottle to reach ambient temperature if possible, or wrap it in a protective moisture barrier if it must remain cold.
To protect the wine label from friction scratches against the inside of the bag, consider wrapping the middle of the bottle in a single sheet of tissue paper. Lay the sheet flat, place the bottle in the center, and gently roll the paper around the glass, tucking the excess neatly under the base. This step also adds an extra layer of anticipation for the recipient during unboxing.
Shaping the Bag
Never slide a heavy bottle into a flat, unopened bag. Gently open the bag by pulling the handles apart, then reach inside to press the bottom gussets completely flat. If the bag includes a cardboard base reinforcer, ensure it is lying perfectly flat against the bottom of the bag. This cardboard insert is crucial; it distributes the concentrated weight of the bottle across the entire base, preventing the paper from bowing or tearing.
Lowering the Bottle
To avoid damaging the bag or shocking the glass, use a two-handed grip to lower the bottle. Support the bottom of the bottle with your dominant hand while guiding the neck with your other hand. Slowly lower the bottle vertically into the center of the bag. Avoid letting the bottle slide down the sides of the bag, as the base of the bottle can catch on the interior seams or tear the delicate top rim of the paper.
Centering and Stabilizing
Once the bottle rests on the bottom insert, check its alignment. The bottle should stand perfectly vertical in the center of the bag. If the bag is slightly too wide, the bottle may lean to one side, which shifts the center of gravity and makes the package prone to tipping over.
To stabilize a loose bottle, crumple a single sheet of tissue paper into a soft, loose cushion and tuck it around the base of the bottle. Alternatively, you can slide a custom-cut cardboard collar or a clean piece of corrugated cardboard behind the bottle to keep it snugly positioned against the back of the bag. This prevents the bottle from shifting back and forth when you carry it by the handles.
Closing and Decorating the Bag for a Professional Finish
With the bottle safely positioned, you can now focus on the upper portion of the bag. The way you close and decorate the top of the bag determines the overall visual impact of your presentation.
Managing the Top Opening
How you handle the top opening depends entirely on the style of bag you have chosen:
- For Paper Bags with Handles: The most elegant method is to have tissue paper peeking out of the top. Take a sheet of tissue paper, pinch it in the center, shake it gently to let the corners drape downward, and tuck the pinched end into the bag next to the bottle neck. This creates a soft, voluminous puff of paper that conceals the bottle neck while framing the handles.
- For Paper Bags without Handles (Sack Style): Fold the top 3 cm to 5 cm of the bag downward toward the back to create a clean, crisp horizontal fold. Crease the fold firmly with your fingernail or a bone folder. You can secure this fold with a piece of double-sided tape or a decorative sticker.
- For Fabric or Drawstring Bags: Gather the fabric tightly around the neck of the bottle, just below the decorative foil capsule. Smooth out any uneven bunching so the fabric pleats look uniform around the entire circumference.
Tying and Securing
If your bag features built-in ribbon handles, pull them taut and ensure they are not twisted. For bags that require manual tying, select a ribbon that matches your color scheme. A classic satin ribbon (about 2.5 cm wide) adds a luxurious sheen, while cotton twine or rustic jute cord offers a minimalist, organic feel.
To tie a perfect bow around the neck of the bottle or the handles of the bag, loop the ribbon around the target area and tie a secure single knot first. When forming the loops of the bow, ensure they are symmetrical and proportional to the size of the bag. For a modern, minimalist look, skip the bow entirely and tie a clean, tight square knot, leaving the ribbon ends long and cut at a sharp 45-degree angle to prevent fraying.
Adding Embellishments
Personalize the presentation by adding small, thoughtful details to the ribbon or twine. Thread a handwritten gift tag onto the ribbon before tying the final knot. Ensure the tag hangs flat against the front of the bag so your recipient can easily read their name.
For an organic touch, tuck a small sprig of dried eucalyptus or a single stem of dried bunny tails behind the knot. If you are using tissue paper peeking out of the top of the bag, you can apply a personalized wax seal directly onto one of the visible tissue folds. To do this safely without damaging the bag, melt the wax and stamp the seal on a silicone baking mat first, then use a small piece of double-sided adhesive tape to transfer the finished wax seal onto the paper.
Final Inspection
Before heading out the door, place the completed gift on a flat surface and step back to inspect your work. Verify the following details:
- The bag stands perfectly upright on its own without leaning or wobbling.
- The handles are completely untwisted and free of snags.
- The sides of the bag are smooth, with no sharp bulges indicating the bottle is resting at an awkward angle.
- The gift tag is facing forward and clearly visible.
Adjusting Your Technique for Different Bag Materials
Different packaging materials require distinct handling techniques to ensure they look their best and maintain their structural integrity.
Paper and Kraft Bags
Paper bags are highly susceptible to creasing and tearing if handled roughly. When opening a paper bag, avoid snapping it open through the air, as this can split the side seams or weaken the bottom corners. Instead, open it gently using your hands.
If you find that the bottom of a budget paper bag feels thin or weak, you can easily reinforce it. Cut a small rectangle of stiff cardboard to match the exact dimensions of the bag’s base and slide it inside before inserting the bottle. Always lower the bottle slowly; dropping a heavy glass bottle even a few centimeters can blow out the bottom of a paper bag instantly.
Fabric, Canvas, and Jute Bags
Fabric bags are incredibly durable, but they can easily look messy if they are wrinkled or creased from storage. Before placing the bottle inside, run a quick hand steamer over the fabric or press it with an iron on a low heat setting. This is particularly important for cotton canvas and linen, which wrinkle easily.
Because fabric is flexible, it will conform to the shape of the bottle. This means any bumps or structural imperfections inside the bag will be visible from the outside. Ensure the bottle’s label is facing forward and that any protective tissue wrapping is smoothed down flat to prevent unsightly lumps. When tying drawstrings on jute or canvas bags, pull them tight and wrap the excess cord around the neck of the bottle multiple times to create a neat, banded collar effect.
Insulated and Reusable Bags
Insulated wine bags are designed for utility, often featuring built-in thermal linings, zippers, Velcro, or metal snap closures. These bags are excellent for transport to outdoor picnics or casual dinners where the wine needs to remain chilled.
Because these bags are naturally bulkier and more utilitarian, keep decorative additions minimal. Avoid using delicate tissue paper, which can easily tear when catching on zippers or Velcro fasteners. Instead, focus your decorative efforts on a high-quality, weather-resistant gift tag attached directly to the zipper pull or handle. If the bag features a zipper closure, ensure the zipper is closed smoothly without catching on the bottle’s foil capsule.
Frequently Asked Questions (FAQ)
How do I stop the bottle from shifting inside a loose bag?
To prevent a bottle from sliding around in a bag that is too wide, you need to fill the empty space to create a snug fit. The easiest method is to crumple a few sheets of coordinating tissue paper and pack them gently around the sides and base of the bottle. You can also slide a custom-cut piece of heavy cardboard or a corrugated bottle sleeve into the bag alongside the bottle. This acts as a physical buffer, absorbing movement and keeping the bottle centered, which prevents the bag from tipping over when carried.
Is it necessary to wrap the bottle before putting it in the bag?
While not strictly mandatory, wrapping the bottle in a sheet of tissue paper or a lightweight cloth sleeve before placing it in the bag is highly recommended. This extra layer serves several practical purposes: it protects the delicate paper label from rubbing against the inside of the bag, cushions the glass against minor impacts, and absorbs any minor condensation if the bottle was previously chilled. Additionally, it enhances the gifting experience by adding a layer of suspense and elegance when the recipient pulls the bottle out of the bag.
Community discussion
Share your experience or ask a question. Comments are reviewed before publication.