
To use a seam guide to maintain consistent seam allowances, you must measure the precise distance from your sewing machine’s needle to the desired seam line, secure the guide at that exact position parallel to the feed dogs, and gently guide the raw edge of your fabric flush against it as you sew. A seam guide acts as a physical barrier or visual anchor, preventing your fabric from drifting and ensuring that every seam in your project is perfectly uniform. Whether you are piecing together intricate quilt blocks or assembling a structured garment, mastering this tool eliminates guesswork and elevates the professional finish of your needlework.
Why Consistent Seam Allowances Matter
In needlework and garment construction, a seam allowance is the distance between the raw edge of the fabric and the stitching line. While a variance of just one or two millimeters might seem negligible on a single piece of fabric, these minor discrepancies compound quickly across multiple seams. In garment sewing, inconsistent seam allowances directly alter the final fit, leading to mismatched side seams, puckered armscyes, or a finished piece that is either too tight or completely out of proportion. For quilters, even a tiny deviation from the standard 1/4-inch seam allowance prevents corners from matching up and distorts the geometry of the entire quilt top, resulting in wavy borders and misaligned blocks.
Beyond aesthetics and fit, consistent seam allowances are vital for the structural integrity and durability of your project. Seams that are too narrow may fray and pull apart under tension or after repeated laundering, especially when working with loose-weave fabrics commonly favored in Singapore’s warm, humid climate. Conversely, overly wide seams waste fabric and create unnecessary bulk inside the garment, which can ruin the drape and cause discomfort.
Products mentioned in this guide
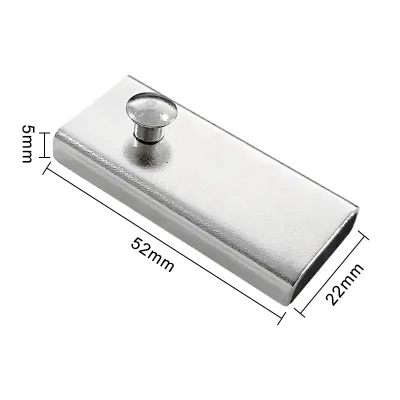
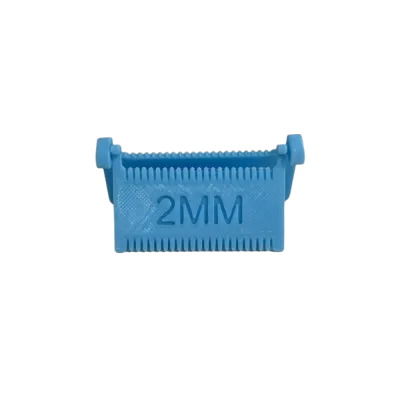
Prices are valid at publication and may change. Please refer to the product page for the latest price.
A physical seam guide is highly beneficial during long, straight runs—such as hemming curtains or joining long fabric panels—and during repetitive piecing tasks where muscle fatigue can cause your eyes to wander. While freehand guidance using the throat plate lines may suffice for short, curved details, a dedicated guide ensures absolute precision over long sewing sessions.
Preparing Your Machine and Workspace
Before installing any seam guide, preparing your sewing machine and workspace is essential for achieving accurate results. Begin by thoroughly cleaning your machine’s bed, throat plate, and feed dog area. Over time, lint from fabrics, thread dust, and stray fibers accumulate around the feed dogs and bobbin case, which can lift the fabric slightly or cause uneven feeding. Turn off your machine, remove the presser foot and throat plate, and use a small lint brush or a vacuum attachment to clear out any debris. Wiping down the exterior machine bed with a dry microfiber cloth ensures a smooth, flat surface free of oils or dust, allowing magnetic or adhesive guides to sit perfectly flush without rocking or slipping.

Next, gather the necessary tools for your setup checklist:
- Your chosen seam guide (magnetic, adhesive, screw-on, or tape).
- A clear quilting ruler or a specialized metal seam-measuring gauge with a sliding pointer.
- Several fabric scraps of the exact same weight and fiber content as your project fabric to use for testing.
- A small screwdriver if you are using a screw-on guide.
Once your workspace is clean and organized, check and set your machine’s default needle position. Most modern sewing machines default to a center needle position, but some projects may require a left or right needle position to accommodate specific presser feet or sewing techniques. It is critical to select and lock in this needle position on your machine’s settings before taking any measurements. Any subsequent change to the needle position after the guide is installed will completely invalidate your measured seam allowance, leading to inaccurate stitching.
Installing and Aligning Your Seam Guide
Installing your seam guide correctly requires precise measurement rather than visual estimation. The universal first step for setting up any guide is to measure the exact desired seam width directly from the center of the needle drop to the right. Lower the needle manually using the handwheel so it pierces a piece of paper or sits just above the throat plate. Place your clear quilting ruler flat on the machine bed, aligning the specific measurement line (such as 5/8 inch or 1/2 inch) directly with the needle’s point. The edge of the ruler pointing to the right now represents the exact path your fabric’s raw edge must follow.
Setting Up Magnetic and Adhesive Guides
Magnetic and temporary adhesive seam guides are incredibly popular due to their ease of placement and versatility. To install a magnetic guide, place it flat on the metal throat plate of your machine, aligning its straight edge flush against the right edge of your measuring ruler. Ensure the guide runs perfectly parallel to the feed dogs; if the guide is angled even slightly, it will steer the fabric diagonally, causing the seam allowance to fluctuate as you sew.
When positioning these guides, verify that they do not interfere with the movement of the presser foot or the feed dog mechanism. The guide must sit far enough to the right or front to avoid pinching the presser foot as it moves up and down. For computerized sewing machines, check your manufacturer’s manual before using a strong magnetic guide, as strong magnets can sometimes interfere with internal electronic components; in these cases, an adhesive guide or low-tack painter’s tape is a safer alternative.
Once positioned, perform a quick stability test: press firmly down on the guide and try to wiggle it with your finger. If using an adhesive guide, ensure the tape is fully pressed down without air bubbles; if using a magnetic guide, verify that the magnetic pull is strong enough to resist the lateral pressure of fabric sliding against it.
Adjusting Screw-On and Throat Plate Guides
For a more permanent or heavy-duty setup, screw-on guides and adjustable throat plate attachments offer exceptional stability. These guides attach directly to the threaded holes present on the throat plate of many sewing machines. To install one, begin by loosening the attachment screw or sliding mechanism slightly, keeping it loose enough to slide freely but secure enough not to fall off.
Slowly slide the physical guide along its mounting bar or slot until the guiding edge aligns perfectly with your desired measurement mark on the throat plate or your measuring ruler. Double-check that the guide is square and parallel to the needle path. Once aligned, tighten the mounting screw securely using a small screwdriver. Apply firm but controlled pressure; overtightening can strip the delicate threads on your machine’s throat plate or damage the screw itself, while undertightening will allow the guide to shift under the vibration of high-speed sewing.
Sewing Techniques for Perfect Fabric Guidance
Having a perfectly aligned seam guide is only half the battle; proper fabric handling is crucial to maintaining a consistent seam allowance. When sewing, your primary focus should be on proper hand placement. Place your left hand gently on the fabric to the left of the presser foot to guide its overall direction, and place your right hand slightly in front of the machine bed, guiding the raw edge of the fabric so it remains flush against the seam guide. Avoid pulling or pushing the fabric through the machine; pulling from behind can bend the needle or distort the stitches, while pushing from the front can cause fabric bunching and uneven feeding.
The fundamental rule of sewing with a guide is to let the machine’s feed dogs do the work of advancing the fabric forward. Your role is simply to act as a gentle rudder, keeping the raw edge of the fabric lightly kissing the vertical wall of the seam guide. Do not force the fabric hard against the guide, as this will cause the fabric to buckle, ride up the guide, or create friction that slows down the feed dogs.
Managing bulky seams, intersecting layers, or thick fabrics requires extra care. When approaching an intersecting seam (such as a cross-seam in quilting or a side seam in garment construction), the sudden increase in thickness can push the fabric away from the guide. To counter this, slow down your machine speed and use your fingers or a sewing stiletto to hold the fabric edge firmly against the guide just before it reaches the presser foot. Maintaining a steady, moderate sewing speed gives you significantly more control and reaction time to correct any minor drifts before they become permanent mistakes.
Safety Warning: Always prioritize your physical safety when guiding fabric close to the presser foot. Keep your fingers at a safe distance—at least two to three centimeters—away from the needle and all moving parts. Never place your fingers directly in front of the needle path, and use tools like a stiletto or wooden presser to guide small or delicate fabric pieces past the needle.
Testing Your Seam and Troubleshooting Drift
Before sewing your actual project pieces, always perform a trial run on fabric scraps to verify the accuracy of your setup. The smoothness of the fabric sliding against the guide, and whether the guide slips or leaves marks, depends on the exact fabric and guide material combination. Cut two small rectangular scraps of your project fabric, align their edges, and sew a straight seam along the guide.
Take the stitched sample to your cutting mat and use a clear acrylic ruler to measure the distance from the stitched line to the raw edge at several points along the seam. If you find that your seam allowance is consistently too wide or too narrow, make small, incremental adjustments. If the seam is too wide, shift your guide slightly to the left (closer to the needle); if it is too narrow, shift it to the right. Alternatively, if your machine allows micro-adjustments to the needle position, you can fine-tune the needle slightly to the left or right to achieve the exact millimeter-perfect seam width without moving the physical guide.
Troubleshooting common issues during a project prevents frustration and ruined fabric:
- Slipping Guides: If a magnetic guide slips during sewing, it is often due to heavy fabric pulling on the guide. You can reinforce the magnet by placing a strip of low-tack painter's tape or masking tape directly behind it on the machine bed to block it from sliding.
- Fabric Riding Up: If lightweight or soft fabrics tend to ride up over the edge of a thick guide, switch to a lower-profile guide, or use a stack of sticky notes as a guide, which provides a flat, non-slip edge that holds fabric down.
- End-of-Seam Drift: Fabric often drifts away from the guide during the last few inches of a long seam because there is less fabric left for your hands to control. To prevent this, place a finger gently on the tail end of the fabric strip, keeping a slight tension to guide the final inches straight past the needle.
Frequently Asked Questions (FAQ)
Understanding the practical limits and maintenance of your seam guides helps you choose the right technique for every project. Here are answers to common questions about using these tools effectively.
Can I use a standard seam guide for curved seams?
Standard rigid seam guides, such as magnetic blocks or screw-on metal bars, are primarily designed for straight lines and long, continuous seams. Because they present a long, flat surface, attempting to run a curved fabric edge against them will cause the fabric to bind, bunch, or pull away, resulting in an uneven seam.
For curved seams, it is best to remove rigid physical guides. Instead, rely on the short, circular markings on your machine’s throat plate, use a specialized curved seam guide attachment (which has a minimal contact point), or apply a small piece of tape directly aligned with the needle drop to serve as a single-point visual reference.
How do I prevent an adhesive seam guide from leaving residue?
Adhesive seam guides are highly convenient, but leaving them on your machine bed for extended periods can cause the adhesive to cure, leaving a sticky, stubborn residue when removed. To prevent this, always peel the guide off gently and slowly at a 45-degree angle rather than pulling it up abruptly, which can stretch the material or leave more adhesive behind.
If sticky residue remains on your machine bed, avoid using harsh chemicals like acetone, which can melt plastic casings or strip painted guidelines. Instead, apply a tiny amount of mild soapy water or a specialized, plastic-safe adhesive remover to a microfiber cloth. Gently rub the sticky area until clean, ensuring that absolutely no liquid drips into the feed dogs, bobbin area, or internal electronic mechanics of your sewing machine.
Community discussion
Share your experience or ask a question. Comments are reviewed before publication.