
To use a needle threader correctly without bending the wire, you must maintain a perfectly straight alignment and ensure the needle eye is large enough to accommodate both the doubled-over wire and your thread. The thin wire loop is designed to compress as it passes through the needle eye, but any lateral force, twisting, or pulling of oversized thread will immediately deform or snap the delicate metal. By mastering a tension-free pull and matching your threader to the correct needle size, you can prevent the frustrating breakage that many beginners experience.
Why the Wire Bends: Understanding Your Threader's Limits
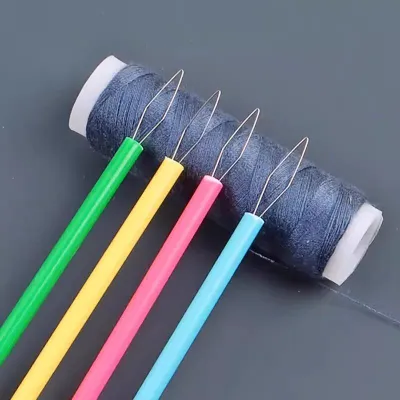
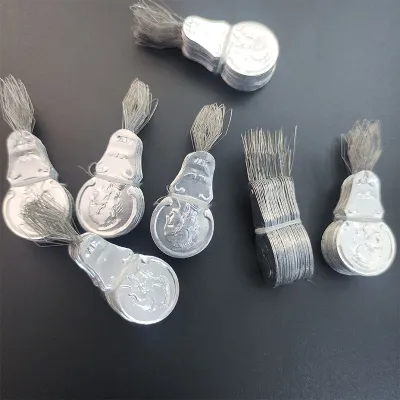
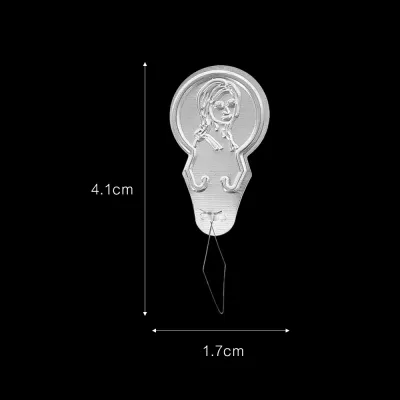
A standard wire needle threader is a simple tool consisting of three main parts: a flat handle (typically made of thin aluminum stamped with a historical profile, or a small plastic tab), a flexible diamond-shaped wire loop, and a crimped or glued base where the wire ends meet the handle. The wire itself is incredibly fine, often made of steel or brass wire measuring less than 0.2 millimeters in diameter. This thin profile is necessary so that the wire can fit through the tiny eyes of hand-sewing needles.
The mechanical design of the wire loop relies on longitudinal flexibility. When you push the loop through a needle eye, the sides of the diamond compress inward, flattening the loop. Once the wire clears the eye on the other side, the natural spring tension of the metal allows it to pop open again, creating a wide target for your thread. However, while the wire is highly efficient at compressing along its length, it has almost no lateral structural integrity.
Products mentioned in this guide
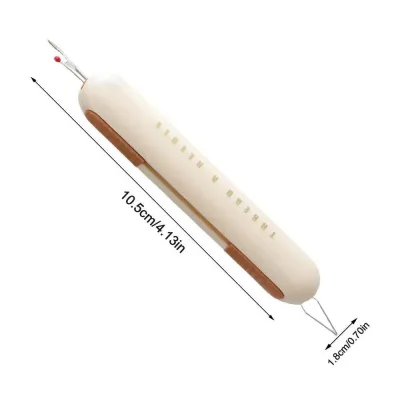
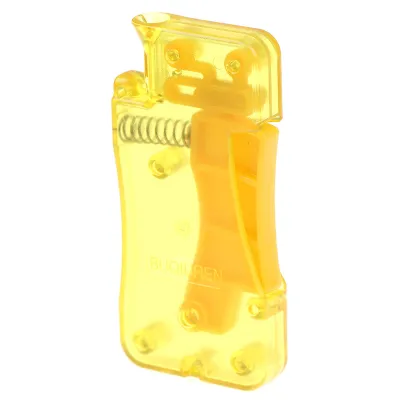
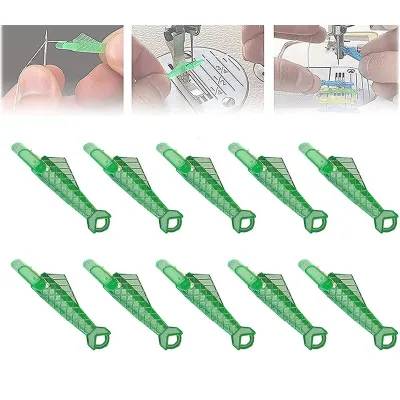
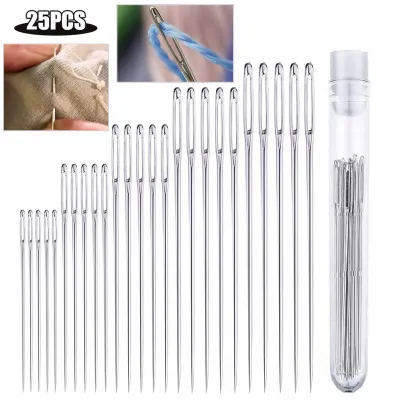
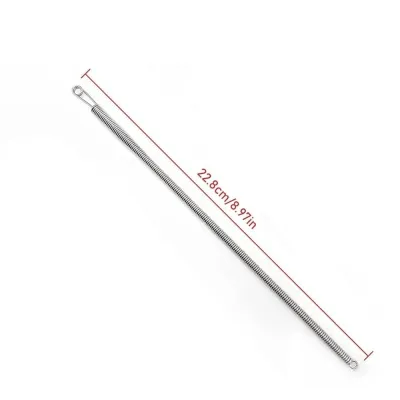
Prices are valid at publication and may change. Please refer to the product page for the latest price.
This lack of lateral strength means that any side-to-side movement, twisting, or uneven pulling forces will instantly exceed the metal’s elastic limit. When this happens, the wire undergoes plastic deformation—it bends permanently. The most vulnerable point of the entire tool is the crimped base where the wire enters the handle. This area acts as a fulcrum; any lateral pressure concentrates force right at this joint, leading to a bent wire or causing the wire to snap completely out of the handle. To preserve your tool, establish a core rule: the wire must always pass through the needle eye without resistance. If you feel any friction or catching, stop immediately, as the needle eye is too small or the thread is too thick for that specific threader.
Choosing the Right Needle and Thread Combination
Preventing wire damage begins long before you insert the tool into the needle. It requires a proper understanding of how needle sizes and thread thicknesses interact with the threader. Hand-sewing needles come in various types, including sharps, betweens, embroidery (crewel) needles, and tapestry needles, each with different eye dimensions. Standard wire needle threaders are designed for medium-sized needle eyes, such as those found on utility sharps or embroidery needles. They are entirely incompatible with ultra-fine needles like size 10 or 12 quilting, applique, or beading needles, which have microscopic eyes that will instantly crush the wire loop.

Furthermore, you must account for the combined thickness of the wire and the thread. When you pull the threader back through the needle eye, the eye must temporarily accommodate four distinct layers of material: two strands of the metal wire loop and two strands of the thread (since the thread is folded over inside the loop). If you are using a thick thread—such as buttonhole twist, heavy-duty upholstery thread, or multiple strands of embroidery floss—the combined volume of the thread and the wire will exceed the physical limits of the needle eye. Trying to force this combination through the eye creates immense friction, pinching the wire and tearing it away from its handle.
To avoid this, always perform a quick visual and tactile check before threading. Cut a clean end of your thread and attempt to pass it through the needle eye manually. The single strand of thread should glide through the eye with absolutely no resistance. If the single strand feels snug, or if you have to yank it to get it through, the needle eye is too small for that thread thickness. Attempting to use a wire threader in this scenario will inevitably result in a broken tool. For thick threads, you must either upgrade to a needle with a larger eye or use a different type of threading tool.
Step-by-Step Guide to Threading Without Damaging the Wire
Step 1: Insert the Wire Straight Into the Needle Eye
Begin by holding your sewing needle firmly between the thumb and forefinger of your non-dominant hand. Position your fingers close to the needle eye to stabilize it, keeping the opening clearly visible and facing directly toward you. In your dominant hand, pinch the flat handle of the needle threader between your thumb and index finger. It is crucial to hold the handle gently; gripping it too tightly can cause you to apply accidental angling forces.
Align the tip of the diamond-shaped wire loop directly with the needle eye. In a slow, deliberate motion, push the wire loop straight through the eye. The key to protecting the wire during this step is maintaining a perfectly linear path. Do not twist the handle, do not wiggle it from side to side to “find” the hole, and do not push at an angle. The wire loop must enter the eye straight on so that the compression forces are distributed evenly along both sides of the diamond.
As you push, the wire loop will compress smoothly and glide through the eye. Continue pushing until the wire loop has emerged completely on the opposite side of the needle, and the threader’s handle is resting almost flush against the needle. The wire loop should now be fully open on the other side, ready to receive the thread.
Step 2: Pass the Thread Through the Extended Wire Loop
With the wire loop resting securely through the needle eye, take your thread in your dominant hand. Gently feed the end of the thread through the wide, open diamond of the wire loop. You only need to pass about 2 to 3 centimeters of the thread through the loop to create a small tail; there is no need to pull a long length of thread through at this stage.
While performing this step, observe a critical safety rule: keep the wire loop completely stationary inside the needle eye. Do not pull on the threader handle, and do not allow the threader to hang unsupported, as the weight of the handle can pull the wire at an angle and bend it against the needle eye. The thread must remain loose inside the wire loop.
Avoid pulling the thread taut or trying to slide the thread down to the very base of the wire loop where it meets the handle. If you pull the thread tight before withdrawing the threader, you create a pinching effect. This premature tension squeezes the wire loop together while it is still outside the needle eye, concentrating stress at the fragile crimped base and causing the wire to bend or snap when you attempt to pull it back through.
Step 3: Withdraw the Threader Smoothly
Once the thread tail is resting loosely inside the wire loop, prepare to withdraw the tool. Maintain your firm grip on the needle with your non-dominant hand. With your dominant hand, grasp the flat handle of the needle threader.
Slowly and smoothly, pull the threader handle straight back, away from the needle. As you pull, the wire loop will begin to compress again as it is drawn back into the needle eye. Because the thread is looped inside the wire, the wire will carry the thread along with it, folding the thread in half as it passes through the eye.
Keep your grip on the thread tail completely loose. The thread must be allowed to glide freely as it is drawn through the eye. If you hold the thread too tightly, you will create resistance, forcing the wire loop to bear the brunt of the tension, which will stretch and deform the wire.
As the wire loop completely clears the needle eye, it will pull the loop of thread through with it. Once the thread loop has emerged on your side of the needle, release the threader handle. Gently grasp one side of the thread loop and pull it through the needle eye until you have a single strand of thread running through the needle, with the short tail hanging free. Your needle is now threaded, and your wire threader remains perfectly straight and undamaged, ready for its next use.
Common Mistakes That Break the Wire (and How to Fix Your Technique)
Many sewing enthusiasts, especially beginners, view needle threaders as indestructible utility tools rather than the delicate instruments they actually are. Understanding the common habits that lead to broken wires allows you to consciously adjust your technique and extend the lifespan of your tools.
One of the most frequent errors is forcing a mismatched needle and threader combination. Attempting to push a standard wire threader into a fine quilting, applique, or beading needle is a guaranteed way to crush the wire. The physical opening of these specialized needles is simply too narrow to accommodate the gauge of the wire. If you encounter resistance during insertion, stop immediately. The correct action is to switch to a micro-wire threader specifically rated for fine needles, or to use an alternative threading method.
Another common mistake is twisting the threader handle during insertion. When the wire does not slide in easily, users often rotate or wiggle the handle to find the opening. This twisting motion subjects the wire to torsional stress, which it is not designed to withstand. The wire will twist at its weakest point—the crimped base—and snap. To correct this, ensure you have excellent lighting and, if necessary, use a magnifying glass. Align the wire loop perfectly with the eye and push in a single, straight line without any rotational movement.
Yanking frayed thread is another major culprit behind broken threaders. In warm, humid climates like Singapore’s, natural fiber threads such as cotton can absorb moisture from the air, causing the fibers to swell, soften, and fray easily at the ends. When you attempt to pull a frayed thread end through the needle eye, the loose, swollen fibers can catch on the metal edge of the eye. If you pull harder to overcome this resistance, the wire loop will stretch and snap. To fix this, always use sharp fabric shears to cut your thread at a clean 45-degree angle immediately before threading. This creates a stiff, pointed end that resists fraying. You can also run the thread end over a block of beeswax or a thread conditioner to bind the fibers together and lubricate the thread, allowing it to glide smoothly through the eye.
Finally, many users continue to use an already compromised threader. If a wire loop has a minor bend or is slightly asymmetrical, its structural balance is ruined. The next time you use it, the compression forces will not distribute evenly, causing the wire to bend further or snap inside the needle eye. Inspect your threader before every use. If the wire is not a perfect, symmetrical diamond, replace it. Keeping a multi-pack of inexpensive wire threaders on hand ensures you always have a fresh, straight tool available.
Alternative Tools for Thick Threads and Tiny Eyes
When your sewing project involves materials that are incompatible with standard wire threaders, using the wrong tool will only lead to frustration and broken equipment. Fortunately, several alternative tools and techniques are designed specifically for these challenging scenarios.
For thick threads, heavy embroidery floss, or wool yarn, coin-style or disc threaders are an excellent alternative. Instead of a flexible wire loop, these tools feature a rigid, flat metal plate with a small hook stamped into the end. You insert the rigid hook through the needle eye, catch the thread or yarn in the hook, and pull it back through. Because the hook is solid metal, it cannot bend or snap like a wire loop. These are ideal for large-eye needles, such as tapestry, darning, or chenille needles, where a delicate wire threader is unnecessary and highly vulnerable to damage.
If you struggle with fine needles or have limited hand dexterity, automatic needle threaders offer a mechanical solution. These devices are available as standalone desktop units or are built directly into many modern sewing machines. To use a desktop automatic threader, you place your needle into a designated slot, lay the thread across a guide, and press a button or lever. A tiny, precise mechanism pushes a microscopic hook through the needle eye, catches the thread, and pulls it back. This eliminates the need for manual alignment and completely protects the delicate threading hook from human error or excessive force.
For medium to large needles, you can also master the “fold and pinch” manual threading method, which requires no tools at all. Simply drape the thread over the tip of your needle and pull it down tightly on both sides to fold it in half. Pinch this folded loop tightly between your thumb and index finger, squeezing hard until only a tiny sliver of the folded thread is visible between your fingertips. Bring the needle eye directly down over this pinched fold. The stiffness of the compressed, folded thread allows it to pop easily through the eye, after which you can grab the loop and pull it through. This method is highly reliable and ensures you are never stranded without a way to thread your needle.
Frequently Asked Questions (FAQ)
Can I use a standard wire needle threader for six-strand embroidery floss?
No, attempting to pull all six strands of embroidery floss through a standard wire needle threader is one of the quickest ways to bend or break the wire. When six strands of floss are looped through the wire, they fold over to create twelve strands of cotton. This massive bundle of thread cannot physically fit through the eye of a standard embroidery needle alongside the two strands of the threader’s wire. The resulting friction will pinch the wire loop and tear it from its handle. If your project requires all six strands, you should separate the strands and thread them in smaller groups, or switch to a heavy-duty coin-style hook threader or a specialized wide-loop threader designed specifically for thick floss and yarn.
How do I safely straighten a slightly bent needle threader wire?
Because the wire used in needle threaders is extremely thin, it is highly susceptible to metal fatigue. If the wire is only slightly bent out of shape, you can attempt to gently coax it back into its original diamond form using a pair of flat-nose pliers with smooth jaws. Work slowly, applying minimal pressure to avoid nicking or scratching the metal. However, you must keep in mind that once metal has bent, its molecular structure is permanently weakened at the point of the bend. The wire will be much more prone to bending again and will likely snap during subsequent uses. While a quick fix can save a project in a pinch, replacing the threader is always the safest and most reliable option.
Why does my thread keep slipping out of the wire loop before I pull it through?
This frustrating issue typically occurs when the thread end is frayed, blunt, or cut straight across, which prevents it from nesting securely in the crook of the wire loop. It can also happen if you hold the thread too loosely or pull the threader back at an angle, causing the thread to slide out of the side of the loop. To prevent this, always use sharp sewing shears to cut your thread at a clean 45-degree angle, creating a sharp point. If you are working in a humid environment like Singapore, where natural fibers can soften and expand, lightly moistening the tip of the thread or coating it with a small amount of beeswax will keep the fibers tightly bound together, ensuring the thread stays securely nested in the wire loop as it passes through the needle eye.
Community discussion
Share your experience or ask a question. Comments are reviewed before publication.