
Introducing a Mideer drawing board into your child’s daily routine is an excellent way to encourage screen-free creativity, fine motor development, and interactive learning. These lightweight, portable devices use pressure-sensitive liquid crystal technology to let children draw, write, and play games without the mess of traditional markers, ink, or chalk. By understanding the core features of the board and implementing structured, engaging activities, you can transform this simple tool into a versatile hub for both quiet independent play and collaborative family fun.
Unlike traditional tablets that emit blue light, the matte screen of an LCD drawing board relies on reflected ambient light to make drawings visible, making it highly gentle on young eyes. Whether you are looking to occupy your child during a rainy afternoon, practice spelling words, or play a quick game of family Pictionary, this guide provides the practical steps and creative inspiration needed to get the most out of your drawing board.
Getting Started with Your Mideer Drawing Board
Before handing the drawing board to your child, taking a few minutes to understand its design and features will ensure a smooth, frustration-free experience. Unboxing the device reveals a streamlined, kid-friendly design. Most models include the main LCD tablet, a custom-fitted plastic stylus, a tether to secure the stylus to the frame, and a pre-installed coin cell battery. Locate the small eyelets on the stylus and the corner of the board; threading the tether through these loops is highly recommended to prevent the stylus from getting lost during travel or outdoor play.
Products mentioned in this guide
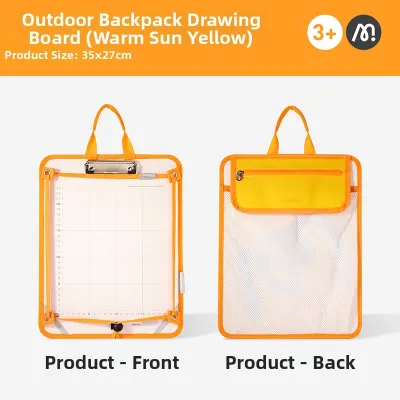
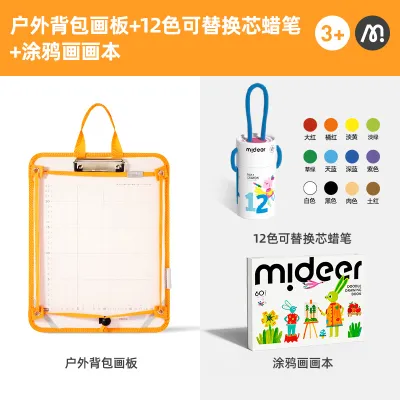
Prices are valid at publication and may change. Please refer to the product page for the latest price.
Operating the board is incredibly straightforward, but explaining the basic mechanics to your child will help them use it independently. The screen is pressure-sensitive, meaning that pressing harder with the stylus creates thicker, bolder lines, while a light touch produces delicate, thin strokes. To clear the screen, simply press the central erase button—usually marked with a trash can or circular icon. If the screen does not clear, locate the slide lock switch on the back or side of the frame. This switch acts as a screen-lock mechanism; when engaged, it disables the erase function to preserve your child’s artwork, and when disengaged, it allows for instant, one-click clearing.
To promote healthy habits, set up a comfortable, well-lit drawing space for your child. Because the screen does not have a bright internal backlight, it performs best under direct, natural light or a well-positioned desk lamp. Ensure your child sits at a child-sized table that supports good posture, preventing them from slouching or holding the board too close to their face. Setting up this dedicated space helps children focus and signals that drawing time is a special, focused activity.
Step-by-Step Creative Activities for Kids
While simple doodling is a wonderful way for children to express themselves, the flat, responsive surface of the drawing board can be used for a wide variety of structured games and educational exercises. By introducing guided activities, you can keep your child engaged for longer periods and support their cognitive development.

Tracing and Shadow Play
Tracing is a fundamental activity that helps young children develop fine motor control, spatial awareness, and hand-eye coordination. Because the drawing board has a flat, matte surface, it serves as an excellent platform for tracing physical objects and templates.
- Stencil Tracing: Place thin, semi-transparent plastic stencils or lightweight paper templates directly onto the screen. Instruct your child to guide the stylus along the cutouts or printed lines. The pressure from the stylus transfers through the stencil, leaving clean, precise lines on the screen underneath. This is a highly rewarding activity for toddlers who are still learning to control their hand movements.
- Shadow Silhouette Drawing: Position the drawing board flat on a table near a sunny window or directly beneath a adjustable desk lamp. Place a small toy—such as a plastic dinosaur, a toy car, or an animal figurine—on the edge of the board so that its shadow falls across the screen. Have your child trace the outline of the shadow. Once they are finished, remove the toy to reveal the clean silhouette. This activity teaches children about light sources, angles, and shapes in a highly visual way.
Interactive Storytelling and Pictionary
Turning drawing into a shared social experience helps children develop language skills, emotional expression, and cooperative play habits.
- Mess-Free Family Pictionary: Create a simple deck of prompt cards featuring everyday objects, animals, or actions suited to your child's age group. Take turns drawing a card and sketching the item on the board while the other players guess. The instant-erase button allows you to clear the screen in a fraction of a second, keeping the game fast-paced and exciting without wasting paper or dealing with dried-out whiteboard markers.
- Collaborative Storyboarding: Start a story with a simple drawing and a spoken sentence, such as, "Once upon a time, a little turtle lived in a big blue ocean." Pass the stylus to your child and ask them to draw the next part of the story, adding their own sentence, like, "One day, the turtle found a shiny treasure chest." Continue passing the board back and forth, building a unique visual narrative. You can slide the lock switch to "save" the final scene, allowing your child to show their completed storyboard to other family members before erasing it.
Learning Letters, Numbers, and Shapes
Integrating early education into playtime helps children absorb foundational concepts in a relaxed, low-pressure environment. The instant-erase feature is particularly valuable here, as it removes the fear of making mistakes.
- Handwriting and Letter Tracing: Draw dotted lines representing letters, numbers, or geometric shapes on the board, then have your child trace over them with the stylus. If they make a mistake or step outside the lines, they do not have to worry about messy eraser crumbs or smudged paper; they can simply clear the screen and try again. This repetitive practice builds muscle memory for writing strokes.
- Visual Math Exercises: Use the board as an interactive math aid. Draw a group of simple objects, such as five small fish, and write a mathematical symbol next to them. Ask your child to draw three more fish and calculate the total. For subtraction, you can draw a set of shapes and have your child use the stylus to cross out a specific number of items, helping them visualize how numbers decrease. This hands-on approach makes abstract mathematical concepts tangible and easy to understand.
Tips to Maximize Engagement and Screen-Free Fun
To ensure the drawing board remains a favorite toy over the long term, parents can use a few simple strategies to keep the experience fresh, exciting, and integrated into daily routines.
- Introduce Weekly Drawing Challenges: Prevent boredom by establishing a "drawing challenge of the week." Write down a list of fun, imaginative prompts on small pieces of paper and keep them in a jar. Prompts could include "draw a house made of candy," "design a superhero outfit," or "draw what you think an alien looks like." Drawing a new prompt each week gives children a clear starting point and sparks their imagination.
- The Ultimate Travel Companion: The lightweight, compact nature of the drawing board makes it an exceptional travel toy. Keep it in your bag for car rides, flights, or long waits at local restaurants or medical appointments. Because it generates no physical waste, has no loose caps to drop, and requires no internet connection, it provides hours of quiet entertainment in confined spaces without the need for a smartphone or tablet screen.
- Create a Dedicated Creation Station: Set up a specific area in your home where the drawing board is always accessible, placed alongside other physical art supplies like modeling clay, building blocks, or safe safety scissors. Encourage your child to use the board as a planning tool; for example, they can sketch a blueprint of a castle before building it with blocks, or draw a colorful background scene to place behind their clay figures. This teaches them to view the drawing board as a supportive tool for broader creative projects.
Care, Maintenance, and Safety Guidelines
Proper care and maintenance will extend the lifespan of your drawing board, protect the sensitive LCD screen, and ensure a safe play environment for your child.
- Screen Cleaning Instructions: To clean dust, fingerprints, or smudges off the display, wipe the surface gently with a soft, dry, or slightly damp microfiber cloth. Never use harsh chemical cleaners, window sprays, alcohol, or abrasive sponges, as these can permanently strip the protective matte coating off the screen. Additionally, ensure that no water drops enter the edges of the frame where the internal circuitry is housed.
- Battery Management and Safety: LCD drawing boards typically operate on a small CR2025 or CR2032 coin cell battery, which powers the screen-clearing function. If the erase button stops working, first verify that the screen lock switch on the back is in the unlocked position. If it is unlocked and the screen still will not clear, the battery likely needs replacing. Always check that the battery compartment is secured with a small screw to prevent children from accessing it. When replacing the battery, do so completely out of reach of children, and dispose of the old coin cell battery immediately in accordance with local safety guidelines.
- Storage and Physical Protection: Store the stylus in its designated slot on the board when not in use to prevent it from being misplaced. Avoid exposing the drawing board to extreme heat, such as leaving it inside a parked car under direct sunlight, as high temperatures can cause the liquid crystals in the screen to degrade or lose responsiveness. Teach your child not to place heavy objects on top of the screen and to avoid dropping it on hard surfaces, as sharp impacts can crack the delicate internal display layers.
Frequently Asked Questions (FAQ)
Why is my Mideer drawing board not erasing properly?
If the screen does not clear when you press the erase button, the most common cause is that the screen lock switch on the back or side of the board is engaged. Slide the switch to the unlocked position and try pressing the erase button again. If the switch is unlocked and the board still fails to erase, the coin cell battery is likely depleted and needs to be replaced. Finally, check the screen surface for any sticky residue or deep, physical scratches that might physically damage the liquid crystal layer.
Can I use regular pens or markers on the drawing board?
No, you should never use regular pens, pencils, markers, or any sharp metal objects on the drawing board. The screen is designed specifically for the rounded, smooth plastic tip of the included stylus. Using standard writing instruments can permanently scratch, puncture, or stain the matte display surface, rendering the board unusable. If you lose the original stylus, look for a manufacturer-approved, soft-tipped plastic replacement stylus.
Is the drawing board safe for toddlers?
Yes, the drawing board is made from non-toxic, durable plastic and offers a completely mess-free alternative to traditional art supplies. However, close parental supervision is highly recommended for children under 3 years old. This is because the stylus, the attaching tether, and the coin cell battery inside the screw-secured compartment can pose potential choking hazards if damaged or handled incorrectly. Always inspect the board regularly to ensure the battery compartment screw remains tightly fastened.

Community discussion
Share your experience or ask a question. Comments are reviewed before publication.