
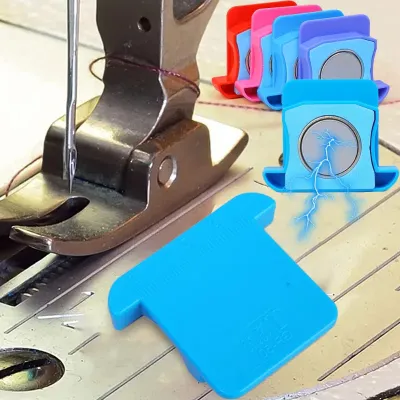
Achieving perfectly straight seams is one of the most fundamental skills in sewing, yet it remains a persistent challenge for beginners. A magnetic seam guide is a simple, highly effective tool designed to sit on your sewing machine’s metal needle plate, acting as a physical barrier that keeps your fabric aligned as you stitch. By placing this small magnetic accessory at a precise distance from your needle, you can feed fabric smoothly and maintain a consistent seam allowance throughout your entire project. Using it correctly requires a blend of machine safety checks, accurate measurements, and proper fabric-handling techniques.
Preparation and Safety Checks for Your Sewing Machine
Before you begin using a magnetic seam guide, gather the essential tools for your sewing workspace. You will need your sewing machine, the magnetic seam guide itself, several fabric scraps of a similar weight to your project for testing, a measuring tape or a metal seam gauge, and a clear ruler. Having these items on hand ensures you can verify your measurements before making any permanent stitches in your project fabric.
The first and most critical step is to consult your sewing machine’s instruction manual. While magnetic seam guides are incredibly useful, they are not universally compatible with all sewing machines. Modern computerized sewing machines contain delicate internal electronics, digital sensors, and precise stepper motors that control the needle position and stitch patterns. A strong magnet placed directly on the needle plate can emit a magnetic field powerful enough to disrupt these components, potentially causing electronic errors, sensor failures, or permanent damage to the machine’s motherboard.
Products mentioned in this guide
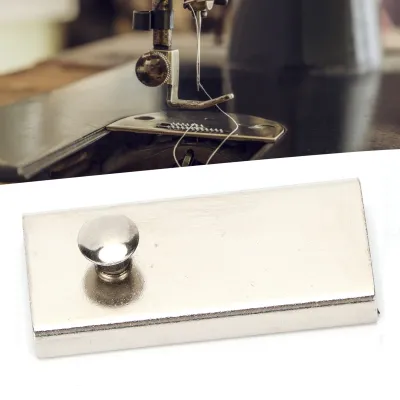
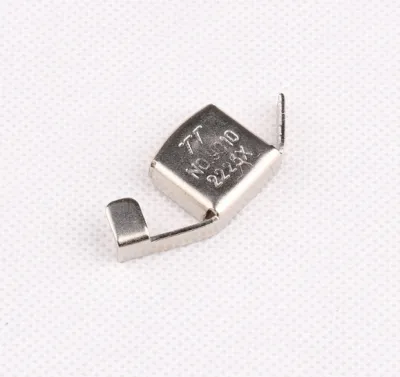
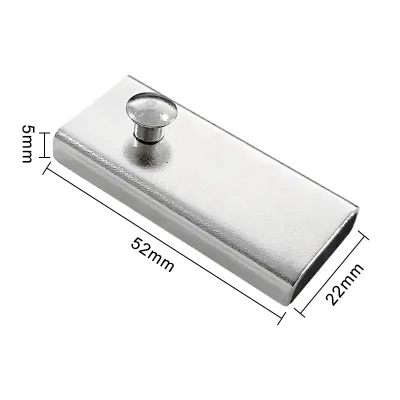
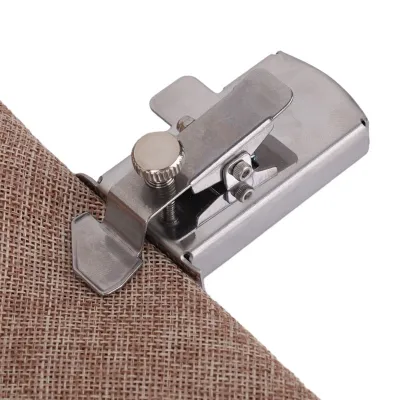
Prices are valid at publication and may change. Please refer to the product page for the latest price.
Look specifically for any warnings regarding magnetic accessories in your manual’s safety or maintenance sections. If your manufacturer explicitly prohibits the use of magnets on or near the machine, or if you own a highly computerized model and cannot find clear approval, you must establish a strict stop condition. Do not risk damaging your machine’s circuitry. Instead, switch to a non-magnetic alternative such as an adhesive seam tape, a snap-on guide, or a screw-on metal seam guide that secures into the pre-drilled holes on your machine’s bed. If your manual confirms it is safe to use magnetic accessories, or if you are working on a traditional mechanical sewing machine, you can safely proceed to the next step.
How to Measure and Attach the Magnetic Seam Guide
To achieve professional results, you must first determine the exact seam allowance required for your sewing project. Garment construction typically relies on a standard 5/8-inch (approximately 1.6 cm) seam allowance to allow room for adjustments and seam finishes. In contrast, quilting projects almost universally demand a precise 1/4-inch (approximately 6 mm) seam allowance to ensure that pieced blocks align perfectly. Check your pattern instructions carefully before setting your guide.

Once you know your target width, you must measure the distance directly from your needle’s drop position. Sewing machines often allow you to adjust the needle to a left, center, or right position. Set your needle to the position you intend to use for your project, then place a metal seam gauge or a clear ruler flat on the needle plate. Align the zero mark of your measuring tool precisely with the side of the needle, extending the tool outward to the right.
Next, take your magnetic seam guide and prepare to position it. You want the straight, vertical edge of the guide to sit perfectly parallel to the direction of the fabric feed, which runs from the front of the machine to the back. Carefully lower the guide onto the metal needle plate at your measured mark. Ensure that the guide sits completely flat on the plate and is placed far enough to the right that it does not block the feed dogs or interfere with the opening of your bobbin cover.
Allow the magnet to snap securely onto the metal plate. The magnetic pull should feel firm and resistant to light lateral movement. Once in place, it is vital to perform a manual safety check. Turn the handwheel toward you slowly by hand to ensure the needle clears the presser foot and does not strike the magnetic guide at any point. Feed a small scrap of fabric along the guide’s edge to verify that the fabric moves smoothly and that the distance from the needle to the guide matches your intended seam allowance perfectly.
Step-by-Step Technique for Sewing Straight Seams
With your guide securely positioned and tested, you can begin sewing your project seams. Start by aligning the raw edge of your fabric gently against the straight edge of the magnetic guide. The fabric should rest lightly against the guide without being forced underneath it or pushed up against its vertical wall. Once the fabric is aligned, lower your presser foot to hold the material firmly in place.
As you begin to sew, pay close attention to your hand placement and physical pressure. Keep your hands relaxed, placing your fingers lightly on the fabric to guide it toward the presser foot. A common beginner mistake is to push or pull the fabric laterally against the guide or forward through the machine. You must let the machine’s feed dogs do the work of drawing the fabric backward; your hands are simply there to keep the fabric’s raw edge kissing the side of the magnetic guide. Forcing the fabric can deflect the needle, leading to skipped stitches or broken needles.
Your visual focus plays a major role in stitching straight lines. Instead of staring directly at the rapidly moving needle, train your eyes to watch the point where the raw edge of the fabric meets the straight wall of the magnetic guide. If you keep the fabric edge consistently aligned with this stationary boundary, your stitches will automatically remain straight and even. Staring at the needle often causes micro-adjustments that result in wavy seams.
When you start and end your seam, remember to secure your stitches. Use your machine’s backstitch or reverse function to sew two or three stitches backward and forward at both ends of the seam. This prevents the thread from unraveling during handling and wear. Maintain a steady, moderate speed; sewing too quickly can cause the fabric to bounce away from the guide, especially if you are still developing your coordination.
If your project requires you to pivot at a corner, you can still use the guide as a reference. Sew until you reach the turning point, then stop the machine with the needle down in the fabric. Lift the presser foot, pivot the fabric 90 degrees (or the required angle), and lower the presser foot. Ensure the new raw edge aligns with your magnetic guide before you resume sewing. If the corner shape prevents direct alignment, you may need to temporarily slide the guide back, complete the turn, and reposition it.
Troubleshooting Slipping Guides and Crooked Stitches
Even with a straightforward tool like a magnetic seam guide, you may occasionally encounter issues with slipping or uneven stitching. If you notice the guide shifting out of place during a seam, the most common cause is excessive lateral pressure. Pushing the fabric too hard against the guide will eventually overcome the magnet’s friction. Another frequent culprit is the accumulation of microscopic sewing machine oil, lint, or fabric dust on the metal needle plate, which reduces the magnet’s grip. To fix this, remove the guide, wipe both the needle plate and the bottom of the magnet with a clean, dry microfiber cloth, and focus on guiding the fabric with a lighter touch. If you frequently sew heavy fabrics like denim or canvas, consider upgrading to a guide with a wider magnetic base to handle the increased resistance.
Wavy or puckered seams are another common frustration. This issue typically occurs when you pull the fabric from behind the presser foot as it exits the machine. Pulling disrupts the natural feeding cycle of the feed dogs, stretching the fabric as the stitches are formed. When the fabric relaxes, it puckers. To resolve this, keep your hands positioned entirely in front of or to the side of the presser foot, allowing the machine to feed the material at its own pace.
If your seam width is inconsistent despite using the guide, check if the fabric is riding up the side of the magnet. Thick or stretchy fabrics can easily slide over a guide with rounded or low-profile edges. Always ensure the fabric lies completely flat against the needle plate before it reaches the guide. Verify that the guide’s edge is perfectly vertical and sits flush against the plate so that fabric cannot slip underneath or climb over it.
Cleaning and Safe Storage Practices
Proper maintenance of your magnetic seam guide ensures its longevity and protects your sewing environment. After every sewing session, take a moment to clean the guide. Magnets naturally attract tiny metal shavings, pins, and loose steel fibers, while the sewing process generates significant lint and oil residue. Wipe the bottom of the magnet and your machine’s needle plate with a soft, dry cloth to prevent these particles from scratching your machine’s polished surfaces or weakening the magnetic hold.
When you are not using the guide, store it safely to prevent damage to other items in your home. Keep the magnetic guide in a dedicated pouch, a small plastic box, or its original packaging rather than letting it loose in a drawer.
Because these accessories utilize relatively strong magnets, you must store them away from sensitive household items. Keep the guide well clear of credit cards, smartphones, computer hard drives, tablets, and smartwatches, as magnetic fields can cause data loss or screen distortion. Most importantly, ensure the magnet is kept far away from anyone wearing a pacemaker or other implantable medical devices, as magnetic fields can interfere with their proper operation.
Frequently Asked Questions (FAQ)
Can I use a magnetic seam guide on a computerized sewing machine?
You should always check your sewing machine’s user manual before using a magnetic seam guide on a computerized model. Because computerized machines rely on sensitive digital sensors, stepper motors, and internal circuit boards, strong magnetic fields can cause electronic interference or permanent component damage. While some modern computerized machines have shielded interiors that allow magnetic accessories, others strictly prohibit them. If your manual advises against magnets, choose an adhesive, snap-on, or screw-on seam guide instead to protect your machine’s electronics.
What should I do if the magnetic seam guide is not strong enough?
If your guide slips easily, start by cleaning both the bottom of the magnet and your sewing machine’s metal needle plate with a dry cloth to remove any lint, dust, or oil. If the guide continues to slide when sewing thick or heavy fabrics, the magnet may not be powerful enough for the weight of your project. In this case, consider upgrading to a magnetic seam guide with a larger magnetic base or dual magnets. Alternatively, you can switch to a mechanical screw-on seam guide, which secures directly into the threaded holes on your needle plate for an absolute, slip-proof hold.
Community discussion
Share your experience or ask a question. Comments are reviewed before publication.