
Hand-stitching leather is a deeply satisfying craft that combines precision, patience, and the right set of tools. To successfully complete your first leather project, such as a minimalist cardholder or a custom key fob, you must master the fundamental steps of preparing your leather, punching clean holes, and executing a classic saddle stitch. A standard leather stitching kit provides the essential tools required to achieve professional, durable results. By understanding how to prepare your materials, handle your tools safely, and maintain consistent tension, you can transform raw leather pieces into a beautifully finished, hand-crafted item that lasts for years.
Identifying Essential Tools in Your Leather Stitching Kit
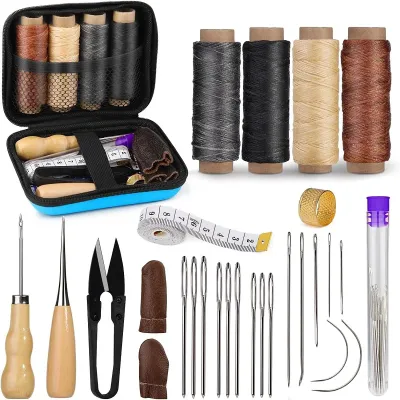
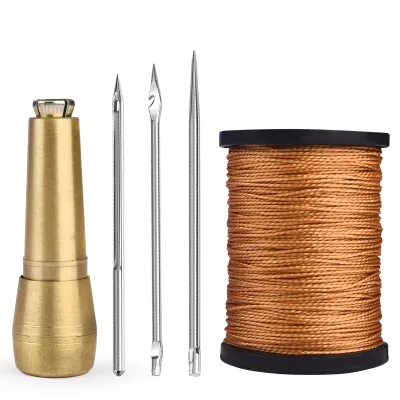
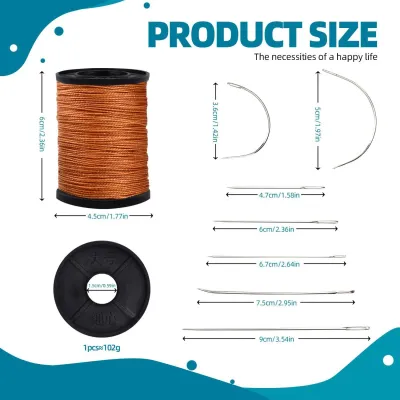
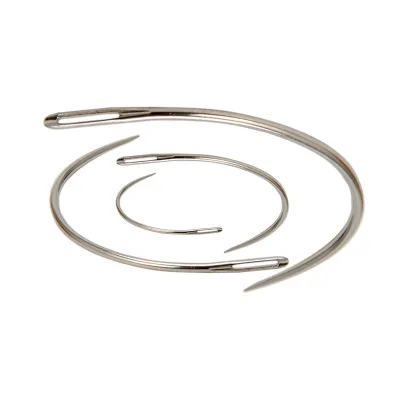
Opening a leather stitching kit for the first time can be intimidating due to the variety of specialized tools. The core of any kit consists of pricking irons (also called stitching chisels), harness needles, waxed thread, and a protective cutting mat. Pricking irons are multi-pronged metal tools designed to mark and punch evenly spaced holes through the leather. Harness needles differ from standard sewing needles because they feature blunt tips to prevent piercing the leather fibers and larger eyes to accommodate thick, heavy-duty thread. Waxed thread, typically made of braided polyester or linen, is pre-coated with wax to reduce friction, prevent fraying, and lock the stitches securely in place.
Before you begin your project, it is crucial to inspect the condition of your tools to ensure a smooth crafting experience. Run your fingers carefully along the prongs of your pricking irons to verify they are perfectly straight, sharp, and free of metal burrs. Inspect the eyes of your harness needles to ensure they are smooth and polished; any rough edges inside the needle eye can shred your thread during stitching. A high-quality kit will also include a self-healing cutting mat or a dense poly punching pad, which protects both your work surface and the delicate tips of your punching tools from damage.
Products mentioned in this guide
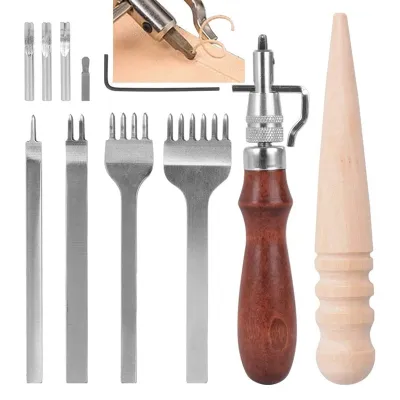
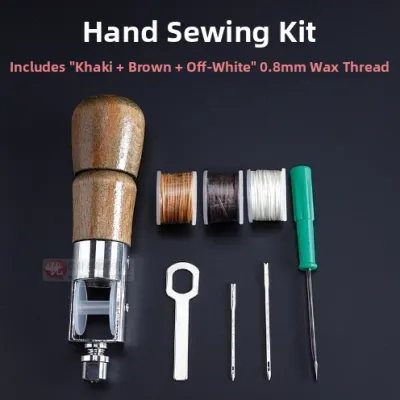
Prices are valid at publication and may change. Please refer to the product page for the latest price.
As a beginner, you should focus on mastering these essential tools before expanding your collection. While advanced kits may include specialized accessories like stitching ponies, edge bevelers, or groovers, you can easily complete a basic project with just your irons, needles, thread, and a mallet. Keeping your workspace organized and understanding the specific role of each tool will prevent mistakes and help you build confidence as you progress through your first leathercraft project.
Preparing the Leather and Waxed Thread
Proper preparation is the foundation of clean, professional leatherwork. Begin by marking a straight guide line along the edge of your leather pieces where the stitches will run. You can achieve this by using a stitching groover to carve a shallow channel, or a wing divider to lightly scratch a parallel line at a consistent distance from the edge. For most small leather goods, a distance of 3mm to 4mm from the edge is ideal. This guide line ensures that your stitching holes remain perfectly aligned and do not drift toward or away from the edge of the leather.

Once your guide line is marked, you must calculate the correct length of waxed thread for your seam. A reliable rule of thumb for the classic saddle stitch is to measure the length of the seam you plan to sew and multiply it by four. If you are working with exceptionally thick leather, multiply the seam length by five to account for the extra distance the thread must travel through the layers. It is always better to have a little extra thread at the end than to run out mid-seam, which requires a complex and visible splicing process.
To thread your harness needles, use the professional locking method to prevent the thread from slipping out of the needle eye. First, pass about 20mm of the thread through the eye of the needle. Next, take the pointed tip of the needle and pierce it directly through the center of the thread tail, about 10mm away from the eye. Pull the long end of the thread down toward the needle point, sliding the pierced loop over the eye to lock the thread securely in place. Repeat this process with a second needle on the opposite end of the thread.
Before you begin punching holes, temporarily secure your leather pieces together to prevent them from shifting. You can apply a very thin layer of leather cement or double-sided crafting tape along the seam allowance, keeping the adhesive well within the border so it does not squeeze out. Alternatively, use binder clips padded with scrap leather to hold the pieces firmly in place. This step ensures that the front and back layers remain perfectly aligned, resulting in matching holes on both sides of your project.
Punching Clean and Even Stitching Holes
Creating clean, vertical holes is the most critical step in achieving straight, beautiful stitches. Always place a high-density polyethylene punching pad or a thick rubber mat underneath your leather before you begin. Never punch directly onto a standard self-healing cutting mat or a hard table surface, as this will quickly dull or bend the sharp prongs of your pricking irons. The punching pad absorbs the impact energy and allows the prongs to pass through the leather safely.
Position your pricking iron vertically on your marked guide line. It is vital to maintain a strict 90-degree angle relative to the leather surface; if the iron is tilted even slightly, the exit holes on the backside of the leather will be misaligned, resulting in crooked, uneven stitches. Hold the tool firmly with your non-dominant hand, keeping your fingers well clear of the striking area. Strike the top of the iron with a nylon, polyurethane, or wooden mallet using controlled, even force. Avoid using a standard metal hammer, as the steel-on-steel impact will deform and mushroom the head of your pricking irons over time.
When punching a long line of holes, you must maintain consistent spacing. To do this, always place the first prong of your pricking iron into the last hole of the previous punch before striking the tool again. This technique acts as a built-in guide, ensuring that the distance between every single hole remains identical. If your kit includes irons with different numbers of prongs, use the multi-prong irons (such as 4-prong or 6-prong) for straight lines to speed up the process and maintain perfect alignment.
Navigating corners and curved edges requires a different strategy. Switch to a 2-prong or single-prong iron when rounding a corner, as these tools allow you to rotate the angle gradually without altering the spacing between the holes. Take your time during this phase, checking the alignment of each hole before striking. Once all the holes are punched, gently pull the leather off the punching pad and inspect both sides to ensure the prongs have penetrated cleanly through all layers of the leather.
Mastering the Saddle Stitch Technique
The saddle stitch is the gold standard of hand-stitching in leathercraft because of its incredible durability and classic appearance. Unlike a machine lockstitch, which will completely unravel if a single thread breaks, a saddle stitch uses two needles on a single thread that continuously cross paths through each hole. If one thread wears through, the remaining thread continues to hold the leather pieces securely together. This interlocking structure is what makes hand-stitched leather goods exceptionally long-lasting.
To begin the saddle stitch, pass one of your needles through the first hole of the seam and pull the thread through until you have equal lengths on both sides. You will now have a needle in your left hand and a needle in your right hand. Take the left-hand needle and pass it through the second hole, pulling it through to the right side. Next, take the right-hand needle and pass it through the exact same second hole, directing it to the left side. To ensure a consistent stitch slant, always insert the second needle in the same position relative to the first thread—either consistently above or below it.
Managing thread tension is essential for a clean finish. After completing each stitch, pull both needles firmly and evenly away from the leather. The tension should be snug enough to pull the thread flat against the leather surface, but not so tight that it puckers or distorts the leather. Developing a consistent rhythm and applying the same amount of pulling force to every single stitch will result in a uniform, professional appearance along the entire seam.
If you make a mistake, such as skipping a hole or twisting the thread, it is best to address it immediately. Carefully back out the needles and unthread the incorrect stitches until you reach the error, then resume the proper sequence. Once you reach the end of your seam, secure the thread by backstitching through the last two or three holes. Cut the remaining thread close to the leather, leaving a tiny tail of about 1mm. If you are using polyester thread, carefully melt the tail with a lighter and press it flat against the leather to lock it; if using linen thread, secure the tail with a small drop of leather glue.
Inspecting and Finishing Your Hand-Stitched Project
After completing your last stitch, take a moment to thoroughly inspect your handiwork. Examine the stitch line on both the front and back of the leather to ensure the tension is uniform and the slant of the stitches is consistent. If you notice any minor irregularities, you can use a smooth bone folder or the flat face of your mallet to gently tap along the stitch line. This action flattens the thread and helps settle the stitches into the leather, smoothing out any minor tension discrepancies.
Next, check the surrounding leather surface for any accidental scratches, tool marks, or adhesive residue. If you used double-sided tape or leather cement, gently rub away any exposed adhesive with your fingers or a crepe rubber eraser. Minor surface scuffs on vegetable-tanned leather can often be buffed out using a clean, soft cloth and a small amount of leather conditioner, which restores the natural oils and protects the surface.
The final step in completing your project is edge finishing, which elevates your work from a hobbyist level to a professional standard. Use fine-grit sandpaper to sand the edges of the joined leather pieces until they are perfectly flush and smooth. Apply a small amount of water, beeswax, or burnishing gum to the sanded edge, then rub it vigorously with a wooden slicker. The friction generates heat, which seals the loose leather fibers and creates a smooth, dark, and glossy edge that beautifully frames your hand-stitched work.
Frequently Asked Questions (FAQ)
Why does my waxed thread keep fraying while stitching?
Thread fraying is typically caused by excessive friction during the stitching process. If the eyes of your harness needles have sharp internal edges, or if the punched holes in your leather are too small, the thread will experience high friction as it is pulled through. Additionally, pulling the thread at an angle rather than straight through the hole strips away the protective wax coating, weakening the fibers. To prevent fraying, ensure your needle eyes are smooth, use an awl to slightly enlarge tight holes, and run your thread through a block of beeswax to restore its coating if it begins to feel dry.
Can I use a regular metal hammer instead of a mallet?
You should avoid using a standard metal hammer on your leathercraft tools. Steel hammers are extremely hard and do not absorb shock. Striking the hardened steel of a pricking iron or an awl with a metal hammer will quickly deform, chip, or mushroom the struck end of the tool, rendering it useless and potentially sending dangerous metal shards into the air. Instead, always use a dedicated crafting mallet made of nylon, polyurethane, or dense wood, which absorbs the impact energy and preserves your tools.
How do I fix a mistake if I punch a hole in the wrong place?
Because genuine leather is a natural, fibrous material, any hole punched into it is permanent. There is no invisible way to erase a misplaced hole. For minor cosmetic errors, you can try applying a tiny amount of leather filler or edge paint to mask the hole, or gently massage the surrounding leather with a bone folder to close the fibers slightly. However, the best approach is prevention. Always practice your tool placement, spacing, and striking force on scrap pieces of the same leather before working on your final project.
Community discussion
Share your experience or ask a question. Comments are reviewed before publication.