
Threading tiny seed beads one by one onto a needle is a meticulous, time-consuming process that can quickly drain the joy from any needlework project. A bead spinner solves this problem by using rotational force to thread dozens of beads onto a needle in a matter of seconds. By spinning a bowl filled with beads and holding a specialized needle at the correct angle, you can complete jewelry, embroidery, and loom designs in a fraction of the time. Mastering this tool requires a basic understanding of its physics, the right combination of materials, and a bit of hand-eye coordination.
What Is a Bead Spinner and How Does It Work?
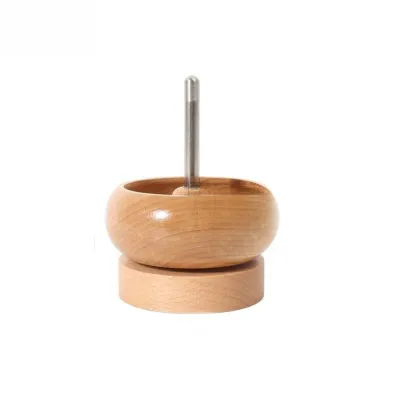
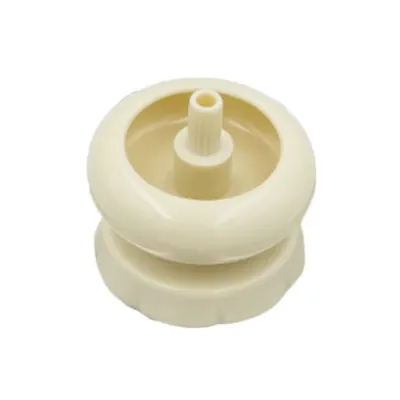
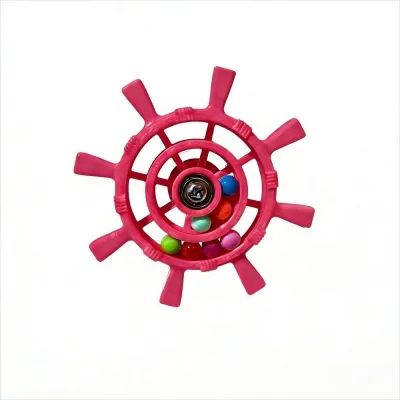
A bead spinner is a mechanical or electric craft tool consisting of a shallow bowl mounted on a central spindle, which sits atop a weighted base. The design allows the bowl to spin smoothly and rapidly around its vertical axis. This simple tool relies on centrifugal force to streamline your workflow. When you spin the bowl, the motion pushes the loose beads outward and upward against the curved inner walls, creating a sloping vortex of aligned beads.
As the beads spin in a continuous, uniform stream, you insert a curved needle into the path of the oncoming beads. Because the beads are packed tightly together by the rotational force, their holes naturally align as they slide along the outer edge of the vortex. When the tip of your needle meets this moving stream, the kinetic energy of the spinning beads forces them to slide onto the needle shaft automatically. This tool is highly effective for stringing large quantities of uniform seed beads, making it indispensable for creating multi-strand necklaces, fringe earrings, beaded embroidery, and detailed loom work.
Products mentioned in this guide
Prices are valid at publication and may change. Please refer to the product page for the latest price.
Tools and Materials You Need
To achieve consistent results, you must assemble a compatible set of materials. The performance of a bead spinner depends heavily on the physical interaction between the bowl, the beads, the needle, and the thread.

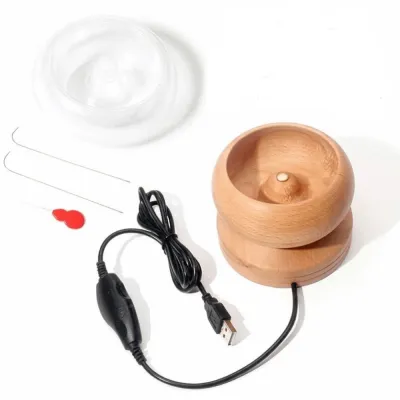
- Bead Spinner: You can choose between a manual spinner (spun by hand or using a mechanical thread-crank) and an electric spinner. Manual wooden spinners are popular for their tactile control, durability, and quiet operation. Electric models use a motor to maintain a constant speed, which is helpful for high-volume production but offers less immediate physical feedback.
- Beads: Small, highly uniform beads are essential. Glass seed beads in sizes 11/0, 8/0, or 6/0 work best. Irregularly sized or cheaply manufactured plastic beads can jam the needle or fail to ride the vortex smoothly.
- Beading Needle: You must use a specialized curved needle, often referred to as a "J" needle or a curved big-eye needle. The curve allows the needle tip to sit horizontally against the spinning beads while the shaft clears the rim of the bowl. Ensure the needle is thin enough to pass through your chosen bead size.
- Beading Thread: Select a strong, low-stretch thread such as nylon (for example, size D or 0.15mm thread) or silk. The thread must be thin enough to double over through the needle's eye while still allowing the bead holes to slide over the transition point without catching.
- Accessories: Work over a soft bead mat or a shallow tray to catch stray beads that may spill during practice. A block of beeswax or synthetic thread conditioner is also highly recommended to coat the thread, reducing static and friction.
Step-by-Step Guide to Using a Bead Spinner
Using a bead spinner is a tactile skill that relies on rhythm and muscle memory. Follow these sequential steps to set up your workspace and master the basic technique.
Step 1: Prepare Your Thread and Needle
Begin by cutting a manageable length of beading thread. For beginners, a length of 1 to 1.5 metres is ideal; anything longer increases the risk of tangling, while shorter lengths will require frequent knotting and splicing. Pull the thread through your thread conditioner two or three times to flatten any stray fibers, reduce static electricity, and prevent knots.
Thread your curved needle. If you are using a big-eye needle, split the central eye, pass the thread through, and pull it down to secure it. If you are using a traditional curved needle, pass the thread through the small eye and leave a short tail of about 5 to 10 centimetres. Secure the working end of your thread to prevent the beads from sliding off immediately. You can do this by tying a temporary “stop bead” about 15 centimetres from the end of the thread, or by tying a secure knot if your project design allows it.
Step 2: Fill the Spinner Bowl
Pour your seed beads into the spinner bowl. Finding the correct volume of beads is critical for creating a functional vortex. The ideal level is between one-third and one-half full.
If you do not add enough beads, they will simply slide around the bottom of the bowl without climbing the walls, making it impossible for the needle to catch them. Conversely, overfilling the bowl is a common beginner mistake. An overfilled bowl restricts the movement of the beads, preventing them from forming a smooth vortex, and often results in beads spilling over the outer rim when you begin to spin. Ensure the beads are clean, dry, and free of any static cling before you start.
Step 3: Create the Vortex and Catch the Beads
If you are right-handed, you will hold the curved needle in your dominant hand and spin the bowl with your non-dominant hand. Spin the bowl in a counter-clockwise direction. This direction ensures that the beads approach the needle tip head-on when you hold the needle pointing to the right (clockwise). Spin the bowl at a steady, moderate speed—fast enough to push the beads up the outer wall, but not so fast that they fly out.
Hold the curved needle lightly between your thumb and forefinger, keeping your hand and wrist completely relaxed. Gently lower the curved tip of the needle into the spinning beads. The needle should enter the bowl near the outer edge, pointing directly into the oncoming flow of beads at a shallow angle of about 15 to 30 degrees relative to the surface of the bead pile. Do not push, stab, or force the needle into the beads. Instead, let the needle skim the surface. When held at the correct angle, the kinetic energy of the moving beads will cause them to rapidly “jump” onto the needle tip and slide up the shaft.
Step 4: Slide and Repeat
As you maintain a steady spin with your non-dominant hand, watch the shaft of the needle fill with beads. Once the needle is about half to three-quarters full, gently lift the needle tip out of the spinning bead pile.
Using your fingers, slide the gathered beads off the needle shaft, over the needle eye, and down onto the working thread. Be careful not to pull too hard, as a sharp tug can snap thin needles or break the thread. Once the needle is clear, lower the tip back into the spinning vortex and repeat the process. With practice, you can keep the bowl spinning continuously with occasional gentle nudges from your non-dominant hand while your dominant hand continuously skims and clears the needle.
Common Mistakes and How to Fix Them
It is normal to drop beads or struggle to catch them during your first few attempts. Recognizing the physical causes of these issues allows you to adjust your technique quickly.
Problem: Beads won’t catch on the needle.
- Fix: This is usually caused by an incorrect needle angle, insufficient spinning speed, or a size mismatch. First, verify that your needle is thin enough to pass through your beads by manually threading one. Next, check your spinning speed; if the bowl is turning too slowly, the beads will not pack tightly enough to slide up the needle. Finally, adjust the angle of your needle. If it is pointing too far downward, it will plow into the beads and stall the spin. If it is pointing too far upward, the beads will simply bounce off the tip. Aim for a shallow, skimming angle where the tip is submerged just a few millimetres below the surface of the moving beads.
Problem: Thread tangles or knots frequently.
- Fix: High-speed spinning can generate static electricity, causing the thread to twist and knot. Always use a thread conditioner like beeswax to coat and smooth the fibers before you begin. Additionally, ensure your thread tail is not too long; a tail that drapes into the bowl can easily wrap around the central spindle, instantly snapping your thread or pulling your project into the bowl. Keep your working thread held back and away from the spinning center.
Problem: Beads fly out of the bowl.
- Fix: If beads are escaping the spinner, you are either spinning the bowl too fast or the bowl is overfilled. Empty some of the beads until the bowl is only one-third full, and practice spinning at a slower, more controlled pace. The goal is a controlled centrifugal climb, not a high-velocity spray.
Tips for Getting the Best Results
To make your bead spinning sessions as efficient and comfortable as possible, implement these professional practices.
- Work Over a Dedicated Surface: Always place your bead spinner on a large, high-friction bead mat or a soft cotton towel. If beads spill or fly out of the bowl, the soft fabric will stop them from bouncing and rolling off your desk, making cleanup simple.
- Invest in Quality Needles: Cheap, rigid needles bend permanently or snap easily under the pressure of the spinning beads. High-quality, flexible carbon steel curved needles can bend slightly to accommodate the contours of the bowl without losing their shape.
- Maintain the Spindle: A smooth spin is essential for maintaining a consistent vortex. Regularly wipe down the central spindle and the inside shaft of the bowl with a dry microfiber cloth to remove dust, wood shavings, or stray thread fibers. If your manual wooden spinner begins to squeak or drag, apply a single drop of sewing machine oil or mineral oil to the metal shaft to restore its spin.
- Practice Ergonomics: Bead spinning involves repetitive wrist and hand movements. Keep your shoulders relaxed, support your elbows on your worktable, and take regular breaks every 20 to 30 minutes to stretch your hands and wrists to prevent fatigue.
Frequently Asked Questions (FAQ)
These common questions help clarify the limits and maintenance of your bead spinning equipment.
Can I use a bead spinner for large or irregularly shaped beads?
Bead spinners are designed primarily for small, highly uniform beads, such as size 11/0 or 8/0 seed beads. Large, heavy, or highly irregular beads—such as bugle beads, gemstone chips, or large pony beads—do not behave predictably under centrifugal force. Instead of forming a smooth, aligned vortex, they tumble erratically, which can bend your needle, damage the spinner bowl, or cause the beads to fly out of the spinner entirely. For irregular beads, traditional hand-threading remains the safest and most efficient method.
Do I need an electric bead spinner?
For beginners, a manual bead spinner is highly recommended. Manual spinners are affordable, highly portable, and give you immediate tactile control over the spinning speed, allowing you to feel how the beads interact with your needle. Electric bead spinners are excellent for high-volume production work or commercial jewelry making, but they require a power source, cost more (typically ranging from S$40 to S$80 on online marketplaces, compared to S$15 to S$30 for manual versions), and have a steeper learning curve because you cannot instantly adjust the speed with your fingers.
How do I clean and maintain my bead spinner?
To keep your spinner operating smoothly, wipe the bowl and spindle with a dry or slightly damp microfiber cloth after each use to remove static dust and skin oils. Never use harsh chemical solvents or submerge a wooden spinner in water, as moisture can warp the wood and ruin the alignment of the spindle. Store your spinner in a dry, dust-free environment, and check that the spinning mechanism is completely clear of tiny stray beads or thread fibers before putting it away.
Community discussion
Share your experience or ask a question. Comments are reviewed before publication.