
Starting embroidery is an exciting creative outlet, but struggling with threading needles can quickly stall your progress. The secret to threading needles easily lies in understanding how thread fibers behave and preparing the tip of your embroidery floss correctly. By matching your materials and using simple physical techniques, you can slide even multi-stranded floss through a needle eye in seconds. This guide covers the essential preparation steps, five practical threading methods, and key troubleshooting strategies to keep your stitching sessions smooth and frustration-free.
What You Need to Prepare
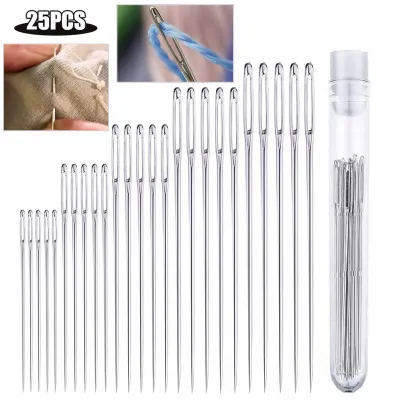
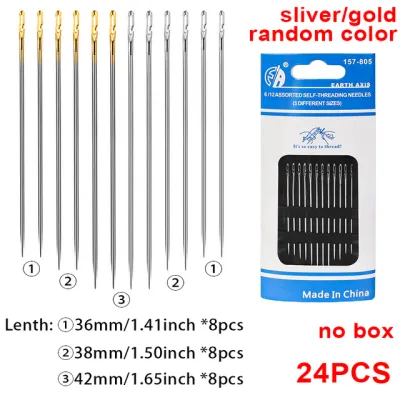
Before attempting to thread your needle, gathering the correct tools and understanding how they interact is crucial. Embroidery needles, often called crewel needles, feature long, narrow eyes designed to accommodate multiple strands of thread. The size of the needle eye must correspond directly to the thickness of your thread. For instance, standard stranded cotton embroidery floss consists of six individual strands that can be separated or used together, requiring a flexible approach to needle selection. In contrast, pearl cotton is a non-divisible, twisted thread that is significantly thicker and demands a much larger needle eye.
To set yourself up for success, you will need a few basic tools: a pack of high-quality embroidery needles in various sizes (typically sizes 5 to 10 for beginners), your chosen embroidery floss, and a pair of exceptionally sharp fabric scissors or embroidery snips. Standard household utility scissors are often too dull, crushing the thread fibers rather than cutting them cleanly, which leads to immediate fraying. Additionally, you may want to keep a few optional aids on hand to assist with stubborn threads. A simple wire needle threader, a small block of natural beeswax, or a tiny scrap of stiff paper (such as an old business card or a thread organizer tag) can make a world of difference when working with complex fibers or smaller needle eyes.
Products mentioned in this guide
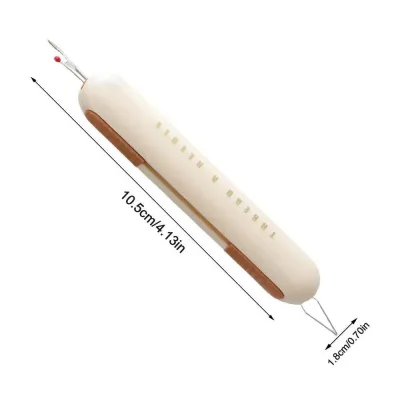
Prices are valid at publication and may change. Please refer to the product page for the latest price.
5 Practical Methods to Thread Your Embroidery Needle
Successfully threading needles depends almost entirely on creating a stiff, flat, and highly visible thread tip that can pass through the needle eye without bending. When thread is limp, frayed, or split, pushing it through a tiny metal opening becomes nearly impossible. Instead of forcing a soft thread through a fixed eye, the most effective techniques involve manipulating either the thread’s physical properties or your hand movements to make the path as direct as possible.

While many specialized gadgets exist to assist with this task, learning a few manual techniques first builds valuable hand-eye coordination and ensures you can thread a needle anywhere without relying on extra tools. Below are five practical, tried-and-tested methods. Beginners are highly encouraged to practice the tool-free hand techniques first, as they are often the fastest once mastered, before moving on to mechanical aids.
Method 1: The Pinch and Snip Technique (No Tools Required)
The pinch and snip technique is the most fundamental, tool-free method used by experienced embroiderers worldwide. It relies on minimizing the amount of loose, unsupported thread that can bend when approaching the needle eye. By keeping the thread extremely short and firmly supported, you eliminate the floppiness that usually causes threading failures.
To begin, pinch the embroidery thread tightly between your thumb and index finger. Slowly release your grip just enough to reveal only a tiny, microscopic tip of the thread—no more than one or two millimeters.
Next, take your sharp embroidery scissors and snip this exposed tip at a clean, 45-degree angle. Cutting at an angle rather than straight across prevents the individual cotton plies from splaying out and creates a sharp, pointed edge that naturally guides itself into the needle eye.
Finally, do not try to guide the thread into the needle. Instead, keep pinching the thread firmly so it cannot bend, hold the needle in your other hand, and push the needle eye down onto the exposed thread tip. Because the thread is supported by your fingertips, it has nowhere to go but straight through the eye.
Method 2: Using a Wire Needle Threader
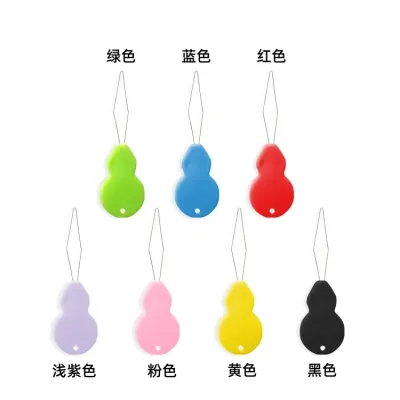
If you have unsteady hands, visual strain, or are working with exceptionally fine needles, a classic wire needle threader is an invaluable, low-cost accessory. This tool features a flexible, diamond-shaped steel wire attached to a small metal or plastic handle, designed to easily slip through small openings and pull thread back through.
First, hold the handle of the wire threader and insert the thin wire loop directly through the eye of your embroidery needle. The wide loop of the threader is much easier to target than a soft thread end.
Once the wire loop is fully through the eye, pass the end of your embroidery thread through the large opening of the wire loop. You only need to slide a small tail of thread through, as the wire loop provides a massive target compared to the needle eye itself.
Gently pull the wire threader back out of the needle eye. As the wire retracts, it will collapse and carry the embroidery thread smoothly through the metal eye with it.
Be aware that wire threaders are delicate instruments. They can easily break or bend if you attempt to force a thick thread through a needle eye that is physically too small to accommodate it; always verify that your needle size is compatible with your thread thickness before pulling.
Method 3: The Palm Friction Trick
The palm friction trick is a traditional, highly effective hack that uses the natural texture and friction of your skin to flatten and align loose thread fibers. This method is particularly useful when you are working with multiple strands of floss that refuse to stay grouped together.
To execute this method, lay the cut end of your embroidery thread completely flat across the palm of your hand or across the soft pad of your thumb. Ensure the thread is straight and unsupported by any other tools.
Take your embroidery needle and press the eye flat against the thread, aligning the long axis of the eye with the direction of the thread. Press down with moderate pressure so the thread is sandwiched between the needle and your skin.
Rub the needle eye briskly back and forth over the thread in a short, rapid motion. The friction against your skin will naturally roll, flatten, and stiffen the cotton fibers, causing them to loop upward directly through the needle eye. Once a small loop of thread pops through the eye, simply grab it with your fingers and pull the tail through.
Method 4: Stiffening the Thread Tip
When working with stubborn, high-ply embroidery floss, the individual cotton strands tend to separate and bloom at the tip, making threading highly frustrating. Temporarily stiffening the tip binds these loose fibers into a single, solid unit that behaves like a needle itself.
One common approach is to lightly moisten the tip of the thread. While many stitchers quickly run the thread through their lips, consider personal hygiene and the cleanliness of your materials, especially if you plan to gift or sell your finished embroidery. A clean alternative is to keep a damp sponge or a drop of water nearby to lightly wet your fingertips before pinching the thread.
Alternatively, you can rub the cut end of the thread against a small bar of natural beeswax or a tiny dab of clear lip balm. Beeswax coats the cotton fibers, binding them together tightly and adding a physical stiffness that makes threading incredibly simple.
However, you must avoid over-wetting or applying too much wax. Excess moisture or heavy wax build-up can cause the cotton fibers to swell or stick, which will jam the needle eye and make it even harder to pull the thread through.
Method 5: The Paper Fold Guide
The paper fold guide is a highly precise, clever technique that is perfect for threading multiple strands of floss or working with very fine needle eyes where traditional methods fail. It uses a temporary, stiff envelope to carry the limp thread through the needle eye.
Start by cutting a very small strip of stiff, thin paper, such as a piece of a business card, a heavy envelope, or a paper thread organizer tag. The strip should be about two centimeters long and narrow enough to fit through your needle eye. Fold this paper strip precisely in half.
Place the end of your embroidery thread inside the fold of the paper, pinching it tightly. The thread should be completely hidden inside the fold, with only the creased, stiff edge of the paper exposed at the top.
Push the stiff, creased edge of the paper directly through the needle eye. Because the paper is rigid, it will slide through the eye effortlessly, carrying the enclosed thread along with it. Once the paper is halfway through, grasp the paper and the thread tail, pull them both through, and slide the paper guide off the thread.
Troubleshooting Common Threading Frustrations
Even with the best techniques, you will occasionally encounter frustrations while threading needles. Understanding how to diagnose and correct these issues quickly prevents unnecessary stress and keeps your embroidery project moving forward.
One of the most common problems is when the thread frays immediately upon touching the needle. If your thread end looks like a tiny broom, it will never pass through the eye. The solution is to re-cut the thread at a sharp angle using dedicated, ultra-sharp embroidery scissors. Avoid chewing the end of the thread or pulling the individual fibers apart aggressively, as saliva and mechanical pulling weaken the twist of the cotton and encourage immediate splitting.
If your thread bends and constantly refuses to enter the eye, the needle eye is likely too small for the thickness or the number of strands you are using. To resolve this, separate your embroidery floss and try using fewer strands, or switch to a larger crewel needle with a more generous eye. It is always better to use a needle that matches your thread than to force a mismatch.
If you are struggling simply because you cannot see the needle eye clearly, remember that visual contrast is key. Avoid squinting in low light; instead, hold your needle against a bright, solid, light-colored background, or wear a pair of magnifying craft glasses. If manual visibility remains a challenge, transition permanently to a dedicated wire needle threader to save your eyesight and your patience.
Tips for Maintaining Your Needles and Threads
Proper maintenance of your tools is the ultimate way to ensure hassle-free threading in the long run. Over time, needles and threads degrade, and physical wear can make threading significantly more difficult than it needs to be.
Needle care is especially important in humid climates like Singapore’s. High ambient humidity can cause steel needles to develop microscopic rust or pitting, which creates a rough texture that catches and shreds delicate embroidery floss. After every stitching session, wipe your needles with a clean, soft microfiber cloth to remove skin oils and moisture. Store your needles in a dry pincushion—ideally one filled with emery sand, which helps keep the metal clean and polished—or in a dedicated needle case with anti-rust felt.
Thread care is equally vital for maintaining smooth fibers. Keep your embroidery floss organized, wound on bobbins, and untangled in a storage box. Store your threads away from direct sunlight and high heat to prevent the cotton fibers from fading, drying out, and becoming brittle.
Finally, know when it is time to retire your tools. Discard any needles that feel rough, are slightly bent, or have visible burrs around the eye. These physical defects will continuously catch on your thread, causing fraying and making threading an uphill battle regardless of the method you use.
Frequently Asked Questions (FAQ)
Why does my embroidery thread keep fraying when I try to thread the needle?
Fraying is typically caused by using dull scissors that crush the cotton fibers instead of slicing them, or by pulling the embroidery floss strands apart too aggressively. It can also occur if the needle eye has microscopic burrs or rough edges from wear. To prevent this, always use sharp embroidery snips, cut at a 45-degree angle, and inspect your needle’s eye under bright light to ensure it is smooth.
Should I use a larger needle if I am using thick embroidery floss?
Yes, your needle size must always match both the thickness of your thread and the weave of your fabric. Using a needle with an eye that is too small will strip, wear down, and fray your thread as you pull it through the fabric, while a needle that is too large will stretch the fabric fibers and leave unsightly permanent holes. Always test your needle and thread combination on a scrap piece of your project fabric first to verify a smooth, clean glide.
Community discussion
Share your experience or ask a question. Comments are reviewed before publication.