
Threading an embroidery needle is the foundational skill that sets the tone for your entire stitching project. While it can initially feel challenging or tedious, mastering a few physical techniques and understanding your materials will transform this step into a quick, second-nature habit. By preparing your thread correctly and using the natural mechanics of your hands, you can avoid the common pitfalls of split fibers, bent needles, and wasted time.
Whether you are working with delicate silk or thick stranded cotton, the key to success lies in matching your tools to your materials. Taking a systematic approach ensures that your thread glides through the needle eye smoothly, preserving the integrity of the fibers and keeping your creative momentum flowing.
Preparing Your Thread and Needle
Before attempting to thread your needle, you must ensure that your needle size and thread thickness are fully compatible. Embroidery needles, often called crewel needles, feature a long, medium-width eye designed to accommodate multiple strands of embroidery floss. If the needle eye is too small for the number of strands you plan to use, forcing the thread through will shred the fibers and make stitching incredibly difficult. Conversely, a needle eye that is too large will create unnecessary holes in your fabric.
Products mentioned in this guide
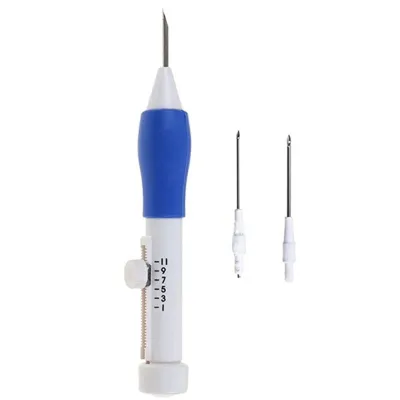
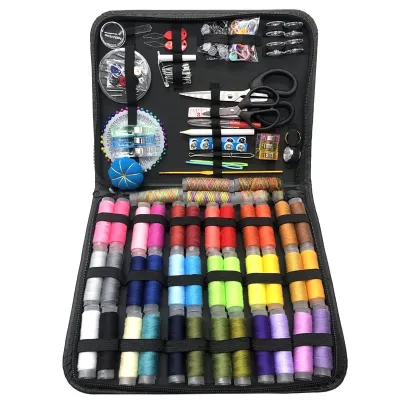
Prices are valid at publication and may change. Please refer to the product page for the latest price.
Most embroidery projects utilize stranded cotton floss, which consists of six individual strands twisted together. Beginners often make the mistake of trying to thread all six strands at once for delicate work, or pulling them apart haphazardly, which leads to severe tangling. To prepare your thread, cut a manageable length and gently separate the exact number of strands required by your pattern. Pulling each strand out individually, rather than pulling them apart in groups, keeps the fibers straight and manageable.
The way you cut your thread plays a critical role in how easily it passes through the needle eye. Always use a pair of dedicated, sharp embroidery scissors rather than dull household scissors. A dull blade crushes the thread fibers, creating a flat, frayed end that resists entering the needle eye. Hold the thread taut and cut it at a clean 45-degree angle. This angled cut creates a sharp, pointed tip that guides the thread smoothly through the opening.
Managing the overall length of your thread is equally important for a frustration-free embroidery experience. A thread that is too long is prone to knotting, tangling, and wearing down as it repeatedly passes through the fabric. A standard recommendation is to cut a length of thread roughly equal to the distance from your fingertips to your elbow, which is approximately 45 to 50 centimeters. This length provides ample working material without compromising the structural integrity of the cotton strands.
Step-by-Step Instructions to Thread the Needle
To thread a needle manually, you must control the flexibility of the thread. Start by pinching the thread between your dominant thumb and index finger. Slide your fingers down until only a tiny, microscopic tip of the thread is visible between your fingertips. By minimizing the exposed length of the thread, you prevent it from bending, folding, or collapsing when it makes contact with the metal eye of the needle.

Next, optimize your physical environment to ensure maximum visibility. Position yourself under a bright, direct light source, such as a dedicated craft lamp or near a bright window. It is highly beneficial to hold the needle against a contrasting background. If you are threading dark thread, hold a sheet of white paper behind the needle; if you are threading light or white thread, use a dark fabric or background to make the boundaries of the needle eye stand out clearly.
Instead of trying to push the flexible thread end into the needle eye, reverse your physical approach. Hold your thread hand completely still, keeping the tiny pinched tip rigid. Bring the needle toward the thread in your other hand, aligning the eye vertically with the thread tip. Gently push the eye of the needle down onto the stationary thread. This “needle-to-thread” technique utilizes the rigid structure of the needle to capture the thread, rather than relying on the limp thread to find the opening.
Once you feel the thread tip enter the needle eye, maintain your grip on the needle and slowly open your pinching fingers. Use your thumb and index finger to grasp the short end of the thread that has emerged through the other side of the eye. Pull the thread through smoothly and gently, keeping it parallel to the needle. Avoid yanking or pulling at a sharp angle, as the sharp metal edges of the needle eye can easily shave or fray the cotton fibers.
Alternative Methods and Helpful Tools
If manual threading remains difficult due to visual fatigue or fine motor challenges, several highly effective tools can simplify the process. The most common tool is the classic wire loop needle threader. To use it, gently insert the flexible wire loop through the eye of your embroidery needle until it protrudes fully. Pass your embroidery thread through the large wire loop, then slowly pull the threader back out of the needle eye. The wire loop collapses, effortlessly drawing the thread through the eye with it.
For crafters who thread needles frequently or work on large-scale projects, desktop or automatic needle threaders offer a mechanical solution. These devices feature a small slot where you place your needle eye-down. After laying the thread across a designated groove, you press a lever or button that mechanically pushes a tiny hook through the needle eye, catching the thread and pulling it through. When using these devices, always verify that your needle size is compatible with the machine’s internal mechanism to avoid damaging the delicate hook.
Another highly reliable manual technique is the fold-over method, which works exceptionally well for thicker threads, wool, or larger needle eyes. Loop the end of your thread tightly over the shaft of your needle, pulling it down so it folds sharply in half. Pinch this folded loop as tightly as possible between your thumb and index finger, then slide the needle out. The compressed, folded crease creates a stiff, flat edge that you can easily push directly through the needle eye.
Regardless of the method you choose, it is vital to recognize when to stop and adjust your approach. If a wire threader resists passing through a needle eye, do not force it. Forcing a threader can permanently bend the wire, break the tool, or damage the internal plating of the needle eye. If you encounter resistance, it is a clear indicator that either your thread is too thick, your needle eye is too small, or the wire loop itself is too large for that specific needle size.
Troubleshooting Common Threading Issues
When threading becomes a struggle, the issue is almost always a physical barrier that can be easily diagnosed and resolved. If your thread end keeps splitting or fraying before it even reaches the needle, your scissors are likely dull. Re-cut the thread end with a pair of high-quality embroidery scissors. If the fibers continue to separate, you can lightly run the tip of the thread over a block of beeswax or a specialized thread conditioner to temporarily bind and stiffen the fibers.
Sometimes, the obstacle lies within the needle itself rather than the thread. Inexpensive or heavily used needles can suffer from manufacturing defects, such as tiny metal burrs inside the eye, or internal rust caused by exposure to humidity. These rough surfaces act like tiny saws, shredding your thread as you try to pull it through. Inspect the eye of your needle under a magnifying glass; if you notice any rough edges, discoloration, or structural deformities, discard the needle and replace it with a fresh one.
If you find yourself repeatedly failing to thread a needle despite using proper technique, the thread may simply be too thick for the chosen needle size. For example, trying to fit four or more strands of stranded cotton through a size 10 crewel needle is physically impractical. Refer to a standard needle size chart and switch to a larger needle (such as a size 3 or 5) or reduce the number of strands you are using for your embroidery design.
Finally, do not underestimate the impact of physical fatigue and environmental factors on your fine motor skills. Threading a needle requires intense visual focus and steady hand-eye coordination. If you have been stitching for hours, your eyes may struggle to focus, and your hands may become unsteady. Take a short break, rest your eyes, step into a well-lit room, or utilize a magnifying lamp to reduce strain and make the process effortless.
Next Steps: Securing Your Thread for Embroidery
Once you have successfully threaded your needle, you must prepare the thread ends to ensure even tension and secure stitches. If you are working with multiple separated strands of embroidery floss, take a moment to align the cut ends perfectly. If the strands are uneven, they will pull through the fabric at different rates, resulting in loose loops and an uneven texture on the surface of your embroidery project.
For standard embroidery projects where the back of the fabric will not be visible, a simple overhand knot at the long end of the thread is the quickest way to secure your starting point. To tie a clean knot, wrap the end of the thread around your index finger, roll it off with your thumb to create a coil, and pull it tight. This creates a secure anchor that prevents the thread from pulling through the fabric on your first stitch.
If you prefer a clean, professional finish on both the front and back of your work, you can explore knotless starting methods. The loop method is highly popular when stitching with an even number of strands; fold a single long strand in half, thread the cut ends through the needle, and catch the loop end with your first stitch on the back of the fabric. Alternatively, you can leave a short tail on the back of your fabric and weave it into your first few stitches to secure it without a bulky knot.
Before making your very first stitch on your fabric, perform a quick tension and smoothness check. Hold the needle and gently slide it along the threaded section to ensure it moves freely without catching. Ensure that the short tail of your thread is roughly one-third the length of your working thread; this prevents the needle from accidentally unthreading while you work, allowing you to focus entirely on creating beautiful, precise stitches.
Frequently Asked Questions (FAQ)
Why does my thread keep fraying when I try to thread the needle?
Thread fraying is typically caused by using dull scissors that crush the cotton fibers instead of cutting them cleanly. It can also occur if you handle the thread end excessively, which untwists the strands and separates the individual fibers. To prevent fraying, always use sharp embroidery scissors to make a clean, angled cut, and minimize the amount of contact your fingers make with the very tip of the thread before threading.
Should I wet the thread to make it easier to thread?
While wetting the thread with saliva is a common traditional habit, it is generally not recommended for high-quality embroidery. Moisture can cause certain natural fibers, such as silk or delicate cotton, to swell, weaken, or discolor. Additionally, introducing moisture to the needle eye can promote rust over time, which will ruin both your needles and your fabric. Instead of wetting the thread, use a tiny amount of beeswax, a thread conditioner, or the fold-over method to stiffen the tip safely.
Community discussion
Share your experience or ask a question. Comments are reviewed before publication.