
Achieving a flawless, professional finish on your first scale model kit can feel challenging, especially when working with Tamiya acrylic paints. Unlike standard water-based craft paints, Tamiya’s unique formula is an alcohol-soluble acrylic. This means it requires specific preparation, thinning, and application techniques to prevent common beginner frustrations like visible brush strokes, clumping, or peeling paint.
In Singapore’s warm and humid climate, managing the behavior of these fast-drying paints is particularly important. High humidity can affect how solvents evaporate, making proper thinning and surface preparation essential steps rather than optional chores. By understanding how to control the paint’s viscosity and prepare your plastic surface, you can achieve a smooth, durable finish that looks like it was airbrushed, even when using a humble hand brush.
Essential Tools and Materials for Tamiya Acrylics
Before opening your first bottle of paint, gathering the correct supporting materials is vital for a smooth workflow. Tamiya acrylics are highly sensitive to the tools they are paired with, and using the wrong accessories can lead to immediate application issues.
Products mentioned in this guide
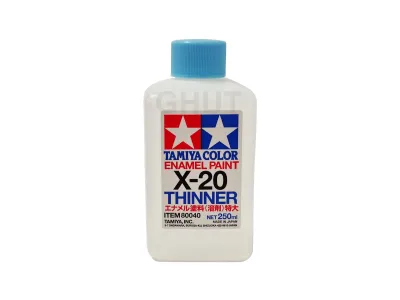
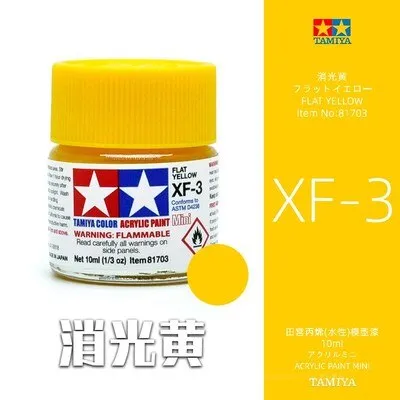
Prices are valid at publication and may change. Please refer to the product page for the latest price.
To set yourself up for success, ensure you have the following core supplies ready:
- Tamiya Acrylic Paints: These are available in small glass jars, typically designated as "X" for gloss finishes and "XF" for flat or matte finishes.
- Compatible Thinner: A dedicated thinner formulated specifically for alcohol-based acrylics is necessary to adjust the paint's viscosity.
- Quality Synthetic Brushes: Look for brushes with soft, durable synthetic bristles (such as nylon or Toray fiber) in various sizes, including a medium flat brush for wide areas and a fine detail brush.
- Non-Porous mixing Palette: A ceramic paint well, a plastic mixing tray, or a metal palette works best. Avoid paper plates or cardboard, which absorb the paint's liquid content and dry it out prematurely.
- Stirring Sticks: Metal stirrers or plastic rods are ideal for thoroughly blending the settled pigment at the bottom of the paint jar.
- Plastic-Compatible Primer: A high-quality primer designed for polystyrene plastic is essential to give the paint a surface to grip.
When purchasing your primer and thinner, always check the product labels to ensure they are explicitly compatible with acrylic formulations. Using a harsh lacquer-based primer or an incompatible enamel thinner can chemically react with your acrylic paint, causing it to curdle, clump, or fail to adhere to the model.
Investing in a few high-quality synthetic brushes is far better than relying on cheap, natural-hair brushes. Natural hair brushes are often too soft and absorb excessive moisture, which can cause the bristles to clump together when exposed to alcohol-based acrylics. Synthetic bristles maintain their spring, hold their shape under the weight of the paint, and are much easier to clean after a painting session.
How to Thin Tamiya Acrylic Paint Correctly
Thinning your paint is the single most important step in model painting. Straight out of the jar, Tamiya acrylic paint is too thick for direct brush application; applying it unthinned will result in heavy, unsightly brush textures and a loss of fine molded details on your model kit.
Choosing the Right Thinner
Because Tamiya acrylics are formulated with an alcohol base, they do not mix well with simple tap water or solvents meant for other paint types. To maintain the paint’s chemical integrity, you must use a compatible thinner that allows the acrylic binder to remain stable while reducing the paint’s thickness.
The most reliable option is the manufacturer’s proprietary acrylic thinner, often labeled as Tamiya X-20A. This thinner contains a precise blend of alcohols and flow-improving agents designed to maximize paint flow and leveling. Alternatively, high-percentage isopropyl alcohol (91% or 99% IPA) can be used as a highly effective, cost-efficient substitute.
Never use harsh solvents meant for enamel or lacquer paints, such as mineral spirits or hardware-store paint thinners, for basic brush painting on bare plastic. These strong chemicals can easily curdle the acrylic binder, turning your paint into a gummy mess, and can even melt or distort the delicate polystyrene plastic of your model kit. Always verify the thinner’s compatibility on the paint bottle label or test a small mixture on your palette before applying it to your model.
Mixing Ratios and the Consistency Test
There is no single, rigid numerical ratio that works for every bottle of Tamiya paint, as pigment density varies between colors and older jars may have partially dried. Instead, you should aim for a visual and physical consistency, adjusting your mix dynamically as you work.
A safe baseline starting point for brush painting is a ratio of roughly two to three parts paint to one part thinner. To mix, use a clean stirring stick to transfer paint from the jar to your non-porous palette, then use a pipette or dropper to add the thinner. Blend the two liquids thoroughly on the palette until the mixture is uniform.
To verify if your paint is thinned correctly, perform the “skim milk” consistency test. Drag a small amount of the mixed paint up the side of your mixing well or palette. The paint should coat the surface smoothly and slide back down slowly, leaving a translucent, even film. If the paint runs down instantly like water and pools at the bottom without leaving a color film, it is over-thinned. If it clings heavily, leaves thick ridges, or remains completely opaque, it is still too thick.
Over-thinning is a common beginner mistake that breaks down the acrylic binder. When the binder is compromised, the pigment can no longer hold together on the plastic surface, leading to pooling, running into the model’s recessed panel lines, and a patchy, weak finish that easily rubs off.
Step-by-Step Guide to Brush Painting Your Model
Once your paint is thinned to the perfect consistency, the physical application process requires patience, systematic steps, and a gentle touch to achieve a smooth finish.
Surface Preparation and Priming
Before any paint touches your model, the plastic surface must be completely clean. During the manufacturing process, a oily chemical called a mold release agent is sprayed onto the steel molds to help the plastic parts pop out easily. If left on the plastic, this invisible residue will repel your paint, leading to instant pooling, bead formation, and eventual peeling.
To prepare the surface, wash all model parts while they are still on the plastic frames (sprues) in a bowl of warm, soapy water using a mild dishwashing liquid. Gently scrub the surfaces with a soft-bristled toothbrush to remove manufacturing oils and any oils left behind by your fingers. Rinse the parts thoroughly under clean running water, and let them air dry completely on a clean, lint-free towel.
After washing, applying a plastic-compatible primer is essential. Polystyrene plastic is naturally smooth and non-porous, making it difficult for water- or alcohol-based acrylics to grip. A primer chemically bonds to the plastic and leaves behind a micro-textured, matte surface that provides excellent mechanical adhesion for your color coats.
Apply a light, even coat of primer—either from a spray can or by hand—and allow it to cure fully. In Singapore’s humid climate, curing can take longer than in dry environments; it is highly recommended to let the primer sit for a full 24 hours to ensure it has completely hardened before you begin painting the color layers.
Applying Thin, Even Coats
The golden rule of model painting is to apply multiple thin coats rather than trying to cover the model in one thick layer. A single thick coat will clog fine details, leave prominent brush marks, and take an incredibly long time to dry thoroughly.
To apply the paint correctly, dip only the lower half of your brush bristles into the thinned paint mixture. Gently wipe the edge of the brush against your palette to remove any excess paint; the brush should be loaded but not dripping. Apply the paint to the model in smooth, consistent, overlapping strokes, moving in one direction.
Do not overwork the paint. Because Tamiya acrylics dry very quickly, the paint will begin to skin over within seconds of application. If you drag your brush back over an area you painted just a minute ago, you will tear this semi-dry skin, resulting in permanent lumps and textures. If you miss a spot, leave it alone and catch it on the next coat.
Allow each coat to dry completely before applying the next layer. This typically takes 20 to 30 minutes, though you should verify that the surface is completely matte and dry to the touch. When applying the second coat, brush perpendicular to the direction of your first coat (a cross-hatching technique) to help level out any minor lines and ensure complete, solid coverage.
Troubleshooting Common Beginner Mistakes
Even with careful preparation, beginners often encounter minor setbacks. Understanding how to diagnose and correct these issues will keep your project on track.
Fixing Visible Brush Strokes and Clumping
Visible brush strokes and clumping usually happen when the paint dries too quickly on the brush, when the paint is applied too thickly, or when you overwork a semi-dry area.
If you notice your paint is drying too rapidly on your palette or brush, try thinning the mixture slightly more. You can also add a single drop of Tamiya Paint Retarder (Acrylic) to your mix. A retarder slows down the evaporation rate of the alcohol solvent, keeping the paint wet on the model for a few moments longer. This extra time allows the wet paint to level itself out naturally across the surface, eliminating brush marks before it cures.
If you have already applied a coat that dried with heavy brush textures or clumps, do not try to paint over it. Instead, let the paint cure completely for 24 hours. Gently sand the affected area using a high-grit sanding sponge (such as 1000-grit or 1500-grit) to smooth out the ridges, wipe away the plastic dust with a damp cloth, and apply a newly thinned, light coat of paint over the sanded area.
Preventing Paint Peeling and Chipping
Paint peeling or chipping off the model is almost always a symptom of poor adhesion, typically caused by skipping the washing step, omitting the primer, or handling the model excessively during the painting process.
The natural oils on your skin can easily transfer to the model, creating barrier patches that prevent the paint from sticking. To prevent this, handle your model parts by their edges, keep them attached to the plastic sprue as long as possible while painting, or mount individual parts onto temporary holders like alligator clips, wooden toothpicks, or dedicated painting handles.
Once your paint job is complete and has cured for 24 to 48 hours, protect your hard work by applying a clear acrylic topcoat. Topcoats are available in flat, satin, or gloss finishes. This clear layer seals the paint, protecting it from physical scratches, dust, and the oils on your fingers when you handle the finished model.
Cleaning Up and Maintaining Your Brushes
Taking proper care of your brushes at the end of a painting session ensures they maintain their shape, flexibility, and performance for your next model kit project.
Never let Tamiya acrylic paint dry on your brushes. Because the paint is alcohol-based, once the resin cures, it becomes highly water-resistant and incredibly difficult to remove without harsh chemicals that can destroy synthetic bristles. Keep a jar of clean water or isopropyl alcohol on your desk, and rinse your brush thoroughly every few minutes during your painting session, and immediately when you finish.
After rinsing out the bulk of the pigment, wash your brushes thoroughly using a mild brush soap or a dedicated acrylic brush cleaner. Gently work the soap into the bristles using the palm of your hand, paying close attention to the ferrule—the metal band that holds the bristles to the handle. Pigment trapped in the ferrule will dry, expand, and cause the bristles to splay out, ruining the brush’s fine point.
Once clean, rinse the brush in clear water and gently reshape the wet bristles into a sharp point or flat edge using your fingers. Lay the brushes flat on a clean, dry towel, or store them vertically with the bristles pointing upward. Never leave your brushes resting head-down in a cup of water, as this will permanently bend the bristles and dissolve the glue holding the brush head together.
Frequently Asked Questions (FAQ)
Can I use regular tap water to thin Tamiya acrylic paints?
No, using regular tap water to thin Tamiya acrylic paints is not recommended for model kit painting. While water can physically dilute the liquid paint, Tamiya’s formula relies on an alcohol-soluble acrylic binder. Tap water contains minerals, chlorine, and impurities that can disrupt this binder, causing the paint to curdle, separate, or dry with a chalky, uneven finish.
Furthermore, thinning with water significantly reduces the paint’s adhesion to plastic, leading to poor coverage, severe brush strokes, and paint that easily peels off during handling. For the smoothest and most durable results, always use a dedicated acrylic thinner like Tamiya X-20A or high-percentage isopropyl alcohol.
Community discussion
Share your experience or ask a question. Comments are reviewed before publication.