
To properly thin and apply Tamiya acrylic paints for your first model kit, you must understand their unique alcohol-soluble formulation. Unlike traditional water-based acrylics, Tamiya paints require an alcohol-based thinner—ideally Tamiya X-20A—mixed to a smooth, skim-milk consistency. For brush painting, this typically requires a 1:1 or 2:1 paint-to-thinner ratio. Applying this mixture in multiple thin, translucent layers over a washed and primed plastic surface ensures a smooth, durable finish free of unsightly brush strokes or peeling.
Essential Tools and Materials for Tamiya Acrylics
Before opening your first paint jar, gathering a dedicated suite of tools sets you up for success. While it is tempting to grab household items, specialized hobby tools prevent chemical incompatibility and physical damage to delicate plastic parts.
- Tamiya Acrylic Paints: These come in two main finishes: "X" codes for gloss finishes and "XF" codes for flat or matte finishes.
- Thinners: Keep a bottle of Tamiya X-20A Acrylic Thinner on hand. This proprietary formula is chemically balanced to break down the paint's thick pigments without weakening the acrylic binder.
- Brushes: Invest in high-quality synthetic or soft natural-hair brushes. Flat brushes are excellent for broad surfaces, while fine round brushes (sizes 0, 00, or 000) handle small details.
- Mixing Palette and Stirring Tools: Use a metal or plastic well palette and a metal paint stirrer. Avoid wooden toothpicks if possible, as loose wood fibers can shed into the paint.
- Preparation and Finishing Supplies: Gather mild dishwashing soap, a plastic-compatible primer (such as Tamiya Surface Primer), and a clear protective topcoat to seal your hard work.
Using dedicated modeling tools ensures that the paint behaves predictably. Generic solvents or low-grade brushes can shed bristles, melt plastic, or cause the paint to clump on the palette before you even touch the model.
Products mentioned in this guide
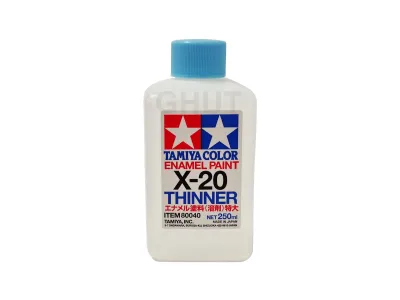
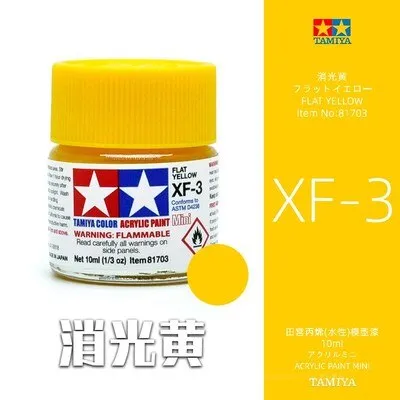
Prices are valid at publication and may change. Please refer to the product page for the latest price.
How to Properly Thin Tamiya Acrylic Paint
Choosing the Right Thinner
Tamiya acrylics occupy a unique middle ground in the hobby world: they are water-soluble but formulated with an alcohol-based medium. Because of this, using the correct thinner is paramount to achieving a smooth application. The manufacturer’s recommended thinner, Tamiya X-20A, contains a specific blend of alcohols and flow improvers designed to keep the paint stable, promote self-leveling, and maintain the integrity of the acrylic binder.

While isopropyl alcohol (IPA) is a common and affordable alternative, it evaporates incredibly quickly. In warm or humid climates, such as Singapore, this rapid evaporation can cause the paint to dry on your brush tip before it even touches the plastic, leading to clumping and textured finishes. If you must use IPA, opt for a high-purity version (91% or higher) and accept that the working window will be shorter.
Under no circumstances should you use harsh hardware-store solvents like lacquer thinner or enamel thinner for standard brush painting unless the product label explicitly states compatibility. These strong chemicals can dissolve the polystyrene plastic of your model kit, permanently warping fine details and ruining your project.
Finding the Correct Thinning Ratio
There is no single, rigid mathematical formula for thinning paint because variables like pigment density, atmospheric humidity, and color age all play a role. Gloss paints (X series) often require slightly different handling than flat paints (XF series) due to their binder structure. Instead of relying solely on numbers, you must train your eyes to recognize the correct physical behavior of the mixture.
The golden rule of model painting is to aim for the consistency of skim milk. When you stir the thinned paint in your palette, it should coat the sides of the well briefly and then run down smoothly, leaving a translucent film rather than a thick, opaque sludge. If the paint pools instantly like water, it is too thin; if it clings heavily to your stirring tool without flowing, it is too thick.
Always perform a test application before touching your model. Use a scrap piece of plastic, a plastic spoon, or a flat section of the model’s sprue (the plastic frame holding the parts). Brush a small stroke onto this test surface; if it flows smoothly, levels out as it dries, and does not obscure molded-in details like panel lines, your ratio is correct.
Step-by-Step Guide to Brush Painting Your Model
Surface Preparation and Priming
A flawless paint job begins long before paint meets plastic. During the manufacturing process, plastic model kits are coated with chemical mold release agents to help them slide out of the steel molds. Additionally, natural oils from your fingers transfer to the parts during assembly. These oils and chemicals create a microscopic barrier that prevents acrylic paint from adhering, leading to pooling and eventual peeling.
To fix this, wash your model parts in a bath of warm water mixed with a few drops of mild dishwashing soap. Use a soft-bristled toothbrush to gently scrub the recessed details, rinse the parts thoroughly with clean water, and let them air dry completely.
Once dry, apply a plastic-compatible primer. Primer acts as a transitional bonding agent, biting into the smooth plastic and leaving behind a micro-textured matte surface that gives the acrylic paint something to grip. Apply the primer in light, even layers according to the manufacturer’s instructions, and allow it to cure fully—typically 24 hours—before you begin painting.
Applying Thin, Even Coats
The secret to a professional, brush-stroke-free finish is patience. Beginners often try to cover the plastic in a single, thick coat to save time, which inevitably leads to visible brush marks, runs, and buried surface details. Instead, commit to the thin coats rule: multiple translucent layers will always yield a superior result compared to one thick layer.
To begin, dip your brush into the thinned paint, absorbing enough to load the bristles but not so much that it pools in the metal ferrule. Touch the brush to a paper towel briefly to wick away excess moisture. When you apply the brush to the plastic, let capillary action draw the paint onto the surface. Use light, fluid strokes, moving in a single direction across each section.
Avoid the temptation to go back over a semi-dry area to fix a spot. Tamiya acrylics dry quickly on the surface; disturbing a partially dried layer will tear the paint film, creating permanent lumps. Instead, maintain a wet edge by working systematically from one side of the part to the other. Let the first coat dry completely—refer to the product label for specific drying times—before applying the second coat. Rotate your stroke direction by 90 degrees on subsequent coats to help cross-weave the paint layers and eliminate any remaining brush marks.
Troubleshooting Common Beginner Mistakes
Fixing Visible Brush Strokes and Clumping
If you notice deep ridges or clumping as your paint dries, the paint is likely drying too quickly or was applied too thickly. In warm climates, the alcohol in Tamiya paint evaporates rapidly, giving the paint film very little time to level itself out.
To resolve this, add one or two drops of a specialized paint retarder (such as Tamiya Paint Retarder) to your paint-and-thinner mixture. A retarder slows down the drying process, allowing the wet paint to flow and self-level on the plastic surface before it cures. If you have already finished a coat and it has dried with rough textures, wait for it to cure completely, then use ultra-fine sandpaper (1500 to 2000 grit) wet-sanded gently over the flawed area. Wipe away the dust, re-thin your paint, and apply a fresh, thin layer.
Preventing Paint Peeling and Chipping
Few things are more frustrating than watching your finished paint job flake off during assembly. This issue almost always traces back to inadequate surface preparation, skipping the primer step, or handling the model too early.
There is a critical difference between paint being dry to the touch and fully cured. While Tamiya acrylics may feel dry within minutes, the underlying acrylic binder can take 24 to 48 hours to fully cure and chemically bond to the primer. Handling the model, applying masking tape, or forcing parts together before this curing process is complete will cause the paint to shear and peel.
To protect your finished work from friction, fingerprints, and minor scratches during final assembly, apply a clear acrylic topcoat. These sealants are available in gloss, satin, and matte finishes. Always check the manufacturer’s instructions for compatibility, and apply the topcoat in light, even passes to seal and preserve your paint job.
Cleaning Up and Maintaining Your Brushes
Your brushes are your most important assets, and proper maintenance keeps them performing like new. Because Tamiya acrylics are alcohol-based, they dry rapidly, and any paint left to dry inside the brush bristles—especially near the metal ferrule—will ruin the brush’s shape and flexibility.
During your painting session, rinse your brush frequently in a small container of water or dedicated brush cleaner. Never let the brush sit face-down in the water, as this bends and permanently deforms the bristles.
Once your session is complete, perform a deep clean. Wash the bristles under lukewarm tap water using a mild soap or a specialized artists’ brush conditioner. Gently work the soap into the base of the bristles with your fingers, rinsing until the water runs completely clear. Gently squeeze out excess water, reshape the damp bristles into a sharp point or flat edge, and store the brushes horizontally or vertically with the bristles pointing upward.
Frequently Asked Questions (FAQ)
Can I use tap water to thin Tamiya acrylic paints?
While you can technically use water to thin Tamiya acrylics in an emergency, tap water is not recommended. Tap water contains dissolved minerals, chlorine, and impurities that can react chemically with the paint binder, leading to spotting, chalky textures, or uneven drying. If you do not have access to Tamiya X-20A thinner, use distilled or demineralized water instead. Keep in mind that water-thinned Tamiya paint lacks the flow improvers found in proprietary thinners, meaning it will dry faster on your brush, flow less smoothly, and have weaker adhesion to the plastic.
How long should I wait between coats of Tamiya acrylics?
Drying times vary based on paint thickness, color pigment density, and environmental humidity. Always check the specific directions on your paint bottle for the manufacturer’s suggested drying window. As a general rule of thumb, wait at least 30 to 60 minutes for the paint to become dry to the touch before applying another thin coat. However, to ensure the underlying layers are stable enough to withstand the physical pull of subsequent brush strokes, waiting several hours or overnight is the safest approach.
Community discussion
Share your experience or ask a question. Comments are reviewed before publication.