
Knitting in the round opens up a world of seamless possibilities, from cozy socks and warm beanies to intricate toy designs. For many beginners, transitioning from flat knitting on straight needles to using a double pointed needle set can feel like trying to wrangle a small, pointy hedgehog. However, once you understand how to manage the needles, distribute your stitches, and maintain even tension, you will find that knitting with multiple needles is highly intuitive. This guide breaks down the process step-by-step, helping you master the physical coordination, cast on without twists, and complete your first seamless projects with confidence.
Essential Tools and Selecting Your First Double Pointed Needle Set
Before casting on, gathering the right materials will significantly reduce your learning curve. As a beginner, your choice of needle material, needle size, and yarn weight can mean the difference between a smooth, enjoyable session and a frustrating struggle with slipping stitches.
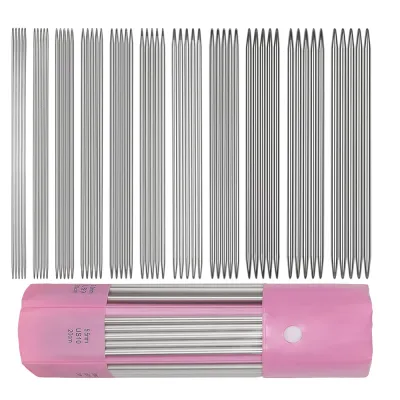
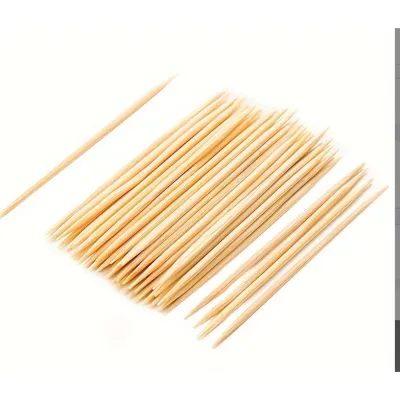
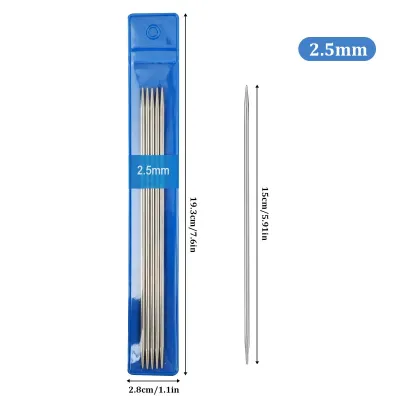
Choosing the Right Needle Material Double pointed needles are commonly made from wood, bamboo, metal, or plastic. For your first project, bamboo or wooden needles are highly recommended. These natural materials have a slightly textured surface that provides a gentle grip on your yarn, preventing your stitches from accidentally sliding off the ends when you set your work down. In contrast, polished metal needles are incredibly slick; while experienced knitters love them for their speed, beginners often find that stitches slip off metal tips far too easily.
Products mentioned in this guide
![[SG 🚚] 5PCS 20CM Stainless Steel Knitting Needles Set 2-5MM Double Pointed Straight Knitting Needles For Sweaters](https://img.lazcdn.com/g/p/9f35947412fa1799e0a57464e119cb4c.jpg_400x400q80.jpg_.webp)
Prices are valid at publication and may change. Please refer to the product page for the latest price.
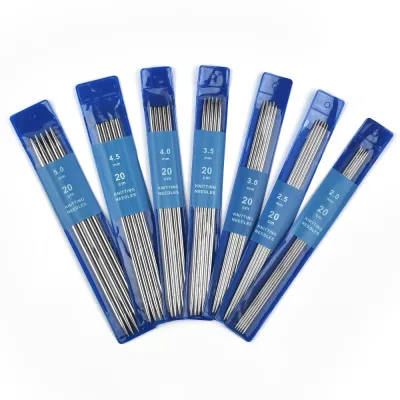
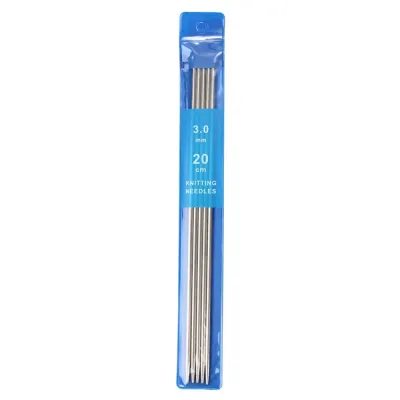
Selecting Needle Size and Length For learning, look for a set of double pointed needles in a medium size, such as 4.0mm to 5.0mm (US 6 to 8). These sizes are comfortable to hold and pair perfectly with common yarn weights. Double pointed needles also come in various lengths, typically ranging from 10cm (4 inches) to 20cm (8 inches). For your first practice project, a length of 15cm (6 inches) is ideal. They are short enough not to feel unwieldy in your hands, yet long enough to hold a reasonable number of stitches securely.
Yarn Selection for Beginners Pair your 4.0mm or 5.0mm needles with a medium-weight yarn, often labeled as worsted weight or 8-ply. Opt for a light, solid color like cream, soft yellow, or pastel blue. Dark colors or highly variegated yarns make it incredibly difficult to see individual stitches, which can lead to missed mistakes or incorrect stitch counts. While pure wool is highly elastic and forgiving for beginners, those practicing in warmer climates like Singapore may prefer a high-quality cotton-acrylic blend. This blend remains comfortable to handle in humid weather while still providing the structural definition needed to see your stitches clearly.
Essential Accessories To keep your project organized, you will need a few simple tools alongside your needles:
- Stitch Markers: A locking stitch marker or a simple plastic ring is essential for marking the beginning of your round.
- Tapestry Needle: A blunt-tipped needle is used to weave in loose yarn tails securely once your project is complete.
- Small Scissors: A compact pair of scissors is necessary for cutting your yarn when finishing your work.
- Needle Point Protectors: These rubber caps slip over the ends of your resting needles to prevent stitches from sliding off when you take a break.
How to Hold and Manage Multiple Needles
The sight of four or five needles pointing in every direction can be intimidating, but the secret to managing them is simple: you only ever knit with two needles at any given time. The remaining needles merely act as holders for your resting stitches, sitting quietly in the background.

Understanding the Needle Geometry When knitting with double pointed needles, your stitches are distributed across three or four needles to form a triangle or a square. A final, empty needle is held in your right hand to do the actual knitting. For example, if you are using a four-needle setup, three needles will hold your active stitches in a triangle shape, while the fourth needle is your working needle. As you knit across one needle of the triangle, it becomes empty, and the needle you just knit off of becomes your new working needle.
Positioning Your Hands To begin knitting, pick up the needle holding the stitches you are about to knit (the left-hand needle) and your empty working needle (the right-hand needle). Hold them exactly as you would ordinary straight needles. Let the other resting needles hang down naturally below your working area. They will form a loose frame underneath your hands. You do not need to grip or support all the needles at once; your hands should only focus on the two active needles performing the stitches.
Taming the Needle Ends To prevent the unused needle tips from poking your palms or catching on your clothing, pay attention to how they overlap. When arranging your triangle or square of needles, ensure that the needle tips always rest on top of one another in a consistent clockwise or counter-clockwise pattern. Keep your active working needles positioned above the resting needles. This keeps your workspace clear and prevents the resting tips from interfering with your working yarn.
Casting On and Joining in the Round Without Twisting
The transition from a straight line of cast-on stitches to a continuous circle is the most critical step in circular knitting. A single twisted stitch at this stage will create a permanent spiral in your fabric that cannot be fixed later, forcing you to unravel your work and start over.
Casting On and Distributing Stitches To make the process manageable, begin by casting all of your required stitches onto a single double pointed needle. Using a standard long-tail cast-on is highly recommended because it provides a sturdy, elastic edge that handles transitions well. Once all stitches are on this single needle, carefully slip a portion of them onto your second and third needles. For example, if your pattern calls for 36 stitches, slip 12 stitches onto the second needle and 12 onto the third needle, leaving the remaining 12 on the first needle.
Arranging the Needles and Checking for Twists Lay your three stitch-bearing needles flat on a clean table or working surface, arranging them into a neat triangle. The cast-on edge—which looks like a smooth, braided ridge—must face inward, toward the center of the triangle. Look closely at each needle to ensure the stitches are not wrapped around the needle shafts. If the braided edge wraps around to the outside of the triangle at any point, gently rotate the stitches back until the entire inner boundary of the triangle is uniform and untwisted.
Joining the Round Securely Once you have verified that there are no twists, carefully pick up the needles, keeping the triangle shape intact. The working yarn should be coming from the last stitch you cast on, which is on the needle in your right hand. The first stitch you cast on is on the needle in your left hand. To join the round, you will simply knit the first stitch on the left needle using the working yarn from the right needle.
To make the join extra secure and prevent a gap from forming, you can use the swap-stitch method:
- Slip the very first cast-on stitch from the left needle to the right needle.
- Lift the last cast-on stitch on the right needle up and over this slipped stitch, dropping it off the needle.
- Slip the stitch back to the left needle.
- Place your stitch marker on the right needle to mark the beginning of the round, then pull the working yarn and the tail firmly to tighten the join.
Knitting the First Rounds and Preventing Ladders
Once your round is joined, you can begin knitting. While the basic knit stitch remains identical to flat knitting, working on multiple needles introduces a unique challenge known as “ladders.”
The Flow of Circular Knitting To knit your first round, insert your empty working needle into the first stitch on your left-hand needle. Knit this stitch, pulling the yarn snug. Continue knitting across this first needle until it is completely empty. You now hold the newly knit stitches on your right hand’s needle, while the needle that was in your left hand is now empty. Rotate your work slightly, transfer this newly emptied needle to your right hand, and use it to knit across the next needle in the sequence. Repeat this cycle around your project.
Understanding and Identifying Ladders A “ladder” is a vertical strip of loose, stretched-out yarn that resembles the rungs of a ladder. It occurs at the gaps between your needles, where the yarn must travel a slightly longer distance from the last stitch of one needle to the first stitch of the next. If the tension drops during this transition, the stitches on either side of the gap will pull apart, leaving an unsightly line of loose threads down the length of your finished fabric.
Actionable Techniques to Prevent Ladders Fortunately, ladders are easy to prevent once you master a few simple tension adjustments:
- Snug the Second Stitch: When starting a new needle, knit the first stitch normally. When you go to knit the second stitch on that needle, pull your working yarn firmly. Tightening the second stitch anchors the tension much more effectively than pulling the first stitch, which often just pulls yarn from the previous needle and worsens the gap.
- Keep Needle Tips Close: When transitioning from one needle to the next, bring the tips of both needles as close together as possible. Avoid pulling them apart or letting them dangle loosely while you make the first few stitches.
- Shift Your Transition Points: If you find that ladders still form, you can periodically move your stitches around. Every few rounds, knit one or two stitches from the next needle onto your current needle before switching. This shifts the gap location constantly, preventing a continuous vertical line of loose tension from forming.
Checking Your Fabric Orientation As you knit, your fabric will grow downward from your needles. Make sure that your project is growing inside the circle of needles, with the smooth, right side of the fabric (stockinette stitch) facing outward toward you. If you find yourself knitting on the far side of the circle with the bumpy purl stitches facing outward, your work has turned inside out. Simply push the fabric through the center of the needles to pop it right-side out, and ensure you are always knitting on the side of the circle closest to your body.
Binding Off and Weaving in Ends
Finishing your project neatly is just as important as a clean start. Binding off in the round requires a slight adjustment to prevent a noticeable step or jog where the circle ends.
Executing the Bind-Off To bind off, knit the first two stitches of the round onto your right needle. Insert your left needle into the first stitch on your right needle, lift it up and over the second stitch, and drop it off. You now have one stitch remaining on your right needle. Knit the next stitch from your left needle so you have two stitches on your right needle again, and repeat the process. Continue this around your project, transitioning from needle to needle just as you did while knitting. When only one stitch remains, cut your working yarn, leaving a 15cm (6-inch) tail, and pull the tail straight through the final loop to secure it.
Bridging the Join Gap Because you are knitting in a spiral, your final bound-off stitch will sit slightly higher than your first bound-off stitch, creating a small “jog” or gap. To create a seamless finish, thread your yarn tail onto a blunt tapestry needle. Insert the tapestry needle under both loops of the very first bound-off stitch of the round, pulling the yarn through. Then, insert the needle back down into the center of the last bound-off stitch. Pull the yarn until the tension matches your surrounding stitches. This simple step mimics a knit stitch, perfectly bridging the gap and creating a flawless, continuous edge.
Weaving in Your Tails Turn your work inside out so the wrong side of the fabric is facing you. Use your tapestry needle to weave both the cast-on tail and the bind-off tail securely into the back of your stitches. The best method for circular knitting is to weave the yarn diagonally along the bumpy ridges of the purl stitches (often called duplicate stitching on the wrong side). Weave the tail in one direction for about 2 to 3 centimeters, then reverse direction for a few stitches to lock the yarn in place. Trim any excess yarn close to the fabric, taking care not to cut your stitches.
Frequently Asked Questions (FAQ)
Why do my stitches keep slipping off the ends?
This common issue usually happens when you set your work down or transition between needles. To prevent stitches from sliding off, try pushing your active stitches toward the middle of each resting needle before you begin working with the next one. Switching from slippery metal needles to bamboo or wooden needles provides natural friction that holds yarn in place. Additionally, you can use rubber needle point protectors on the ends of your resting needles, or simply wrap a small rubber band around the tips to act as a temporary stopper.
Can I use the magic loop method instead of double pointed needles?
Yes, the magic loop method—which uses a long circular needle to knit small circumferences—is a highly popular alternative. However, learning to use a double pointed needle set remains a foundational knitting skill. Many traditional patterns, particularly those with intricate shaping like glove fingers, toy limbs, or the crowns of hats, are much easier to navigate with double pointed needles. Mastering both techniques gives you the ultimate flexibility to choose the best tool for every project.
Community discussion
Share your experience or ask a question. Comments are reviewed before publication.