
Sewing a zip with a sewing machine is a fundamental skill that unlocks countless creative projects, from custom cushion covers to tailored garments. While the prospect of sewing your first zipper can feel intimidating, the process is highly manageable when broken down into clear, logical steps. By using the correct presser foot, preparing your fabric properly, and maintaining a slow, steady pace, you can achieve a professional finish on your very first try. The key lies in understanding how your sewing machine interacts with the zipper tape and learning how to position your hands and fabric to maintain total control.
Essential Tools and Materials for Sewing a Zipper
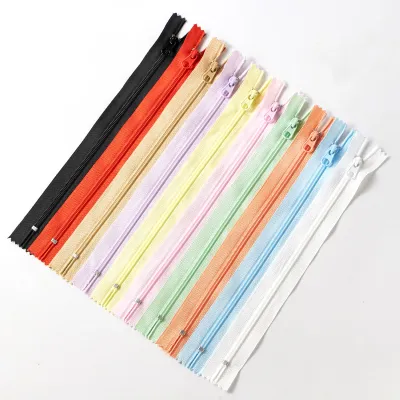
Before you sit down at your sewing machine, gathering the correct tools will save you time and prevent unnecessary frustration. You will need a standard sewing machine, a standard zipper foot, matching all-purpose polyester thread, sharp fabric scissors, pins or sewing clips, a fabric marking pen, and an iron. For your first project, a nylon coil zipper is highly recommended over metal or plastic molded alternatives. Nylon coil zippers are flexible, easy to cut to size, and forgiving if your machine needle accidentally brushes against the coils during setup.
Before starting, always check your sewing machine’s user manual and the manufacturer instructions for your fabric and zipper to ensure compatibility. If instructions conflict or the materials are unidentified, consult a sewing professional before proceeding to avoid damaging your equipment. Most domestic sewing machines use a low-shank system, but some modern or heavy-duty models require a high-shank or specific snap-on attachment. Ensuring your zipper foot matches your machine’s shank type is critical for safety and stitch quality.
Products mentioned in this guide
Prices are valid at publication and may change. Please refer to the product page for the latest price.
It is highly advisable to prepare a scrap piece of your project fabric to run a few test stitches before working on your actual project. This allows you to test the machine’s tension, stitch length, and needle size without risking your main fabric. For medium-weight woven fabrics, a universal size 80/12 needle is typically suitable, but heavier fabrics may require a 90/14 needle. Adjust your stitch length to a standard 2.5mm for construction, and practice sewing right next to a spare piece of zipper tape to get a feel for how the feed dogs pull the material.
Understanding Zipper Feet: How to Sew a Zip with the Right Attachment
To sew a zip successfully, you must use a presser foot designed to accommodate the physical bulk of the zipper teeth. A standard presser foot is wide and flat, designed to press down evenly on both sides of the needle. If you attempt to sew a zipper with a standard foot, the side of the foot will ride on top of the zipper teeth, tilting the foot, causing skipped stitches, and pushing your needle too far away from the zipper tape.

The standard zipper foot solves this problem with its narrow, notched design. It features attachment bars on both the left and right sides, allowing you to snap it onto your machine’s ankle on either side of the needle. This design allows the needle to stitch incredibly close to the zipper coils while the body of the foot rides safely alongside them. Depending on which side of the zipper tape you are sewing, you will adjust the foot to the left or right side of the needle to ensure the fabric and zipper tape are fed smoothly through the machine.
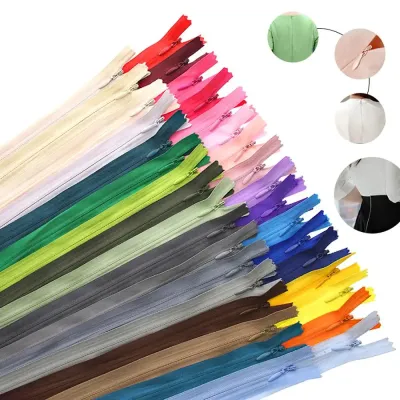
An invisible zipper foot, by contrast, is a highly specialized attachment used exclusively for installing invisible zippers. It features two deep grooves on its underside that actively unroll the coils of an invisible zipper as you sew, allowing the needle to stitch directly beneath the coil. While invisible zippers offer a seamless finish on formal wear, complete beginners should master standard zippers with a standard zipper foot first, as the physical mechanics of aligning and stitching standard zippers provide a stronger foundation in fabric control.
Before you lower the presser foot and press the foot pedal, always perform a manual safety check. Securely attach your chosen zipper foot, and then slowly turn the machine’s handwheel toward you by hand. Verify that the needle clears the opening of the zipper foot completely without hitting the metal. If your machine allows for adjustable needle positions, ensure the needle is set to the correct side to align with the foot’s opening. Skipping this manual check can result in a bent needle, damaged needle plate, or personal injury.
Step-by-Step Process: Sewing a Standard Zipper
Preparing the Fabric and Positioning the Zipper
Achieving a clean, flat zipper installation begins with thorough fabric preparation. Start by pressing your fabric seam allowance open using an iron. For a standard centered zipper, you will typically sew the seam closed first using a temporary basting stitch (a long stitch length of 4.0mm to 5.0mm) where the zipper will go, and a regular stitch length (2.5mm) for the rest of the seam. Pressing this basted seam flat and open creates a crisp, straight crease line that serves as your perfect guide for aligning the zipper tape.
Once your seam is pressed, place your fabric face down on your workspace. Lay your zipper face down directly on top of the pressed-open seam allowance, aligning the zipper teeth precisely with the center of the basted seam line. The top stops of the zipper should sit about 1.5 to 2 centimeters below the raw top edge of your fabric to allow room for waistbands or facings later. Take your time during this step to ensure the zipper tape is completely straight and centered along the seam.
Secure the zipper tape to the seam allowance using pins, sewing clips, or double-sided basting tape. If you are using pins, insert them perpendicular to the zipper teeth, catching only the zipper tape and the single layer of seam allowance beneath it—do not pin through to the front of the main fabric. For beginners, using a wash-away double-sided sewing tape is an excellent way to hold the zipper perfectly flat without the bulk of pins, preventing the fabric from shifting or stretching as you sew.
Finally, mark the bottom stop of the zipper clearly on your fabric. Use a water-soluble fabric pen or a pin placed horizontally to mark exactly where the metal or plastic stop at the bottom of the zipper sits. This mark serves as your visual cue to stop stitching, turn your fabric, and sew the bottom reinforcement stitches.
Stitching the First Side of the Zipper
With your zipper securely pinned or taped to the seam allowance, place your fabric under the sewing machine. Attach your standard zipper foot to the left side of the ankle, allowing the needle to stitch down the right side of the zipper tape. Position your fabric so that the zipper teeth are on the left of the foot, and the needle is poised to stitch through the zipper tape and the seam allowance.
Lower your presser foot and manually lower your needle into the fabric at the very top of the zipper tape. Begin sewing slowly, using a standard stitch length of 2.5mm. Hold the thread tails gently for the first two to three stitches to prevent tangling, and then sew a brief backstitch to lock your threads in place. As you sew down the length of the tape, guide the fabric gently with your hands, allowing the machine’s feed dogs to pull the material naturally; never pull or push the fabric, as this causes puckering and uneven stitches.
Continue stitching slowly down the side of the zipper tape, removing pins just before the presser foot reaches them. Keep your eyes focused on the space between the edge of your zipper foot and the zipper teeth, maintaining a consistent distance of about 2 to 3 millimeters. When your needle reaches the marked bottom stop of the zipper, stop sewing, backstitch to secure the seam, and raise your needle and presser foot to remove the fabric from the machine.
Stitching the Second Side and Finishing the Seam
To sew the second side of the zipper, you must adjust your machine setup to accommodate the opposite side of the zipper tape. Snap your standard zipper foot onto the right side of the ankle so that the needle can stitch down the left side of the zipper tape. Position your fabric under the foot, starting again from the top of the zipper, keeping the zipper teeth to the right of the foot.
As you sew down the second side, you will eventually encounter the physical bulk of the zipper pull. If you attempt to sew past the zipper pull while it is closed, your presser foot will be forced outward, resulting in a crooked, bowed line of stitches. To avoid this, sew until you are about 5 centimeters away from the pull, then stop with your needle down in the fabric. Raise the presser foot, carefully slide the zipper pull past the foot toward the area you have already sewn, lower the presser foot, and resume stitching.
Once both sides of the zipper tape are stitched to the seam allowance, it is time to secure the bottom of the zipper and close the remaining seam. Switch back to your machine’s standard presser foot. Position your fabric right-side up, and stitch a horizontal line of reinforcement stitches directly across the bottom of the zipper, just below the bottom stop, connecting your left and right zipper stitch lines. Finally, if you used a temporary basting stitch to hold the seam closed at the beginning, use a seam ripper to carefully open those basting stitches, revealing your perfectly aligned, functional zipper.
Common Beginner Mistakes and How to Avoid Them
Even with careful preparation, beginners often run into a few common hurdles when learning to sew a zip. Understanding why these issues happen makes them much easier to prevent.
Stitching too close or too far from the teeth: This is one of the most frequent errors. If you sew too close to the teeth, the fabric or thread will catch in the zipper mechanism, preventing it from opening smoothly. If you sew too far away, the zipper tape will expose too much of its fabric backing, looking untidy and compromising the structure of the seam. To maintain a consistent distance, use the edge of your zipper foot as a physical guide against the zipper teeth, and maintain a slow, steady speed so you can adjust your alignment incrementally.
Sewing directly over the zipper pull: This mistake or hitting the metal stops will instantly bend or break your sewing machine needle, and can potentially damage your machine’s internal timing. Always turn the handwheel manually when sewing near the top or bottom stops to ensure your needle does not make direct contact with metal or hard plastic. If you feel any resistance when turning the handwheel, stop immediately, raise the needle, and adjust your fabric positioning.
Fabric puckering: This occurs when the fabric is stretched or pulled taut during the pinning or stitching process. This is especially common when working with lightweight or stretchy fabrics in humid climates like Singapore, where moisture can alter fabric behavior. To prevent this, let the machine’s feed dogs do all the work of pulling the fabric through. You can also apply a thin strip of lightweight fusible interfacing to the seam allowance before sewing to stabilize the fabric and prevent stretching.
Hitting the zipper teeth: This can happen if your fabric shifts or if you do not perform a manual handwheel check before starting. If your needle strikes the teeth, stop sewing immediately, turn off your machine, and inspect the needle. A bent or dull needle must be replaced immediately, as continuing to sew with a damaged needle will ruin your fabric and cause skipped stitches.
How to Test and Verify Your Finished Zipper
Before moving on to the next step of your sewing project, take a few minutes to verify the quality and functionality of your installation. Open and close the zipper multiple times to ensure the pull moves smoothly from top to bottom without catching on the fabric edges or loose threads. If the zipper catches, inspect the inner seam to see if any fabric is sitting too close to the teeth, and trim any stray threads.
Next, lay the project flat on your workspace and examine the seam line below the zipper. The transition from the zipper opening to the permanent seam should be smooth and flat, without any puckering, bubbling, or misalignment. If you notice a noticeable bump at the bottom of the zipper, you may need to press the area again with an iron or adjust the tension of your bottom reinforcement stitches.
Finally, inspect your stitch lines for consistency. Your stitches should be evenly spaced, parallel to the zipper teeth, and secured with clean backstitches at both ends. Taking the time to verify these details ensures your zipper will remain durable and functional through regular use and laundering.
Frequently Asked Questions (FAQ)
Can I sew a zipper without a special zipper foot?
While it is technically possible to sew a zipper using a standard presser foot by shifting your needle position as far to the side as possible, doing so is highly discouraged for beginners. A standard foot is too wide to ride close to the zipper teeth, which often forces the needle to stitch too far from the seam, leaving the zipper tape exposed. It also significantly increases the risk of the foot slipping and the needle striking the zipper teeth, which can break the needle or damage your machine.
Why is my zipper wavy after sewing?
A wavy zipper is usually caused by the fabric stretching as it is fed through the machine. This happens when you pull the fabric from behind the needle or when the presser foot pressure is too high for stretchy or lightweight materials. To prevent waviness, avoid pulling the fabric, use sewing clips instead of pins to keep the layers perfectly flat, and consider applying a strip of fusible interfacing or wash-away stabilizer to the seam allowance to provide temporary structure while you stitch.
Community discussion
Share your experience or ask a question. Comments are reviewed before publication.