
Setting up the perfect light for painting at home requires balancing two critical factors: color accuracy and shadow elimination. To achieve this, you need a combination of high-color-rendering bulbs, daylight-balanced color temperatures, and strategic multi-angled positioning. Relying on a single overhead room light or mismatched lamps leads to frustrating shadows from your hand and brush, as well as severe color shifts that make your artwork look entirely different once it is moved out of your studio. By positioning diffused, high-quality light sources at specific angles, you can transform any corner of your home into a professional-grade painting space where colors remain true and glare is virtually non-existent.
Understanding the Right Light for Painting
To choose the correct light for painting, you must look beyond standard household bulb descriptions and focus on technical specifications. The most critical metric for color accuracy is the Color Rendering Index (CRI). CRI is a quantitative measure of a light source’s ability to reveal the colors of various objects faithfully in comparison with a natural light source. For painting, you should exclusively select bulbs with a CRI of 90 or higher, often labeled as CRI 95+ or “high CRI.” Bulbs with low CRI values will distort your perception of pigments, making it incredibly difficult to mix subtle skin tones, transition smooth gradients, or judge the relationship between warm and cool shades.
The second metric to evaluate is color temperature, which is measured in Kelvin (K). For a neutral color perception that mimics natural daylight without the unpredictable shifts of actual weather, aim for a color temperature range between 5000K and 6500K. This range is widely accepted as daylight-balanced. Light that is too warm (under 4000K) will make your canvas look yellow, causing you to overcompensate by adding too much blue or cool tones to your mix. Conversely, light that is too cool (above 6500K) casts a harsh blue tint, leading you to add excessive warm pigments.
Products mentioned in this guide
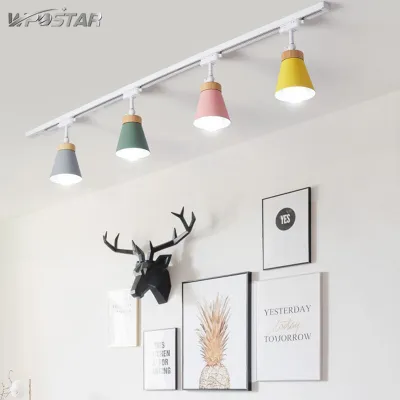
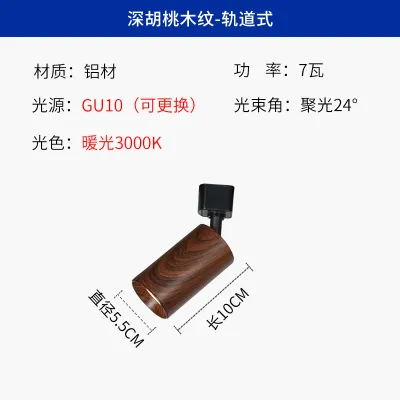
Prices are valid at publication and may change. Please refer to the product page for the latest price.
When shopping for bulbs in Singapore, avoid relying on vague marketing terms like “warm white,” “bright white,” “cool daylight,” or “natural light.” These terms are not standardized across manufacturers and can vary wildly in actual performance. Instead, inspect the physical bulb packaging or the manufacturer’s online product specifications sheet for the exact CRI rating and Kelvin number. Investing in high-quality LED bulbs that explicitly state these parameters ensures your color mixing remains consistent, whether you are working on canvas, heavy watercolor paper, or wood panels.
Essential Gear for Your Home Painting Studio
A functional home studio requires a deliberate separation between general ambient room lighting and dedicated task lighting. Ambient lighting is the overall illumination of the room, which should be bright enough to prevent eye strain but soft enough not to compete with your easel. Task lighting, on the other hand, is the focused light directed specifically at your canvas and mixing palette. Relying solely on a room’s fixed ceiling fixtures is a common pitfall; because these fixtures are positioned directly overhead or behind you, they naturally cast harsh shadows of your head, shoulders, and hands directly onto your working surface.

To achieve soft, even task illumination, you must use diffused light sources rather than bare bulbs. Bare bulbs produce intense, concentrated beams that create sharp shadow edges and blinding glare on wet paint surfaces, particularly when working with glossy mediums like oils or acrylics. You can diffuse your light by using LED panels with built-in frosted covers, small softboxes, or clip-on umbrella modifiers. These tools scatter the light rays in multiple directions, mimicking the gentle glow of an overcast sky and softening the transition between light and shadow on your canvas.
Controlling the physical placement of these light sources requires adjustable mounting gear. Look for sturdy floor stands, articulated desk arms, or heavy-duty spring clamps that allow you to modify the height, angle, and distance of your lights as you work. This adjustability is crucial because different canvas sizes and painting mediums demand distinct lighting angles. For example, a tall vertical oil painting on an easel requires a different light height than a flat watercolor sheet resting on a desk to avoid glare and ensure the wet paper fibers or paint layers dry under observable, consistent conditions.
Step-by-Step Guide to Positioning Your Lights
Once you have gathered the correct daylight-balanced, high-CRI bulbs and adjustable fixtures, the next step is to position them to eliminate shadows and glare. The fundamental principle behind a professional studio setup is cross-lighting. By lighting your working area from multiple directions, you flatten the texture of the canvas weave and ensure a uniform wash of light across the entire surface. Before turning on your specific task lights, aim to create a balanced base of ambient light in the room so your eyes do not have to constantly adjust between a blindingly bright canvas and a pitch-black room.
Positioning the Main Key Lights
To set up your primary light sources, place two main key lights at roughly 45-degree angles to the left and right of your easel. Do not position them directly in front of you, as this will bounce light straight back into your eyes, creating an unbearable glare on wet paint. Similarly, avoid placing them directly behind you, which casts your own shadow over the canvas, or directly above, which creates steep downward shadows from your brush and hand.
This dual 45-degree configuration ensures that the light from the left side fills in any shadows cast by your hand or brush when you paint from the right, and vice versa. If you are predominantly right-handed, you should position the primary or slightly stronger light on your left side to minimize the shadow of your drawing hand, using the right-side light as a softer fill.
To eliminate direct glare, angle the light fixtures slightly downward and outward. This directs the specular reflection—the mirror-like bounce of light off the glossy paint surface—away from your line of sight and toward the floor or opposite walls. If you notice a bright spot on your canvas, gently nudge the light stand outward or tilt the lamp head slightly away from the center of the canvas until the reflection disappears, while still maintaining even illumination.
Adding Fill Lights and Managing Ambient Light
Even with two key lights, you may still encounter minor contrast issues or dark spots in your studio space. To resolve this, you can introduce a lower-intensity fill light. Alternatively, you can bounce one of your adjustable lights off a nearby white wall or ceiling. This bounced light acts as a giant, ultra-soft reflector that gently lifts the shadows in your workspace without introducing new glare points.
Managing the surrounding ambient light is just as important as positioning your task lights. Turn off or block any competing light sources in the room, such as warm yellow table lamps, overhead warm-white kitchen lights, or unshielded fluorescent tubes. Mixing different color temperatures—such as a 3000K warm ambient lamp with your 5500K painting lights—confuses your eyes and severely distorts your color perception. When your visual system tries to adapt to two different light colors simultaneously, your ability to accurately judge subtle color values and temperature shifts in your paint mixtures is compromised.
Common Lighting Mistakes and How to Fix Them
One of the most frequent mistakes home painters make is relying on a single overhead light source. Whether it is a ceiling fan light or a central flush-mount fixture, overhead lighting inevitably casts a shadow of your hand, brush, or palette knife directly onto the lower half of the canvas where you are trying to work. To fix this, immediately supplement or replace the overhead light with the dual-angled task lights described above, ensuring the light path to your canvas remains unobstructed by your body.
Another common issue is mixed lighting environments, which occur when natural window light blends with household artificial lights. For instance, if you paint near a window during the late afternoon, the incoming natural light will gradually warm up and lose intensity, while your indoor lights remain constant. This shift alters how you mix your paints; a color mixture that looks perfectly balanced at 4:00 PM may look shockingly blue or muddy under pure artificial light at night. To prevent this, either paint exclusively under controlled artificial lighting with your window shades drawn, or paint solely using consistent natural light without turning on your indoor lamps.
Canvas glare is a particularly frustrating problem, especially when using heavy body acrylics, oil paints, or glossy varnishes. If you find yourself squinting to see past a bright reflection, try adjusting the forward tilt of your easel. Tilting the top of the easel slightly forward changes the angle of incidence, causing the light reflections to bounce downward toward the floor rather than straight into your eyes. If your easel is fixed, try moving your light stands further back from the canvas or angling them more steeply (closer to a 60-degree angle relative to the canvas plane) to push the glare out of your field of view.
How to Test and Verify Your Lighting Setup
Before committing to a long painting session, take a few minutes to test and verify your lighting setup using simple, practical methods. The easiest way to check for shadows is the “hand shadow test.” Hold your favorite paintbrush or your hand a few centimeters away from the canvas and move it slowly across the entire surface, from top to bottom and left to right. Observe the shadow cast on the canvas; it should be incredibly soft, diffuse, and barely noticeable. If you see a dark, sharp, or distinct shadow following your brush, your lights are either too close, too focused, or not balanced correctly at the 45-degree angles.
Next, perform a quick color check to verify that your lights are rendering colors accurately. Place a physical color wheel, a high-quality printed reference photo, or a neutral grey card on your easel. Examine the primary and secondary colors closely under your painting lights. The colors should look vibrant, crisp, and exactly as you expect them to look. If the neutral grey card appears to have a distinct yellow, green, or blue cast, double-check that you do not have any competing ambient light sources turned on and that your bulbs are indeed rated at 5000K to 6500K with a high CRI.
Finally, remember to test your setup at the specific time of day you plan to paint. If you work in a room with windows and prefer to paint in the evening, test your lights once the sun has fully set to ensure no external streetlights or hallway lights are casting unwanted colors or shadows into your space. If you paint during the day, observe how the changing natural light interacts with your setup, and use blackout curtains or blinds to maintain a stable, repeatable environment that guarantees consistent results every time you pick up your brush.
Frequently Asked Questions (FAQ)
Can I mix natural window light with artificial painting lights?
Mixing natural window light with artificial painting lights is generally not recommended for projects requiring high color accuracy. Natural light is dynamic; its intensity, direction, and color temperature shift constantly throughout the day, ranging from cool blue tones in the morning to warm golden hues in the late afternoon. If you mix this shifting light with static artificial lights, your eyes will struggle to maintain a consistent baseline for color mixing, leading to unexpected color distortions when your finished painting is viewed in other environments.
To maintain complete control over your painting environment, it is best to use blackout curtains or heavy blinds to completely block out window light when you are relying on your artificial studio setup. While natural north-facing light (or south-facing light in the Southern Hemisphere) is historically favored by artists for its relatively stable, indirect quality, you should still avoid mixing it with artificial task lights. Choose one consistent light source for your session and stick to it to ensure your colors remain true from the first brushstroke to the final varnish.
Community discussion
Share your experience or ask a question. Comments are reviewed before publication.