
Setting up your new Liontots LED board is a straightforward process that can instantly elevate your tracing, sketching, and drafting projects. Whether you are a parent helping your child explore creative drawing or an art enthusiast refining your hand-lettering, this ultra-thin light pad provides a consistent, adjustable light source that makes transferring designs effortless. To get started, you only need to prepare a clean workspace, connect the board to a suitable power source, and adjust the brightness to match your paper thickness.
Using a dedicated light board eliminates the frustration of tracing against windows or dealing with uneven overhead lighting. By mastering a few basic techniques, such as securing your papers properly and protecting the acrylic surface, you can ensure your device remains in peak condition for years. This guide will walk you through the complete setup process, from the moment you unbox the device to troubleshooting common operational issues.
Preparing Your Workspace and Checking Your Kit
Before plugging in your light pad, clear a dedicated space on your desk or table to ensure a smooth, uninterrupted drawing experience. Unbox your Liontots LED board carefully and lay out all the contents on a clean surface. Verify that you have received all the essential components listed in the user manual, which typically include the main acrylic drawing board, a compatible power cable, and the manufacturer’s instruction booklet. Checking these items beforehand prevents interruptions once you begin your creative project.
Products mentioned in this guide
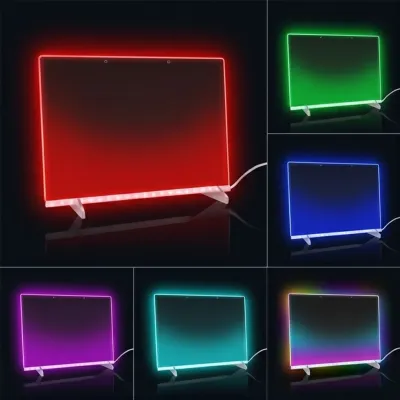
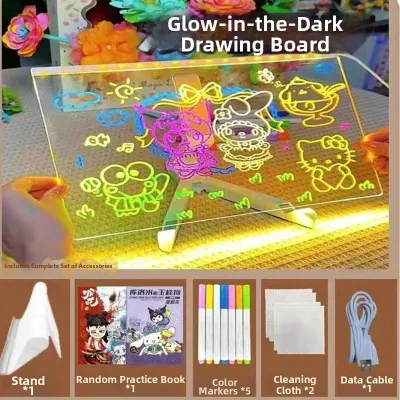
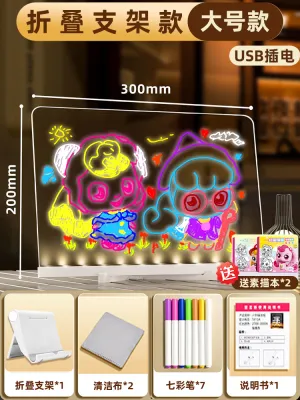
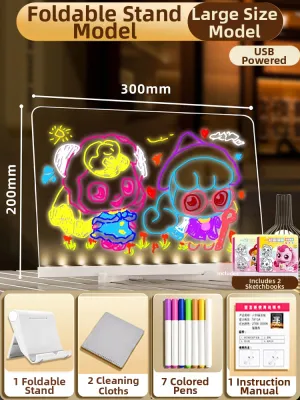
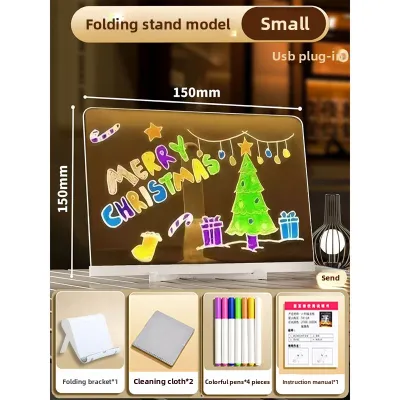
Prices are valid at publication and may change. Please refer to the product page for the latest price.
Choose a flat, stable, and rigid surface for your workspace, such as a sturdy wooden desk or a solid dining table. A level surface prevents the light board from flexing or wobbling while you apply pressure with your drawing tools. Additionally, position the board within easy reach of a wall outlet or a reliable power source so the power cable can lie flat without being pulled taut. A tight or suspended cable poses a tripping hazard and can damage the board’s connection port if accidentally snagged.
Before your first drawing session, inspect the front and back of the acrylic panel for any protective plastic film. Manufacturers often apply a thin, transparent layer of film to protect the sensitive acrylic surface from scratches during manufacturing and shipping. Gently peel this film off from one of the corners to reveal the clear, highly polished surface underneath. Leaving the film on can dull the light output and cause unwanted friction when you try to trace.
Safety is paramount when dealing with electronic stationery devices. Always check the product label on the back of the board or refer to the user manual to confirm the exact power input requirements, which are commonly 5V/1A or 5V/2A for standard USB-powered devices. Do not use high-wattage fast chargers, such as those designed for modern laptops or premium smartphones, unless the manual explicitly states they are compatible. These high-output adapters can deliver excess voltage or current, potentially overheating the internal LED circuitry and reducing the lifespan of your board.
Step-by-Step Setup: Powering On and Adjusting Brightness
Once your workspace is ready, place the Liontots LED board flat on your desk with the power port positioned on the side that matches your dominant hand or your power outlet. Ensure the power cable has plenty of slack and is routed away from your drawing hand’s movement path. Keeping the cable organized prevents your arm from catching on the cord while you trace, which could shift your paper or pull the board out of alignment.

Connect the small end of the provided power cable securely into the input port on the side of the light board. Next, plug the standard USB end of the cable into a compatible power adapter that matches the manufacturer’s specified voltage and amperage. Insert the adapter into your wall outlet. Ensure the connection is snug at both ends, as a loose plug can cause the light to flicker or shut off unexpectedly during use.
Locate the power button, which is typically a touch-sensitive switch situated on the corner or side bezel of the board. A light tap on this button should instantly illuminate the LED panel. Because touch-sensitive switches are highly responsive, make a mental note of its location so you do not accidentally turn off the board with your elbow or wrist while drawing.
Most modern light boards feature an adjustable dimming function to help you find the perfect light level for your project. To adjust the brightness, press and hold the touch-sensitive power button; the light will gradually cycle from its dimmest setting to its maximum brightness. Release your finger when you reach the desired intensity. If you prefer a step-by-step adjustment, some models allow you to cycle through low, medium, and high brightness levels with individual, brief taps.
When using an illuminated drawing surface, prioritizing eye safety is essential, especially during extended drawing sessions. Beginners should always start at the lowest brightness setting and gradually increase the light only until the reference lines become clearly visible. Working with an excessively bright board in a dark room can lead to rapid eye fatigue, headaches, and strain. If children are using the board for school projects or crafts, an adult should assist them in adjusting the light to a comfortable level and monitor their usage time.
Mastering the Basics: Tracing and Drawing Techniques
Securing Your Reference and Drawing Paper
To begin tracing, you must layer your papers correctly to allow the light to project the design upward. Place your original reference image directly onto the acrylic surface of the board, ensuring it is centered within the illuminated area. Next, place your blank drawing paper, sketch paper, or tracing paper directly on top of the reference image. Align the edges of both sheets so your final drawing matches the orientation of the original artwork.
To prevent your papers from shifting while you draw, you must secure them firmly to the light board’s frame. Use a low-tack artist tape, standard masking tape, or lightweight binder clips along the top and side edges of the sheets. Avoid using high-tack packaging tapes, heavy-duty duct tapes, or strong adhesives, as these can leave a sticky residue on the acrylic surface or tear your paper when you try to remove them. If you are using binder clips, place them carefully along the plastic border to avoid scratching the active drawing area.
Adjusting Light for Different Paper Weights
The thickness and density of your paper directly affect how much light can pass through it, which determines how bright your LED board needs to be. Thin media, such as standard tracing paper, vellum, or lightweight 80gsm printer paper, requires very little light to reveal the reference lines underneath. For these materials, keep the board on a low or medium setting to prevent glare and protect your eyes from unnecessary brightness.
If you are working with thicker media, such as heavy sketch paper, bristol board, or watercolor paper, you will need to increase the brightness of your Liontots LED board. The dense fibers of heavy-weight papers block more light, making it difficult to see fine details on lower settings. Gradually increase the brightness until the dark outlines of your reference image show through clearly. Always perform a quick visual check: if you can see the lines clearly without squinting or straining your eyes, your brightness is set correctly.
Pencil Pressure and Surface Protection
The acrylic panel of your light board is durable but susceptible to scratches if handled roughly. When tracing, choose appropriate drawing tools such as graphite pencils, fine liners, or felt-tip pens. Maintain a light to medium hand pressure as you sketch. Pressing too hard with a sharp pencil will not make the line darker on the light board, but it can permanently scratch the acrylic surface or leave deep indentations in your reference image.
To keep your drawing surface pristine and prevent smudging, place a clean, spare sheet of smooth paper under your drawing hand. As you move your hand across the page, skin oils, sweat, and graphite dust can transfer to the paper and the acrylic board, leaving stubborn smudges that are hard to clean. The spare sheet acts as a protective barrier, allowing your hand to glide smoothly across the surface without leaving marks or transferring moisture to your active drawing.
Daily Maintenance and Safe Storage Practices
Proper daily maintenance is key to keeping your light board’s acrylic surface clear and ensuring the internal LED lights function optimally. After every drawing session, turn off the board and wipe the surface with a clean, dry microfiber cloth to remove dust, graphite particles, and fingerprints. Microfiber is ideal because it traps debris without scratching the sensitive acrylic panel. Avoid using standard paper towels or rough sponges, as their coarse fibers can create microscopic scratches that dull the surface over time.
For stubborn smudges or sticky tape residue, slightly dampen your microfiber cloth with clean water or use a dedicated screen cleaner formulated for plastics. Never apply water directly to the board, as moisture can seep into the edges or the power port, causing short circuits or permanent electrical damage. Avoid harsh chemical solvents, acetone, alcohol, or window cleaners, as these chemicals can react with acrylic, causing it to cloud, yellow, or develop fine cracks.
Caring for your power cable is just as important as maintaining the board itself. When you are finished using the device, gently unplug the cable from both the board and the wall adapter. Loosely coil the cable in a wide circle rather than folding it tightly or bending it sharply near the connection ports. Sharp bends can break the delicate copper wires inside the cable, leading to power delivery failures or intermittent connectivity issues.
Store your light board in a safe, dry, and cool environment away from direct sunlight, which can warp the acrylic panel over time. Always store the board flat on a shelf or upright in a vertical organizer where it cannot fall. Never place heavy books, storage boxes, or other heavy objects on top of the board during storage, as excessive weight can warp the frame, crack the acrylic, or damage the internal LED light guide plates.
Quick Troubleshooting for Common Beginner Issues
If your light board does not turn on, start by checking the physical connections. Ensure the power cable is pushed completely into the board’s input port and that the adapter is fully inserted into the wall outlet. If the connections are secure, try plugging the adapter into a different wall outlet, or swap the adapter and cable with a known working set to rule out a faulty cable or power block.
A flickering light is usually a sign of inconsistent power delivery rather than a defect in the board itself. Check if the power cable is loose at the input port; even a tiny gap can interrupt the electrical current. If the connection is snug, the issue may be an underpowered adapter. Ensure your power block meets the manufacturer’s minimum voltage requirements, and avoid plugging the USB cable into low-power ports like those on older desktop computers.
If you notice uneven lighting or dark spots on your drawing surface, first verify that you have completely removed the protective plastic shipping film from both sides of the board. Next, check for any dust, paper fibers, or debris trapped between your reference image and the drawing paper, as these can cast shadows. If the uneven lighting persists even with no paper on the board, inspect the surface for physical damage or warping.
While minor issues are easy to resolve, certain symptoms require immediate safety precautions. If your light board emits a burning smell, makes faint buzzing or clicking noises, or if the casing feels excessively hot to the touch, unplug the device from the wall immediately. Do not attempt to open the casing or repair the internal electronics yourself. Store the board in a safe place and contact the manufacturer’s customer service team for professional assistance or replacement options.
Frequently Asked Questions (FAQ)
Can I use a power bank to power the Liontots LED board?
Yes, many portable LED boards can be powered using a standard power bank, making them highly convenient for drawing on the go. However, before connecting your board, you must verify its voltage and current requirements against your power bank’s output specifications, which are typically printed on the side of the power bank. Ensure the power bank delivers a stable 5V output and matches the required amperage specified in your board’s user manual to prevent unstable operation, flickering, or damage to the internal LEDs.
How do I protect my eyes during long tracing sessions?
To protect your eyes during extended tracing sessions, always ensure your drawing room has adequate ambient light so your eyes do not have to constantly adjust between a bright board and a dark room. Practice the 20-20-20 rule: every 20 minutes, look away from your board at an object 20 feet away for at least 20 seconds to rest your eye muscles. Finally, keep the board’s brightness set to the lowest comfortable level that still allows you to see your reference lines clearly.
Community discussion
Share your experience or ask a question. Comments are reviewed before publication.