
An LED light board, often called a light pad or tracing board, is an invaluable tool for artists, designers, and hobbyists looking to transfer sketches, refine line work, or practice lettering. By projecting a consistent, adjustable light through layers of paper, this slim device allows you to see underlying reference images clearly, making the tracing process highly precise and efficient. Whether you are working on a detailed illustration, transferring a rough sketch to final drawing paper, or practicing calligraphy, setting up your workspace correctly and understanding how to handle your materials will ensure a smooth, professional result.
Preparing Your Workspace and Materials
To get the most out of your LED light board, you need to gather the right tools and establish a comfortable environment before plugging in the device. The core setup requires the LED light board itself, a compatible power source, your reference image, the paper you intend to draw on, and a reliable method to hold everything in place. For securing your sheets, low-tack artist tape, drafting tape, or slim plastic clips are ideal because they hold the paper firmly without tearing the fibers when removed.
Your choice of drawing medium is equally important. While standard printer paper and lightweight sketch paper work beautifully with almost any light board, heavier sheets like cardstock or mixed-media paper require a board with higher brightness capabilities. For writing and drawing instruments, a medium-hardness pencil, such as an HB or 2B, is excellent for initial tracing because it leaves a clear line without requiring heavy pressure that could indent the paper or scratch the acrylic surface of your board.
Products mentioned in this guide
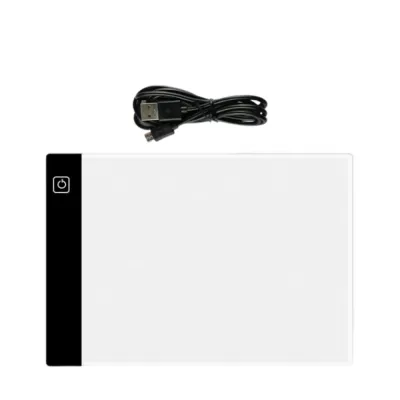
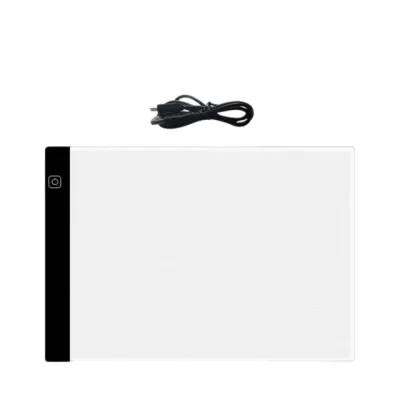
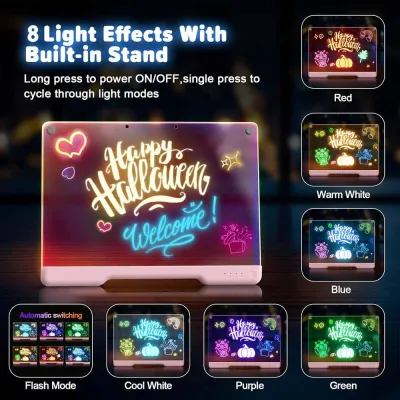
Prices are valid at publication and may change. Please refer to the product page for the latest price.
The physical environment where you work plays a significant role in reducing eye strain and physical fatigue. Position your light board on a stable, flat desk or a slightly angled drafting table to maintain a comfortable posture. If you are working in a bright room, the glare on the acrylic surface can make it difficult to see the illuminated lines, so it is often helpful to dim the overhead lights or draw the blinds slightly. This contrast between the ambient room light and the illuminated board makes the reference image stand out clearly without forcing your eyes to strain.
Before placing any materials down, ensure the surface of your light board is completely clean. Dust, eraser shavings, or small particles of grit trapped under your paper can create bumps that interfere with your pencil strokes or even scratch the protective acrylic layer of the device. Wipe the surface down with a dry microfiber cloth to remove any debris, and ensure your hands are clean and dry to avoid transferring oils or moisture to your drawing paper.
Step-by-Step Guide to Tracing on an LED Light Board
Tracing with an LED light board is a systematic process that transforms a rough concept or reference image into a clean, finished piece of art. By breaking the process down into distinct stages of preparation, alignment, and execution, you can maintain complete control over your lines and avoid common mistakes like misaligned layers or uneven line weights. This workflow ensures that every stroke you make is deliberate and accurately reflects your original reference.

Positioning and Securing Your Reference and Paper
The foundation of a successful trace lies in how securely you position your materials on the illuminated surface. Start by placing your reference image flat against the center of the light board, ensuring there are no folds, creases, or air bubbles underneath. If the reference sheet is wrinkled, the light will refract unevenly, which can distort the proportions of your drawing as you trace over it.
Once the reference image is flat, place your blank drawing paper directly on top of it. Before securing the sheets, turn on the light board briefly to check the visibility and alignment of the underlying image. Make sure the reference is centered under your drawing paper exactly where you want the final artwork to appear, leaving adequate margins around the edges for framing or handling.
To prevent the papers from shifting while you work, secure them firmly to the board. Low-tack artist tape is highly recommended; apply small pieces to the corners or edges of the paper, pressing down gently. Alternatively, you can use slim binder clips or the built-in physical clamps that come with some light board models. Whichever method you choose, ensure the fastening mechanism does not obstruct the path of your hand or pencil as you move across the drawing area.
Adjusting Brightness and Executing the Trace
With your papers secured, turn on the LED light board and adjust the brightness to a level that matches your paper thickness and room lighting. Most modern light boards feature step-less dimming or multiple brightness levels, allowing you to fine-tune the illumination. The goal is to make the lines of the reference image clearly visible through the top sheet without making the light so intense that it causes discomfort or glare.
When you begin drawing, use light, consistent pencil pressure. Pressing too hard can leave deep indentations in your drawing paper, making it difficult to erase mistakes, and can also scratch or damage the acrylic surface of the light board underneath. Hold your pencil at a comfortable angle and let the graphite glide smoothly over the paper, focusing on maintaining a steady hand as you follow the illuminated guides.
It is highly effective to trace the main outlines and major structural shapes of your reference image first. Establishing these primary guidelines early gives your drawing its core structure and ensures that even if the paper shifts slightly later, you have a solid foundation already drawn. Once the main shapes are established, you can zoom in on the finer details, textures, or subtle shading, adjusting the brightness of the board as needed to see the delicate lines of your reference.
Troubleshooting Common Tracing Issues
Even with a careful setup, you may encounter a few common challenges when using an LED light board for the first time. One of the most frequent issues is dealing with faint or barely visible reference images, which usually happens when the top paper is too thick or opaque. If you find that the light cannot penetrate your paper sufficiently, first try increasing the board’s brightness to its maximum setting. If the lines are still faint, try dimming the ambient lights in your room completely, or consider using a lighter weight paper for your initial trace and then transferring that sketch to your final heavier medium later.
Another common frustration is shifting materials, where the reference image or drawing paper moves out of alignment mid-trace. If you notice your paper sliding, evaluate the adhesion of your tape; low-tack tape can lose its stickiness if it accumulates paper dust or eraser crumbs. Replace the old tape with fresh strips, or add extra binder clips along the edges to lock the layers in place. Using a physical border frame or a magnetic backing, if your board supports it, can also provide a highly secure hold.
Eye strain and visual fatigue can occur during long drawing sessions, especially when working in a dark room with a highly illuminated board. To minimize this, avoid working in a completely pitch-black room; instead, keep a soft, warm ambient light on nearby to reduce the harsh contrast between the bright screen and the surrounding environment. Make it a habit to take regular visual breaks every twenty to thirty minutes, looking away from the board and focusing on a distant object to allow your eye muscles to relax.
Maintaining Your LED Light Board for Longevity
An LED light board is a delicate electronic device that requires proper care and maintenance to remain in optimal working condition for years. The acrylic surface is the most vulnerable part of the board, as it can easily collect dust, fingerprints, and scratches. To clean the surface, always use a soft, dry microfiber cloth, wiping gently in circular motions. Avoid using harsh chemical solvents, glass cleaners, or abrasive sponges, as these can cloud the acrylic, strip away protective coatings, or leave permanent scratches that scatter the light unevenly.
Protecting the surface from physical damage is crucial during active use. Never use sharp tools, utility knives, or cutting blades directly on the light board, as they will slice into the acrylic and ruin the smooth drawing surface. If your project requires cutting, always transfer your paper to a dedicated self-healing cutting mat first. Additionally, avoid leaning heavily on the board with your elbows or placing heavy objects on top of it, as excessive pressure can crack the internal LED panels or damage the light distribution layers.
Proper cable management and storage are also essential for preserving the electronics of your light board. When plugging in or unplugging the power cable, handle the connector gently to avoid straining the port on the board, which can loosen over time and cause power connectivity issues. When you are finished with your session, store the board flat or vertically in a protective sleeve or its original box, keeping the power cord loosely coiled rather than tightly wrapped to prevent internal wire damage.
Frequently Asked Questions (FAQ)
Can I use thick watercolor paper on an LED light board?
Yes, you can use watercolor paper, but heavier weights like 300 gsm will significantly block light transmission, making underlying reference images difficult to see. To trace successfully onto thick watercolor paper, turn your LED light board to its maximum brightness setting and work in a completely darkened room to maximize contrast. If the lines are still not visible, a reliable workaround is to trace your reference onto a thinner sheet of tracing paper first, apply graphite to the back of that tracing paper, and then transfer the design onto your watercolor paper by tracing over the lines with a hard pencil.
Is it safe to leave the LED light board on for hours?
Modern LED light boards are designed with energy-efficient LED technology that generates very little heat compared to older, bulky fluorescent light boxes, making them safe for extended drawing sessions. However, to ensure the longevity of the internal components and prevent any minor heat buildup, it is good practice to give the board short rest periods during long projects. Ensure that the ventilation edges of the board are not blocked by papers or fabrics while in use, allowing air to circulate freely around the device.
Community discussion
Share your experience or ask a question. Comments are reviewed before publication.