
A MiDeer drawing board is an exceptional tool for sparking your child’s imagination while keeping your home free of stray crayon marks and paper clutter. Whether you have chosen a high-tech liquid crystal display (LCD) writing tablet or a classic magnetic easel, setting up the device correctly ensures a seamless, safe transition into creative play. Introducing a new drawing tool to your child is more than just handing them a stylus; it is an opportunity to build fine motor skills, encourage cognitive development, and enjoy meaningful bonding time together. By taking a few deliberate steps to prepare, assemble, and maintain the board, you can establish a reliable creative station that supports your child’s developmental milestones for years to come.
Preparing Your MiDeer Drawing Board for First Use
Before introducing the drawing board to your child, take a few minutes to unbox and inspect the item to guarantee a safe, uninterrupted play session. Begin by laying out all the components on a flat surface. A standard unboxing checklist for a MiDeer drawing board typically includes the main drawing unit, a dedicated stylus, a stylus tether string, magnetic stamps (if applicable to your specific model), and any necessary batteries or assembly hardware. Carefully inspect the frame and screen for any signs of shipping damage, such as hairline cracks, loose seams, or screen discoloration. If you notice any structural defects, contact your retailer or the manufacturer before allowing your child to handle the toy.
Next, remove all protective plastic films from the drawing surface and outer frame. These films are meant solely to protect the product during transit and can pose a suffocation hazard if left within a child’s reach. After removing the film, perform a quick age-appropriateness and safety check. Many MiDeer models include small accessories like magnetic stamps, stencils, or small stylus tethers. If your child is under three years old, these small parts must be stored safely out of reach to prevent accidental choking. Additionally, verify that the battery compartment cover is firmly secured with its safety screw.
Products mentioned in this guide
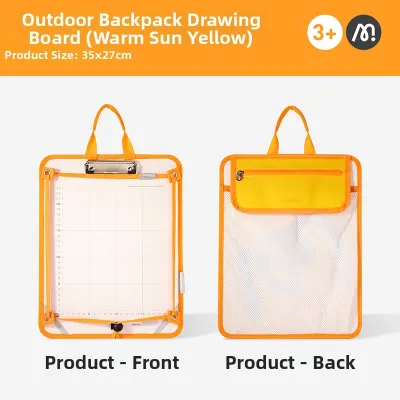
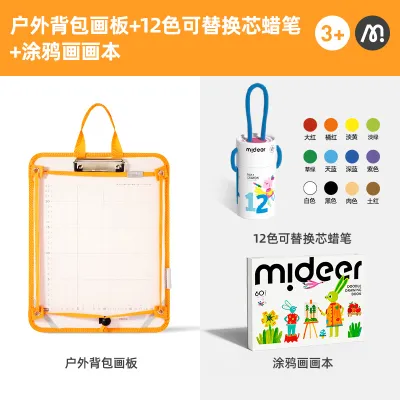
Prices are valid at publication and may change. Please refer to the product page for the latest price.
Finally, locate the lock switch on the back or side of the board if you are setting up an LCD model. This switch prevents accidental erasure of your child’s drawings. Ensure it is toggled to the “unlocked” position before first use, as a locked screen will prevent the erase button from functioning, which can lead to early frustration for a young artist eager to start fresh.
Step-by-Step Guide to Setting Up the Drawing Board
Different types of drawing boards require distinct preparation steps to ensure they function correctly and safely. Whether you are setting up an electronic LCD writing tablet or a physical magnetic easel, following these structured setup steps will help you avoid common operational issues and keep the play area organized.

Setting Up an LCD Drawing Board
Electronic LCD drawing boards rely on pressure-sensitive liquid crystal technology to display lines without the need for ink or chalk. To begin, locate the battery compartment, which is usually secured with a small Phillips-head screw on the back or bottom edge of the frame to keep it child-safe. Use an appropriate screwdriver to open the compartment, insert the required button cell battery (typically a CR2025 or CR2032, but check your specific model’s manual to verify), ensuring the positive (+) and negative (-) terminals align perfectly with the markings inside. Once inserted, replace the cover and tighten the screw firmly so that a child cannot open it.
Next, perform a quick function test to verify the electronic components are working. Take the stylus and draw a few test lines on the screen. The lines should appear smoothly and clearly without requiring excessive pressure. Press the central erase button; the screen should instantly clear back to its dark state. Now, toggle the lock switch to the “locked” position and attempt to write or erase. The existing lines should remain on the screen, proving the lock function is operational. Toggle it back to “unlocked” to prepare the board for your child.
To prevent the stylus from getting lost, locate the small lanyard holes on both the stylus and the corner of the drawing board. Thread the provided tether string through the hole on the stylus, loop it back through itself to secure it, and then tie the other end to the board’s frame. Adjust the length of the string to ensure your child has full range of motion across the entire screen without the cord being tight enough to create a pulling hazard.
Setting Up a Magnetic or Easel Drawing Board
Traditional magnetic boards and wooden easel models require physical assembly and mechanical checks rather than electronic setup. If your MiDeer model features a detachable stand, adjustable easel legs, or a tabletop frame, begin by laying out the structural pieces. Follow the manufacturer’s assembly diagram to connect the legs or support brackets to the main board. Ensure all joints, clips, or wooden dowels click or screw securely into place. Give the assembled structure a gentle shake to verify it is stable and will not tip over when your child applies pressure while drawing.
Once assembled, test the mechanical eraser slider. Slide the eraser knob slowly from one side of the track to the other. The movement should be smooth and require minimal effort, and it should completely clear any magnetic particles from the drawing surface. If the slider feels stiff or leaves faint traces behind, run it back and forth three to four times to distribute the internal magnetic elements evenly across the screen.
Keep the play area organized by placing the included magnetic stamps, stencils, and physical stylus into their designated built-in trays or side pockets. Teaching your child to return each accessory to its specific slot after use not only keeps the drawing station tidy but also helps prevent lost pieces, ensuring the board remains fully functional for future play sessions.
Engaging Your Child: Fun Activities and Drawing Games
A drawing board is a versatile educational tool that can support your child’s cognitive growth, fine motor skills, and language development. By guiding their play with structured, interactive activities, you can maximize the educational value of the board while keeping them engaged.
Tracing and Letter Practice
For younger children who are just developing their pencil grip, tracing is an excellent way to build hand-eye coordination. Place basic shape stencils directly onto the drawing board surface and show your child how to guide the stylus along the inner edges. Start with simple shapes like circles and squares before moving on to more complex patterns.
As your child transitions into preschool age, use the drawing board as a reusable writing slate. Draw a series of dotted lines, simple curves, or uppercase letters on the board, and encourage your child to trace over your lines with their stylus. Because the board can be erased instantly with a single click or slide, your child can practice repetitive writing strokes as many times as needed without the frustration of erasing paper or wasting stationery supplies.
Interactive Storytelling and Pictionary
Turn drawing into a collaborative social activity by playing simple guessing games. Take turns with your child drawing basic objects, animals, or daily items while the other player guesses what it is. This activity helps build vocabulary, teaches turn-taking, and encourages children to identify key visual features of objects.
You can also use the drawing board as a visual aid for storytelling. As you tell a simple story, draw the characters and settings on the board. For example, if you are telling a story about a little bear going to a park, draw a simple bear shape and a tree. As the plot progresses, erase elements or add new details to reflect the story’s action. Encourage your child to take over the stylus and draw what happens next, fostering their imagination and narrative skills.
Sensory and Pattern Play for Toddlers
For very young children, the drawing board is an exciting exploration of cause and effect. Encourage your toddler to scribble freely on the surface using different parts of the stylus or even their fingernails on an LCD screen. Once they have filled the board, guide their finger to press the erase button or slide the magnetic eraser knob. Watching their creations disappear instantly helps them understand the relationship between their actions and the physical response of the board.
If your board includes magnetic stamps, use them to introduce basic math and spatial concepts. Guide your child to press the stamps in a straight horizontal line, or create simple alternating patterns (such as circle, star, circle, star). This hands-on sensory play helps develop fine motor control, spatial awareness, and early pattern recognition skills.
Maintaining and Cleaning Your MiDeer Drawing Board
Proper maintenance ensures your drawing board remains clean, responsive, and safe for your child to use over a long period. Because these boards are handled frequently by young children, they require regular cleaning and careful storage, especially when exposed to specific environmental conditions.
To clean the screen and outer frame, use a soft, dry, or slightly damp microfiber cloth to gently wipe away fingerprints, dust, and smudges. If a deeper clean is necessary, slightly moisten the cloth with clean water, but do not spray water directly onto the screen. Avoid using harsh chemicals, alcohol-based sanitizers, glass cleaners, or abrasive sponges. These substances can strip away the protective anti-glare coating on LCD screens or damage the delicate magnetic film on traditional boards, leading to permanent blind spots or reduced sensitivity.
In Singapore’s warm and highly humid climate, environmental factors play a significant role in the lifespan of electronic and wooden toys. Store the drawing board in a cool, dry indoor location away from direct sunlight, open windows, or high-humidity areas like balconies. Prolonged exposure to heat and moisture can cause LCD screens to warp, battery terminals to rust, or wooden frames to expand and crack. Never leave the drawing board inside a parked car, as the extreme heat can permanently damage the internal liquid crystal layers.
For LCD models, battery maintenance is crucial for preventing internal damage. If your child will not be using the drawing board for several weeks or months, open the battery compartment and remove the button cell battery. This simple step prevents potential battery leakage, which can cause corrosive chemicals to ruin the electronic contacts and render the board unusable. Additionally, wipe the tip of the stylus regularly with a dry cloth to remove any accumulated dirt, oils, or food residue, ensuring it slides smoothly across the screen without scratching.
Troubleshooting Common Issues
If your drawing board is not performing as expected, you can often resolve the issue quickly at home with a few simple checks before seeking a replacement.
- LCD screen does not erase completely: First, check the lock switch on the back or side of the board to ensure it is fully in the "unlocked" position. If it is unlocked but the screen still fails to clear, press the erase button firmly several times. If the issue persists, the battery is likely low on power. Replace the button cell battery with a fresh one, as electronic boards require a small burst of electrical current to reset the liquid crystals and clear the screen.
- Faint or inconsistent lines on the LCD: LCD drawing boards rely on pressure-sensitive technology, meaning the thickness and brightness of the lines depend on how hard the stylus is pressed against the screen. If the lines are too faint, encourage your child to apply slightly more pressure while drawing. Also, inspect the tip of the stylus for wear, flat spots, or embedded dirt that might be reducing the contact area, and wipe or rotate the stylus if necessary.
- Magnetic board slider gets stuck or leaves marks: If the sliding eraser on a magnetic board becomes difficult to move, do not force it, as this can derail the internal magnetic slider. Instead, inspect the track on both the front and back of the board for dust, crumbs, or small toys that might be blocking the path. Gently clean the track using a dry cotton swab to remove any debris. If faint magnetic lines remain after sliding, run the eraser back and forth slowly three to four times to realign the magnetic particles inside the screen.
Frequently Asked Questions (FAQ)
Can I use a regular pen or my finger on an LCD drawing board?
No, you should never use regular ink pens, pencils, crayons, or sharp metal objects on an LCD drawing board. These items can permanently scratch the protective outer layer and puncture the pressure-sensitive liquid crystal screen underneath. The board is designed to be used specifically with the included plastic stylus or a smooth fingernail, which applies the necessary pressure without causing physical damage to the screen.
Is the MiDeer drawing board safe for toddlers?
Yes, MiDeer drawing boards are constructed from durable, non-toxic, and impact-resistant materials designed to withstand typical toddler play. However, because some models include small accessories like magnetic stamps, stencils, or small battery compartment screws, adult supervision is required for children under three years old. Always ensure the battery compartment is screwed shut tightly and inspect small parts regularly for wear or damage.
How long do the batteries typically last in an LCD model?
The battery in an LCD drawing board typically lasts for tens of thousands of erase cycles, often extending up to a year or more with normal daily use. This longevity is because the board consumes absolutely zero battery power while your child is actively drawing or when the screen is displaying a static image; power is only drawn during the brief fraction of a second when the erase button is pressed to clear the screen. Refer to your specific model’s manual for precise battery specifications and keep a spare battery stored safely out of reach for quick replacements.
Community discussion
Share your experience or ask a question. Comments are reviewed before publication.