
Selecting the right thick clear tape for textbook protection depends on matching the tape’s physical properties to the book’s dimensions, the student’s grade level, and the daily wear it must endure. In Singapore’s humid climate, paper covers can easily soften or warp, making a sturdy protective layer essential for keeping school materials intact throughout the academic year. By choosing the correct width and thickness, parents and students can achieve a smooth, bubble-free finish that preserves the book’s cover without peeling or yellowing over time.
Understanding Tape Thickness and Width for Book Covering
Tape thickness is typically measured in microns, and this specification directly dictates how well the tape resists punctures, tears, and corner scuffs. Thicker tapes, generally ranging from 50 to 80 microns, provide a robust barrier that keeps softcover textbooks rigid and prevents the edges from fraying. However, thicker tape requires more deliberate handling during application, as it is less forgiving of sudden folds and requires firm pressure to adhere smoothly.
The width of the tape roll is equally critical when planning your book-covering strategy. Standard packaging tape widths of 48mm or 50mm are excellent for reinforcing spines and edges, but covering entire book faces often requires wider specialty rolls, such as 80mm, 100mm, or even wider book-binding tapes. Using a tape that is too narrow forces you to overlap multiple strips, creating visible seams that can trap dust, moisture, and oils from hands over months of daily use.
Products mentioned in this guide
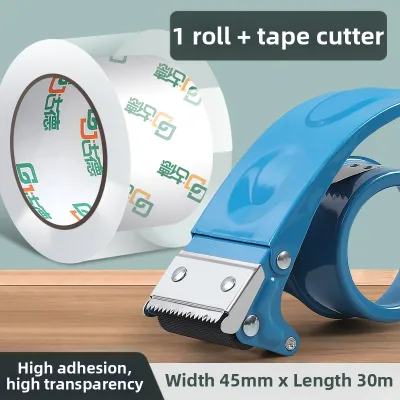
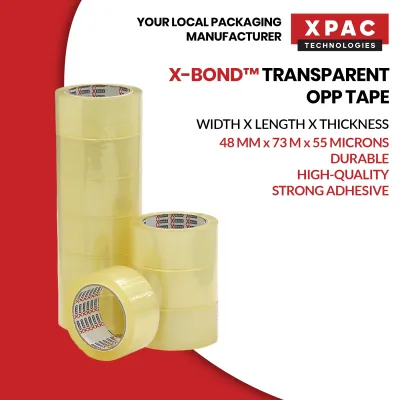
Prices are valid at publication and may change. Please refer to the product page for the latest price.
Adhesive quality and optical clarity are the final pieces of the selection puzzle. Opt for tapes labeled as acid-free or archival-safe, as these adhesives do not degrade or turn yellow when exposed to light and ambient humidity. High transparency ensures that titles, barcodes, and cover illustrations remain perfectly legible, which is particularly important for school library scans and quick identification in a crowded locker or backpack.
Matching Tape Specifications to Grade Levels and Book Sizes
Different academic stages bring distinct textbook formats and handling habits, meaning a one-size-fits-all tape strategy rarely works. Matching the tape’s physical specifications to the specific demands of each grade level ensures optimal protection and a simpler application process.

Lower Primary (Grades 1–3)
Students in lower primary school typically use oversized, thin workbooks, activity sheets, and large-format picture books. These materials often have soft paper covers that crease easily under the enthusiastic handling of younger children. For these books, wider tape rolls—ideally 100mm or broader—are highly recommended because they allow you to cover large surface areas with minimal seams.
A moderate thickness of around 50 to 60 microns is ideal for this age group. This thickness provides sufficient protection against spills and rough handling while remaining flexible enough to wrap around thin, softcover edges without lifting. Using excessively stiff tape on very thin books can cause the covers to curl inward, so maintaining flexibility is key.
Upper Primary (Grades 4–6)
As students progress to upper primary, textbooks become thicker, heavier, and more standardized in size, often matching A4 or B5 dimensions. Backpacks become more crowded with multiple subject files, increasing the friction and pressure on book edges during daily packing and unpacking.
For these standard-sized textbooks, a balanced tape thickness of 60 to 70 microns offers the necessary structural reinforcement. This thickness prevents the corners of heavy books from splitting when dropped or shoved into tight spaces. A tape width of 75mm to 100mm allows for efficient coverage, requiring fewer passes to seal the front and back covers securely.
Secondary and Above
Secondary school and tertiary students handle thick, heavy reference books, dense literature texts, and multi-chapter modules that must survive intense study sessions, transit, and long academic terms. These books are subject to constant page-turning, spine flexing, and surface abrasion from desks and library tables.
To protect these high-use volumes, choose heavy-duty clear tape with a thickness of 70 to 80 microns or more. This heavy-duty grade resists deep scratches and maintains its structural integrity even when subjected to constant friction. High-clarity tape is essential here, as secondary texts often feature small-print reference tables and detailed diagrams on their covers that must remain sharp and readable.
Step-by-Step Guide to Applying Thick Clear Tape Smoothly
Achieving a professional, bubble-free finish with thick clear tape requires patience, a clean workspace, and the right technique. Because thick tape is stiffer than standard stationery tape, proper preparation and application steps are vital to prevent permanent creases.
Begin by preparing the book’s surface. Wipe the entire cover with a dry, lint-free microfiber cloth to remove any dust, static, or natural oils left by hands. Any debris left on the cover will be permanently trapped under the adhesive, creating unsightly bumps and reducing the tape’s overall adhesion.
When applying the tape, do not pull the entire backing off at once if using a backed tape, or do not pull a long free strip if using a standard roll. Anchor the leading edge of the tape along one side of the book cover, leaving a small overhang of about 15mm to 20mm. Slowly roll the tape across the surface while using a plastic squeegee, a felt-edged scraper, or a thick plastic ruler to press the tape down in firm, overlapping strokes from the center outward to push out air bubbles.
For trimming and folding, use sharp, clean scissors or a utility knife on a cutting mat. Cut a small diagonal notch at each corner of the book’s spine to allow the overhanging tape to fold over the cover edges cleanly without bunching. Fold the overhanging edges tightly over the inside covers, pressing firmly to secure the bond. If using blades or scissors, ensure children are supervised, and always cut away from your body to prevent accidental slips.
Common Mistakes to Avoid When Covering Textbooks
One of the most frequent errors when working with thick clear tape is stretching the tape during application. Because thick plastic films have a degree of elasticity, pulling them tightly while sticking them down creates tension; over time, the tape will slowly shrink back to its original length, causing the edges to peel, curl, or pull the book cover with them.
Another mistake is using tape that is too narrow for the book’s face, resulting in multiple parallel seams. These seams not only look untidy but also create ridges where dirt, lint, and moisture can accumulate, eventually weakening the adhesive and causing the tape to lift.
Finally, many people ignore the flexibility of the book’s spine. If you tape tightly across the spine of a closed book, the tape will stretch or split when the book is opened fully. Always allow a tiny amount of slack or apply the tape while the book is partially open to ensure the spine can flex naturally without cracking the protective layer.
Frequently Asked Questions (FAQ)
Can I use thick clear tape on books with glossy covers?
Yes, thick clear tape adheres exceptionally well to glossy paper and laminated covers. However, because glossy surfaces are highly non-porous, the adhesive bond can become incredibly strong over time. Before applying, check the tape packaging to ensure the adhesive is formulated for clean removal or is labeled as acid-free, which reduces the risk of the adhesive chemically bonding with and tearing the glossy laminate if you ever need to adjust it.
How do I remove old, yellowed tape without damaging the book?
Removing old tape requires extreme care, especially on paper covers. You can gently warm the tape using a hair dryer on its lowest heat setting for a few seconds to soften the aged adhesive. Once warmed, slowly peel the tape back at a sharp 180-degree angle, rather than pulling straight up. Always test this method on a small, inconspicuous corner of the book first to ensure the heat or adhesive residue does not lift the printed ink or tear the underlying paper fibers.
Community discussion
Share your experience or ask a question. Comments are reviewed before publication.