
You can easily print high-quality custom photocards at home using a standard desktop inkjet or laser printer. The secret to achieving a professional, store-bought feel lies in matching your printer’s capabilities with the correct paper weight, setting up precise digital templates, and using dedicated finishing tools. With a few adjustments to your print settings and a steady hand for trimming, your DIY cards can look remarkably polished.
By taking control of the printing process, you can create personalized gifts, custom collectibles, or event favors tailored to your exact preferences. This guide walks you through the complete process, from selecting the right materials to executing precise cuts and protecting your finished cards.
Essential Materials and Equipment for Photocard Printing
Selecting the right materials is critical for ensuring your custom photocards have the correct rigidity, texture, and visual appeal. Standard photocards are typically printed on heavy paper between 220 gsm and 300 gsm (grams per square meter). Glossy photo paper offers vibrant colors and high contrast, making it ideal for colorful designs, though it is highly susceptible to fingerprints. Matte photo paper provides a smooth, elegant finish that resists smudges, while heavy cardstock offers excellent rigidity but may require a protective laminate to prevent colors from looking dull.
Products mentioned in this guide
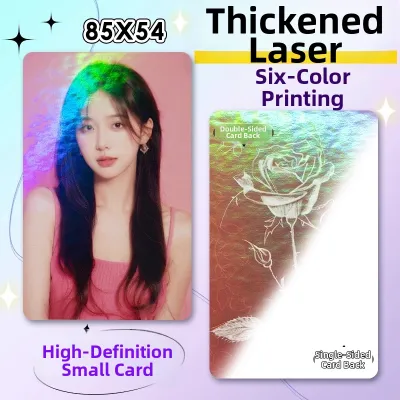

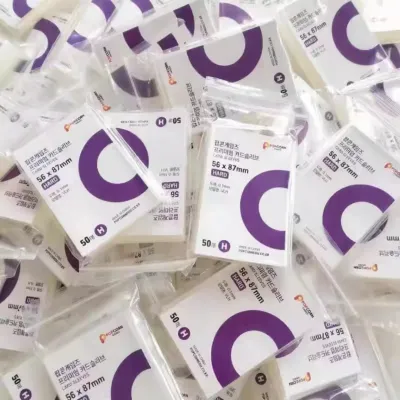
Prices are valid at publication and may change. Please refer to the product page for the latest price.
Before purchasing paper, verify your printer’s compatibility by checking its user manual for the maximum supported paper weight. Many standard home printers struggle to feed paper thicker than 250 gsm through their standard trays, which can lead to roller slippage, misaligned prints, or severe paper jams. If your printer has a manual feed slot or a rear paper tray, use it, as these paths keep the paper flatter during the printing process.
For the finishing stages, you will need tools that ensure clean, straight edges and rounded corners. A rotary paper trimmer or a heavy-duty guillotine cutter is essential; always handle these tools with care, keeping your fingers clear of the blade path and engaging the safety lock when not in use. A 3-in-1 corner rounder punch (ideally with a 4mm or 5mm radius setting) is necessary to mimic the rounded corners of commercial cards. Finally, gather some acid-free plastic sleeves or rigid toploaders to protect your finished prints from moisture and scratches.
Preparing and Formatting Your Photocard Designs
To prevent cutting errors and unsightly white borders, format your digital files with precise dimensions and safety margins. Standard photocard dimensions are typically 54 mm by 86 mm, which is roughly equivalent to 2.1 by 3.4 inches. When setting up your digital canvas in your preferred design software, ensure your resolution is set to at least 300 DPI (dots per inch) to guarantee sharp, detailed prints.

A common mistake is designing exactly to the final card dimensions, which leaves no room for trimming errors. To avoid this, incorporate a bleed area of 2 mm to 3 mm around the entire perimeter of your design, extending your background image fully into this zone. Place thin crop marks or visual guide lines outside the bleed area to show exactly where your trimmer blade should cut. This ensures that even if your blade shifts slightly during trimming, the card will still feature edge-to-edge color without any white paper showing.
You must also account for how colors translate from your computer screen to the printed page. Screens display images using RGB light, while home printers use CMYK inks, which naturally absorb light and can make prints look darker or less saturated. To compensate for this ink absorption, slightly increase the brightness and contrast of your digital files before printing. Running a single-card test print on plain paper is an excellent way to verify color accuracy before using your premium photo paper.
Optimizing Printer Settings for High-Quality Results
To achieve accurate colors and sharp details, manually adjust your printer driver settings rather than relying on default configurations. When you open your printer’s print dialog, locate the Media Type or Paper Type setting. Never leave this on Plain Paper when printing on specialty media; instead, select the option that matches your loaded paper, such as Glossy Photo Paper or Matte Cardstock. This setting dictates how much ink or toner the printer deposits and adjusts the feed speed to prevent pooling or smearing.
Next, change the print quality setting from Standard or Draft to High or Best. This increases the print resolution, ensuring that fine details are sharp and color gradients transition smoothly without visible banding. Keep in mind that high-quality modes use more ink and print at a slower speed, which is necessary to allow the paper to absorb the ink properly.
Color management is another crucial setting to consider. If you are using advanced design software, you can choose to let the software manage colors, selecting the specific ICC profile that matches your paper brand. For simpler setups, select Printer Managed Colors and let the printer’s internal software optimize the output. Always print a single test sheet on standard copy paper first to verify that the layout, alignment, and image orientation are correct before loading your expensive cardstock.
Step-by-Step Printing and Finishing Process
Once your files are prepared and your settings are optimized, you can begin the physical printing and assembly process. Start by fanning your specialty paper sheets to eliminate static electricity, which can cause multiple sheets to feed at once. Load the paper into your printer’s rear tray or manual feed slot, adjusting the paper guides snugly against the edges of the sheet to ensure a perfectly straight feed. Print your designs, handling the completed sheets only by their outer margins to avoid transferring oils from your fingers.
Allowing adequate drying time is essential for inkjet prints, as the wet ink needs to cure and fuse with the paper’s coating. Place the printed sheets flat on a clean, dust-free surface in a low-humidity environment for at least 15 to 30 minutes before handling them. If you are using a laser printer, the toner is fused instantly by heat, but you should still let the sheets cool to room temperature to prevent the paper from curling during the cutting process.
For precision cutting, place your dried sheet onto the bed of your paper trimmer. Align the ruler or guide edge precisely with your printed crop marks, press down firmly on the paper guard to secure the sheet, and slide the blade in one smooth, continuous motion. Once all straight cuts are complete, insert each corner of the individual cards into your corner rounder punch, pressing down firmly to create clean, uniform rounded edges.
To preserve the quality of your custom photocards, slide them into clear, acid-free polypropylene sleeves immediately after cutting. For extra protection and a premium feel, you can place the sleeved cards inside rigid plastic toploaders. This shielding prevents physical scratches, corner bending, and moisture damage over time.
Troubleshooting Common Photocard Printing Issues
Even with careful preparation, you may encounter minor print defects that require troubleshooting. If your printed colors look dull, faded, or have an unusual color cast, perform a printhead nozzle check to ensure none of the ink nozzles are clogged. Additionally, double-check that your printer settings match the loaded paper type, as printing on photo paper with a Plain Paper setting will result in insufficient ink deposition and washed-out colors.
If you experience smudging, bleeding, or ink pooling on the surface of your cards, the paper coating may not be compatible with your ink type. Ensure you are using inkjet-compatible paper for inkjet printers, as laser-only papers lack the absorbent coating required to lock in liquid ink. If the paper is compatible, try reducing the ink saturation in your printer driver settings or allowing the prints to dry in a less humid room.
Misaligned cuts and uneven borders are usually caused by the paper shifting during trimming or a dull blade. Always use the built-in grid lines and paper clamps on your trimmer to keep the sheet perfectly square, and replace your trimmer blade regularly to prevent tearing. If your printer jams repeatedly, verify that your paper does not exceed the printer’s maximum weight limit, and try feeding the sheets one at a time through the manual bypass tray.
Frequently Asked Questions (FAQ)
Can I use regular copy paper for photocards?
Standard copy paper is not suitable for photocards because it lacks the necessary thickness and specialized coating. Standard office paper typically weighs between 70 gsm and 80 gsm, which is far too thin to provide the rigid, premium feel of a collectible card. Furthermore, printing high-density images on uncoated copy paper causes the ink to saturate the paper fibers, leading to warping, wrinkling, and severe ink bleed. For acceptable durability and vibrant colors, always use a dedicated photo paper or coated cardstock weighing at least 220 gsm.
How do I prevent inkjet prints from smudging?
To prevent inkjet prints from smudging, always use quick-dry photo papers designed specifically for inkjet technology and handle the sheets only by their unprinted margins. Allow the prints to dry flat in a dust-free, low-humidity environment for at least 30 minutes before cutting. For long-term protection, you can apply a light, even coat of a compatible clear acrylic sealant spray in a well-ventilated area, or apply a thin self-adhesive laminating sheet over the printed surface before trimming the cards.
What is the best way to cut multiple photocards evenly?
The most reliable way to cut multiple photocards with consistent dimensions is to use a rotary paper trimmer or a heavy-duty guillotine cutter rather than scissors. A rotary trimmer is highly recommended for beginners because the blade slides along a metal guide rail, ensuring perfectly straight lines. To process multiple cards efficiently, print clear crop marks on your template, align these marks carefully with the trimmer’s cutting edge, and secure the paper firmly against the top guide bar to prevent shifting before making your cut.
Community discussion
Share your experience or ask a question. Comments are reviewed before publication.