
Personalizing a greeting card is a wonderful way to transform a simple message into a cherished keepsake. When I Was Four cards, celebrated for their nostalgic designs, retro school motifs, and local cultural humor, offer a delightful canvas for your own creative additions. By integrating personal photographs, handwritten notes, and thoughtful embellishments, you can elevate these charming cards into bespoke gifts that resonate deeply with the recipient.
The secret to successful customization lies in selecting the right tools and techniques. Because these cards feature unique paper stocks and pre-printed illustrations, using incompatible materials can lead to warping, smudging, or tearing. Taking a methodical approach to your DIY additions ensures that your personal touches enhance the original artwork while preserving the card’s structural integrity for years to come.
Selecting Paper-Safe Tools and Materials
Before beginning your project, it is essential to gather tools and adhesives that are gentle on paper. Standard liquid school glues contain a high water content, which easily saturates paper fibers. This moisture causes the cardstock to swell, buckle, and warp as it dries, often ruining the flat profile of the card. Instead, opt for dry adhesives such as acid-free double-sided tape, glue tape rollers, or adhesive dots. These tools provide a strong, instant bond without introducing moisture, keeping your card perfectly flat.
Products mentioned in this guide
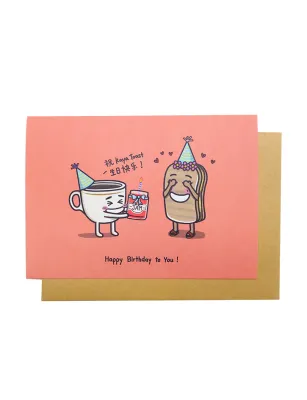
Prices are valid at publication and may change. Please refer to the product page for the latest price.
When choosing decorative embellishments, consider how their weight and texture interact with the card’s surface. Matte, uncoated paper stocks are highly receptive to low-tack washi tapes, paper stickers, and ink stamps. If the card has a semi-gloss or coated finish, heavy embellishments may slide or fail to adhere properly. Lightweight paper accents, pressed flat botanicals, and thin vinyl stickers are excellent choices that add visual interest without creating excessive bulk.
Precision is key to achieving a polished, professional look. Equip your workspace with a self-healing cutting mat, a stainless steel ruler, and a sharp craft knife or precision scissors. A metal ruler is particularly important, as it provides a firm, straight edge that will not be shaved away by a craft blade. When cutting photos or decorative borders, always work on a stable surface, keep your fingers well behind the cutting edge, and apply light, repeated passes with the blade rather than forcing a single deep cut.
Customizing the Photo and Core Layout
Many nostalgic card designs feature retro frames, polaroid-style borders, or open spaces reminiscent of vintage photo albums. Adding a personal photograph to these designated areas instantly anchors the card’s theme. Begin by measuring the exact dimensions of the pre-printed frame on the card. When selecting a photo, choose an image where the main subjects are centered, leaving enough background space around the edges to allow for clean cropping without cutting off important details.

To mount your photo securely without causing permanent damage, consider using acid-free photo corners. These small triangular pockets stick to the card’s surface and hold the corners of the photo in place, allowing the recipient to slide the picture out easily if they wish to frame it separately. If you prefer a permanent mount, apply thin strips of double-sided tape along the outer edges of the photo’s reverse side, pressing down firmly from the center outward to prevent air bubbles.
To make your photograph stand out against the card’s pre-printed background, you can introduce a subtle paper mat. Cut a piece of contrasting cardstock—such as rustic kraft paper, pastel sheets, or textured handmade paper—slightly larger than your photo. Adhere the photo to this backing paper first, leaving a thin, even border around the edges, before mounting the entire assembly onto the card. This simple layering technique adds depth and frames your photo beautifully, making it the clear focal point of the design.
Layering Handwritten Elements and Embellishments
Your handwriting is the most personal element of any card, but different paper finishes react uniquely to different inks. Matte, uncoated cardstock is highly absorbent, making it ideal for fountain pens, gel pens, and fine-liners. However, highly pigmented inks or wet gel pens can bleed through thin paper or smudge if handled too quickly. To prevent ruined designs, always perform a quick drying-time test on an inconspicuous area of the card, such as the back corner or the inside fold, before writing your main message.
Many cards from this brand feature playful fill-in-the-blank prompts or retro school-book layouts. Work with these pre-printed elements rather than trying to crowd them. Use a fine-tip black or blue gel pen to fill in the prompts neatly, matching the scale of the printed text. For your main message, utilize the open spaces of the card, keeping your handwriting neat and spaced. If you wish to add hand-drawn doodles or custom stamps, sketch them lightly in pencil first to ensure proper placement before committing to ink.
To maintain a balanced visual hierarchy, group your embellishments strategically rather than scattering them randomly across the card. Placing small clusters of stickers, washi tape strips, or tiny stamps in opposing corners creates a framing effect that draws the eye toward your handwritten message. Leave plenty of empty space around your text to ensure readability, allowing the original illustrations and your personal additions to coexist harmoniously.
Elevating the Envelope and Final Presentation
The presentation begins the moment the recipient receives the envelope. You can extend the nostalgic theme to the exterior by decorating the envelope flap with a strip of coordinating washi tape or a custom wax seal. If you choose to use a wax seal, opt for a flexible, mailing-grade wax that can withstand the sorting process without cracking. Keep the front of the envelope clean and highly legible, using a dark, waterproof pigment pen for the recipient’s address to ensure it remains readable during transit.
For an extra touch of elegance, consider bundling the card with a custom belly band or a wrap of natural baker’s twine. Cut a strip of textured paper, wrap it horizontally around the closed card, and secure it at the back with double-sided tape. You can slip a small, flat gift under this band—such as a custom bookmark, a sheet of nostalgic stickers, or a flat sachet of local tea. This turns the simple act of opening the card into a multi-layered, tactile experience.
Before finalizing your presentation, always check the overall thickness and clearance of your decorated card. Bulky embellishments like thick foam tape, wooden buttons, or heavy wax seals can make the envelope too thick for standard mailing slots. If you plan to mail the card, ensure it remains flat and within standard thickness limits to avoid extra S$ postage fees or potential damage in the sorting machines. If the card is exceptionally thick or fragile, delivering it by hand or placing it inside a padded gift bag is the safest way to ensure your hard work arrives in pristine condition.
Frequently Asked Questions (FAQ)
How do I fix a smudge or mistake made with ink on the card?
If you make a mistake or smudge the ink while writing, first assess the card’s paper finish. On uncoated matte paper, wet correction fluid can sink in and create an uneven texture. If the ink is still wet, gently dab the area with a clean, dry paper towel to lift the excess pigment without rubbing it into the paper fibers. For dry ink smudges, a specialized sand eraser can sometimes gently shave away the topmost layer of paper fibers, but use very light pressure to avoid tearing the cardstock.
If the smudge cannot be erased cleanly, the best approach is to cover it creatively. Place a decorative sticker, a strip of matching washi tape, or a small piece of contrasting paper over the mistake, then write your corrected text on top of the new layer. This turns an accidental error into an intentional design element. However, if the damage is extensive and covers key pre-printed illustrations or structural folds, it may be best to start fresh with a new card to preserve the quality of your gift.
Can I use liquid glue for attaching heavy embellishments?
Using standard liquid craft glues on greeting card stock is generally not recommended. The water content in liquid glues easily saturates the paper, leading to unsightly warping, wrinkling, and potential ink bleeding on the reverse side of the card. Additionally, liquid glues take time to dry, during which heavy embellishments can slide out of alignment, leaving messy residue behind.
To secure heavier 3D elements like ribbons, buttons, or dried flowers, use dry, high-tack alternatives. Double-sided foam tape is excellent for adding dimensional depth while holding lightweight items securely. For heavier or irregular objects, high-tack glue dots or adhesive squares provide an instant, moisture-free bond that keeps the embellishments firmly in place. Always test your chosen adhesive on a scrap piece of similar paper first to verify its holding strength and ensure it does not bleed through the cardstock.
Community discussion
Share your experience or ask a question. Comments are reviewed before publication.