
A beautifully presented gift begins long before the recipient opens it. While a simple gift bag offers convenience, transforming it into an elegant, memorable presentation requires a thoughtful combination of accessories. By coordinating the textures, colors, and structures of ribbons, tissue paper, and tags, you can elevate standard gift bags into cohesive works of art. Achieving this polished look relies on understanding basic design principles, mastering neat assembly techniques, and matching your materials to the structural style of the bag.
Core Principles for Cohesive Gift Bag Styling
To create a visually satisfying presentation, start by establishing a clear design theme rather than selecting accessories at random. A cohesive aesthetic relies on a deliberate color strategy. You can choose a monochromatic palette, which uses varying shades of a single color—such as navy, slate, and sky blue—to create a sophisticated, modern look. Alternatively, a complementary scheme pairs opposite colors on the color wheel, like forest green and warm gold, for a vibrant contrast. For a subtle approach, an accent palette uses a neutral bag, such as white or kraft paper, paired with a single bold pop of color in the ribbon or tissue paper.
Texture and pattern coordination also play a vital role in balancing the overall design. If your gift bag features a busy, intricate pattern, pair it with solid-colored tissue paper and a simple ribbon to avoid visual clutter. Conversely, a plain, matte bag provides the perfect canvas for textured ribbons, such as grosgrain or velvet, and patterned tissue paper. Mixing textures—like pairing a smooth satin ribbon with a rustic, textured paper tag—adds depth and tactile interest without overwhelming the eyes.
Products mentioned in this guide

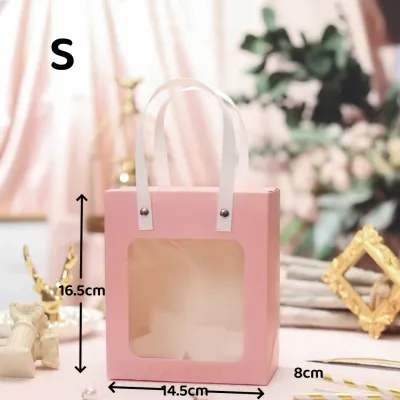
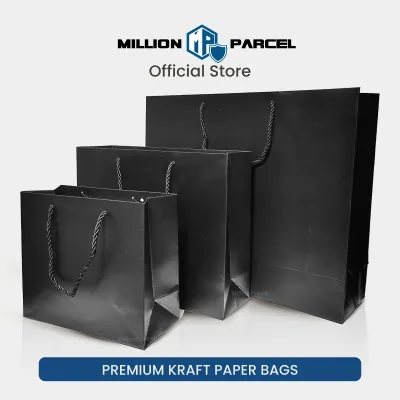

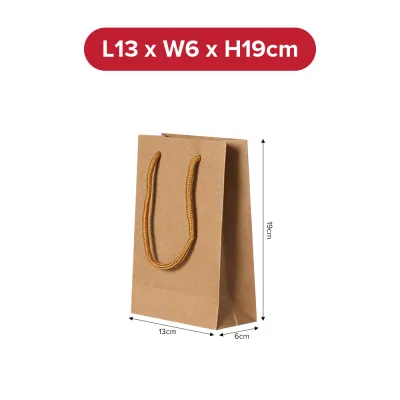

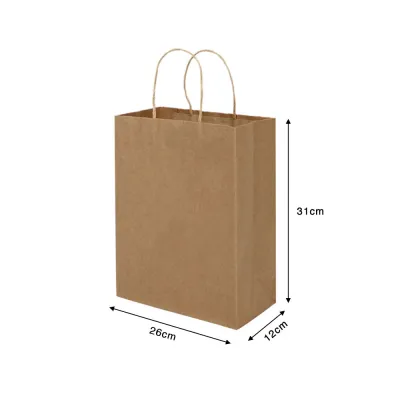

Prices are valid at publication and may change. Please refer to the product page for the latest price.
Finally, let the occasion and the recipient’s profile guide your styling choices. A formal event, such as a wedding or corporate milestone, calls for refined materials like metallic accents, crisp linen-finish tags, and structured satin bows. For a casual birthday or festive holiday gathering, you can experiment with playful patterns, bright colors, and whimsical tag shapes. Aligning the style of the presentation with the spirit of the event ensures your gift feels personal and intentional from the very first glance.
Step-by-Step Assembly for a Professional Finish
Achieving a flawless presentation requires a systematic approach to assembling each component. First, verify that the dimensions of your tissue paper sheets are proportional to the bag; standard medium bags typically require sheets of at least 50 by 70 centimeters to achieve a full, fluffed look. Lay a sheet of tissue flat on a clean surface, pinch the sheet directly in the center, lift it up, and give it a gentle tug downward to form a neat cone shape. Fluff the top edges outward, then place the pinched bottom into the bag. Repeat this with two or three sheets, layering them so the fluffed corners flare out of the bag opening in a balanced, symmetrical arrangement.

Once the tissue paper is positioned, focus on attaching the ribbon to the handles. If the bag has rope or ribbon handles, you can tie your decorative ribbon directly to the base of the handle where it meets the bag grommet. For flat paper handles, loop the ribbon through both handles and tie a neat bow at the center, ensuring the tension is even so the handles do not warp or tear. When cutting the ribbon ends, always use sharp fabric scissors and cut at a clean 45-degree angle or a classic swallowtail V-shape to prevent fraying and add a professional touch.
The final step is positioning and securing the gift tag. A tag should be easily visible but should not block other decorative elements. Thread the tag string through one of the bag handles or tie it directly into the knot of your decorative ribbon bow. If the bag has a busy pattern, position the tag against a solid-colored section or let it drape gracefully over the front face of the bag. When writing on glossy or coated tags, verify that your pen’s ink type—such as gel or ballpoint—is compatible with the surface to prevent smudging, and allow sufficient drying time before attaching the tag. Ensure the tag lies flat and does not twist backward, keeping the recipient’s name clearly legible.
Matching Accessories to Different Gift Bag Materials
The physical properties of your gift bag dictate which accessories will look and perform best. Glossy or coated paper bags have a smooth, reflective surface that pairs exceptionally well with delicate, high-shine ribbons like double-sided satin or organza. For these bags, choose crisp, high-density tissue paper that holds its shape and matches the premium feel of the coated paper. Avoid heavy, rustic twines or thick burlap ribbons on glossy bags, as the stark contrast in texture can look mismatched rather than intentional.
For kraft paper or recycled paper bags, embrace a natural, organic aesthetic. These matte, textured surfaces pair beautifully with rustic accessories like cotton twine, jute cord, or raffia. Choose tags made from heavy cardstock, kraft paper, or even wooden veneer to complement the earthy tone of the bag. When selecting tissue paper for kraft bags, look for soft, muted tones or simple white sheets to maintain a clean, minimalist appearance that highlights the raw texture of the paper.
Non-woven or reusable fabric bags require a different approach to handle their flexible structure. Because fabric bags lack the rigid edges of paper, heavy embellishments can cause the sides to sag. Opt for lightweight, wide ribbons like grosgrain, which provide structural support and hold their shape when tied into larger bows. Use simple, lightweight paper tags to avoid pulling down the fabric handles, and choose soft, pliable tissue paper that conforms easily to the flexible interior of the bag without pushing the sides outward.
Common Pairing Mistakes and How to Avoid Them
One of the most frequent styling errors is overcrowding the presentation with too many competing elements. Using a patterned bag, patterned tissue paper, and a multi-colored ribbon simultaneously creates visual chaos that detracts from the gift. To avoid this, follow the rule of balance: if one element is highly detailed or patterned, keep the other two components solid and understated. This allows the eye to focus on a single design highlight rather than struggling to process conflicting visual cues.
Another common mistake is using ribbons that are structurally mismatched with the bag’s handles. Thin, delicate string tied to thick, padded rope handles can look lost and insignificant, while a wide, heavy velvet ribbon tied to thin paper handles can cause the paper to tear or fold under the weight. Always match the scale and weight of your ribbon to the thickness of the handles. A good guideline is to choose a ribbon width that is roughly equal to or slightly wider than the handle material itself to ensure a balanced silhouette.
Finally, be mindful of the structural weight limits of both the bag and its accessories. Attaching heavy, elaborate tags, clay ornaments, or dense wooden embellishments to a small, lightweight paper bag can cause the bag to tip over or the handles to fail during transport. If you wish to use a heavier decorative tag, secure it close to the base of the handle or rest it gently against the body of the bag rather than letting it dangle freely. This distributes the weight more evenly and preserves the structural integrity of your presentation.
Frequently Asked Questions (FAQ)
Can I reuse ribbons and tags from previous gifts?
Yes, reusing ribbons and tags is an excellent way to reduce waste, provided they are carefully inspected and refreshed. Before using them, check for noticeable creases, fraying edges, or fading colors. You can remove creases from satin or grosgrain ribbons by pulling them gently over the edge of a warm hair straightener or using a low-heat iron. If the ends of a ribbon are frayed, simply trim them at a fresh 45-degree angle. For gift tags, ensure any previous writing is completely covered or trim away damaged edges with a paper trimmer to restore a clean, sharp border.
How do I keep tissue paper from slipping out of the bag?
To prevent tissue paper from shifting or falling out during transport, you can anchor it using simple folding and securing techniques. When placing your gift inside the bag, wrap the bottom portion of the tissue paper around the item itself; the weight of the gift will naturally hold the paper in place at the bottom of the bag. For extra security, you can apply a small piece of double-sided tape or a removable glue dot to the inside rim of the bag, then gently press the outer folds of the tissue paper against it. This keeps the paper perfectly fluffed and positioned without damaging the bag.
Community discussion
Share your experience or ask a question. Comments are reviewed before publication.