
Packaging cookies beautifully requires a thoughtful combination of food-safe barriers, airtight sealing techniques, and coordinated decorative accents. To achieve a professional, bakery-grade presentation, you must first secure the freshness of your baked goods before layering on aesthetic elements like ribbons, custom tags, and stickers. This guide walks you through selecting the right materials, executing a flawless seal, and applying decorative finishes that protect your treats while delighting your recipients.
Essential Materials and Tools for Cookie Packaging
Selecting the right packaging materials is the foundation of a successful gift presentation. The primary container must serve as a protective shield against environmental factors while showcasing the visual appeal of your baked goods. Clear plastic bags made from oriented polypropylene (OPP) or cellophane are highly favored for their exceptional clarity and moisture-barrier properties. These materials allow the intricate details of decorated sugar cookies, vibrant macarons, or classic chocolate chip cookies to remain fully visible to the recipient.
If you prefer a rustic or organic aesthetic, kraft paper bags with built-in clear windows offer an excellent alternative. However, when using paper-based packaging, you must verify that the interior is lined with a grease-resistant barrier. Without this protective lining, butter and oils from the cookies will gradually seep into the paper, resulting in unsightly dark stains that compromise the presentation.
Products mentioned in this guide
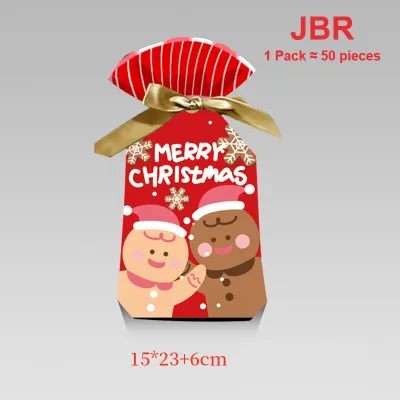
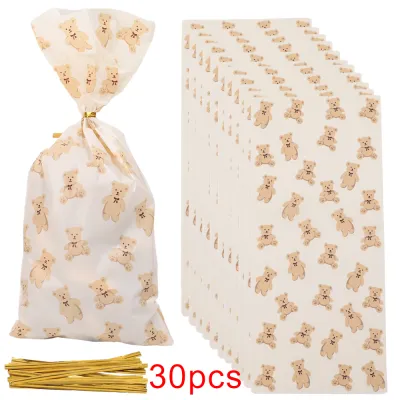
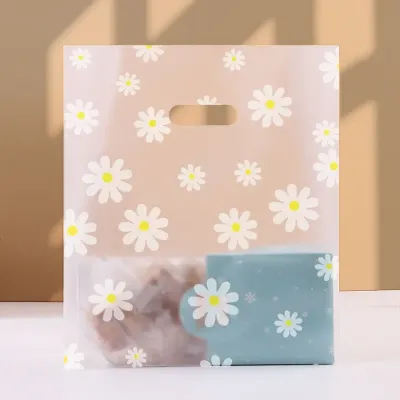
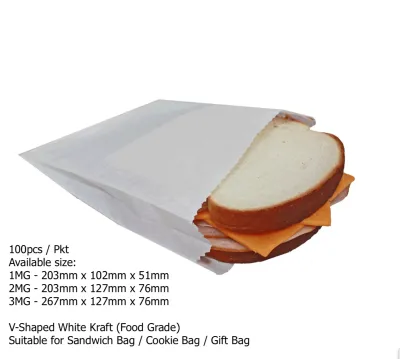
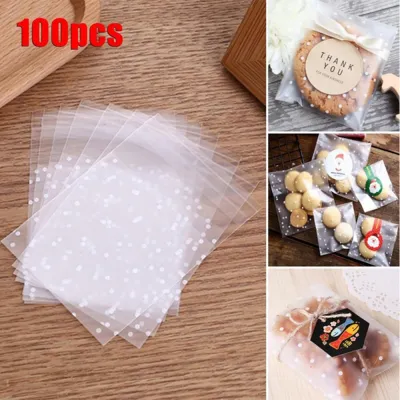
Prices are valid at publication and may change. Please refer to the product page for the latest price.
Beyond the bag itself, your choice of sealing tools directly impacts the shelf life of your cookies. Tabletop impulse heat sealers are the gold standard for creating a true airtight bond on compatible plastic bags. A basic tabletop impulse sealer, which typically costs between S$20 and S$50 at local kitchenware or packaging suppliers in Singapore, is a worthwhile investment if you package baked goods regularly. For temporary or less demanding seals, high-tack clear adhesive tape, self-adhesive sealing strips, or decorative twist ties can be used, though they do not offer the same level of moisture protection as a heat seal.
The decorative elements, such as ribbons, twines, and tags, should be selected to complement the occasion and the bag material. Satin ribbons provide a smooth, luxurious sheen that elevates holiday and wedding gifts, while grosgrain ribbons offer a ribbed texture that holds knots exceptionally well. Natural baker’s twine or jute string pairs beautifully with kraft paper for a cozy, handmade feel.
Regardless of the style you choose, food safety must remain your top priority. Always verify that any packaging material in direct contact with the cookies is explicitly certified as food-safe or FDA-compliant. If you wish to use highly decorative boxes, fabric pouches, or non-certified paper bags, you must first package the cookies in a small, food-safe plastic barrier bag before placing them inside the outer decorative container.
Step-by-Step Guide to Sealing Cookie Bags
Achieving a secure, professional seal requires patience and attention to detail. The sealing process not only keeps the cookies from falling out but also locks out humidity, which is particularly important in warm, tropical climates where cookies can quickly go soft.

Before you begin packaging, you must ensure that your cookies are completely cooled to room temperature. This step is non-negotiable. Warm cookies release residual steam; if you seal them inside a plastic bag immediately, this moisture will condense on the inner walls of the plastic. This trapped condensation creates a damp environment that ruins the crisp texture of the cookies and accelerates the growth of mold. Allow your cookies to rest on a wire cooling rack for at least one to two hours, and touch the thickest part of the cookie to confirm there is no lingering warmth before proceeding.
Once the cookies are fully cooled, prepare your workspace by cleaning and drying all surfaces. Use clean hands, food-safe gloves, or kitchen tongs to handle the cookies. Carefully slide the cookies into the bag, taking care not to drag greasy edges along the upper portion of the bag where you plan to seal or tie the ribbon. Grease residue on the sealing area can prevent heat sealers from bonding properly and can make adhesive tape peel away. Leave at least two to three inches of empty space at the top of the bag to accommodate the seal and the ribbon.
To execute a heat seal, plug in your impulse sealer and adjust the heating dial. For standard thin OPP bags, a low-to-medium setting is usually sufficient. Align the open top of the bag flat across the silicone heating strip, ensuring there are no wrinkles or folds in the plastic. Press the sealer arm down firmly. Hold the arm down until the indicator light turns off, and continue to hold it for one additional second to allow the melted plastic to cool and solidify into a strong seam.
If you are folding and taping the bag instead, fold the top edge down tightly by about half an inch, then fold it over a second time to create a secure double fold. Press the fold flat to crease the plastic, then apply a strip of high-tack clear packaging tape or a decorative paper sticker across the center of the fold to hold it in place.
After sealing, you must verify the integrity of the closure. Gently press the sides of the bag to check for air leaks. If you feel air escaping or if the bag deflates under light pressure, the seal is incomplete. Inspect the sealed edge closely to identify any gaps or weak spots.
Always observe a strict stop condition during heat sealing: if the plastic melts completely through, curls excessively, or emits a sharp burning odor, immediately release the sealer arm and unplug the device. This indicates that the heat setting is too high or the heating cycle is too long. Allow the sealer to cool, wipe away any melted residue from the heating element, lower the temperature dial, and test again on a scrap piece of bag material before continuing with your cookies.
Tying Ribbons and Adding Decorative Finishes
Once your cookie bags are securely sealed, you can begin the creative process of adding ribbons, tags, and other decorative embellishments. This step transforms a simple plastic sleeve into an elegant, personalized gift.
Start by measuring and cutting your ribbon to the appropriate length. For a standard bow on a medium-sized cookie bag, a ribbon length of approximately 30 to 40 centimeters is ideal. This length provides enough slack to wrap around the neck of the bag, tie a secure knot, and form neat loops without leaving excessively long tails that drag. Use sharp fabric shears to make a clean, diagonal cut at a 45-degree angle, or cut a small “V” shape into the ends of the ribbon. This clean finish prevents the fabric fibers from fraying over time.
To tie the ribbon, gather the excess plastic at the top of the bag, positioning your gather just above the heat seal or tape line. Wrap the ribbon around the gathered neck and tie a single, firm knot. If you are using slippery materials like satin or organza, the knot may loosen as you attempt to tie the bow. To prevent this, you can tie a secure double knot first, or use a small, clear elastic hair band to secure the gathered plastic before wrapping the ribbon over it.
Form two even loops with the ribbon tails and tie them into a classic bow. Gently pull the loops and tails to adjust their size, ensuring the bow is symmetrical and proportional to the size of the cookie bag. The bow should be snug against the gathered plastic but not tied so tightly that it distorts the shape of the bag or puts pressure on the cookies inside.
To add a personalized touch, you can easily incorporate gift tags, custom stickers, or natural accents. Slide a pre-punched gift tag onto one of the ribbon tails before tying the final bow, ensuring the written message faces forward. If you prefer stickers, apply a custom-printed label or a metallic seal directly onto the flat surface of the bag, centering it below the ribbon or using it to secure the folded flap. For a botanical touch, tuck a small sprig of dried lavender, rosemary, or a mini bunny tail grass behind the ribbon knot before tightening the bow.
When designing your packaging, aim for visual balance. The decorative elements should enhance the presentation, not obscure the cookies themselves. Keep the ribbon and tags concentrated at the top of the bag, leaving the main body clear so the recipient can appreciate your baking. Additionally, avoid adding heavy ornaments or excessively thick ribbons that could weigh down the top of the bag, as this can cause the plastic to sag, wrinkle, or tear during transport.
Troubleshooting Common Packaging Mistakes
Even with careful preparation, packaging issues can arise. Understanding how to identify and resolve these common mistakes will save you time and preserve the quality of your gifts.
Condensation is one of the most frequent issues, especially in humid environments. If you notice a fine mist or water droplets forming inside the sealed bag, the cookies were packaged before they had cooled completely, or high ambient humidity was trapped inside during the sealing process. To prevent this, always package your cookies in a cool, dry, air-conditioned room. If condensation has already formed, you must remove the cookies immediately, as the moisture will make them soggy and encourage mold. Let the cookies air-dry on a rack, discard the damp bag, and repackage them in a fresh, dry container.
If you encounter broken seals or melted plastic when using an impulse sealer, the issue is usually related to temperature settings or material compatibility. If the plastic splits or melts into holes, lower the heat dial on your sealer. If the seal pulls apart easily without bonding, increase the heat setting slightly or hold the sealer arm down for an extra second after the light goes out to let the plastic set. If the bag material is not designed for heat sealing (such as certain types of true cellophane or thick paper-lined bags), switch to a high-quality double-sided tape or a mechanical closure like a twist tie.
Slipping ribbons can ruin the look of your gift during transit. If your bows are sliding down the neck of the bag, the ribbon material may be too smooth. Switch to a textured ribbon, such as grosgrain, cotton twine, or rustic jute, which naturally grips the plastic. Alternatively, securing the neck of the bag with a small piece of double-sided tape before wrapping the ribbon can keep it firmly in place.
Grease stains on paper packaging can make an otherwise beautiful gift look unappealing. If you are using kraft paper bags or cardboard boxes, always check for grease-proof properties. If the packaging is not grease-resistant, place your cookies in a clear, food-safe plastic bag first, seal it completely, and then place the sealed bag inside the paper container. This dual-layer approach keeps the outer packaging pristine while maintaining the freshness of the cookies.
Frequently Asked Questions (FAQ)
How long do cookies stay fresh in a sealed gift bag?
The freshness of packaged cookies depends on the recipe’s moisture content, the storage environment, and the quality of the seal. Crisp cookies, such as shortbread or gingerbread, generally retain their texture longer than soft, chewy cookies, which can dry out or transfer moisture. An airtight heat seal provides the most effective barrier against ambient humidity, helping to preserve freshness. For precise shelf-life expectations, always refer to your specific recipe guidelines or consult professional baking standards.
Can I use regular craft ribbons for food packaging?
Yes, you can use standard craft ribbons, such as satin, grosgrain, or organza, as long as they are tied on the outside of a fully sealed bag and do not come into direct contact with the cookies. The sealed plastic bag acts as a protective barrier. However, if you plan to place ribbons, twine, or decorative tags inside the bag where they will touch the food, you must ensure those specific materials are certified food-safe and free from chemical dyes or loose fibers.
Community discussion
Share your experience or ask a question. Comments are reviewed before publication.