
Wrapping boxes for gifts neatly requires a blend of precise measurement, sharp creases, and controlled tension. A professional finish is not about speed; it relies on using the right paper weight, securing seams with hidden tape, and finishing with a balanced ribbon. By mastering a few fundamental folding techniques, you can transform any standard rigid box into a beautifully presented gift that shows care and attention to detail.
Gathering the Right Tools and Materials
To achieve a flawless finish, you must first prepare a dedicated workspace and gather high-quality materials. A clean, flat, and completely dry surface—such as a large dining table or a clean hardwood floor—is essential. Working on carpet or cluttered surfaces often leads to accidental paper punctures, uneven folds, and unwanted dust or pet hair sticking to your tape.
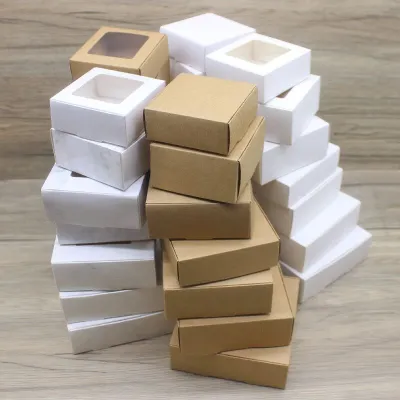
The foundation of your presentation is the gift box itself. Selecting sturdy boxes for gifts ensures that the structure remains rigid under the tension of the wrapping paper, preventing the sides from collapsing or bowing inward. If your gift is oddly shaped or fragile, placing it inside a solid cardboard box first is the most effective way to guarantee clean, sharp edges on the outside.
Products mentioned in this guide

Prices are valid at publication and may change. Please refer to the product page for the latest price.
Next, evaluate your wrapping paper. For beginners, a medium-weight paper (around 80 to 90 gsm) offers the best balance of flexibility and durability. Extremely thin paper tears easily at the corners, while overly thick, foil-lined, or heavily textured papers can be stubborn to crease and difficult to secure with standard tape. If your box is small, choose a paper with a small, repeating pattern; large motifs can get lost or look awkward when cut down to fit a compact surface.
Your choice of adhesive and cutting tools also directly impacts the final look. Sharp scissors are non-negotiable for clean, fray-free cuts along the paper. Always keep your scissors flat against the table when cutting to maintain control and prevent accidental slips. For the neatest appearance, opt for high-quality double-sided tape, which remains completely hidden beneath the paper seams. Before starting, perform a quick test by applying a small piece of tape to a scrap of your wrapping paper; this helps verify if the adhesive holds securely without tearing the paper fibers if you need to reposition it. Finally, select a ribbon that complements your paper’s color palette, ensuring it is wide enough to match the scale of your box.
Measuring and Cutting the Wrapping Paper
One of the most common reasons for messy gift wrapping is using too much or too little paper. Excess paper creates bulky, uneven folds that ruin the clean lines of the box, while insufficient paper leaves gaps that are difficult to hide. To avoid these issues, always measure your paper before making any cuts.

Begin by unrolling your wrapping paper on your flat workspace, keeping the patterned side facing down. Place your gift box in the center of the unrolled sheet. To measure the length required to wrap around the main body of the box, roll the box along the paper, marking each of the four sides. You want the paper to wrap completely around the box with an additional overlap of about two to three centimeters. This overlap ensures you have enough paper to fold a clean, straight seam where the edges meet.
Once the wrap-around length is established, you must measure the side overhang to cover the ends of the box. A reliable rule of thumb is that the paper extending from each side of the box should equal approximately half to three-quarters of the box’s depth. If the overhang is too long, it will bunch up when folded; if it is too short, the raw edges of the box will peek through. Use a ruler or the box itself as a guide to mark these side boundaries.
When you are ready to cut, use long, smooth scissor strokes rather than short, choppy snips. Keeping the paper taut with one hand while gliding the scissors through the sheet helps maintain a straight line. If you struggle with straight lines, look for wrapping paper that features a printed grid pattern on the reverse side, which serves as an excellent guide for perfectly symmetrical cuts.
Step-by-Step Instructions for Wrapping the Box
With your paper cut to the exact dimensions, you can begin the wrapping process. Place the paper face down on your work surface and position the gift box upside down in the exact center. Wrapping the box upside down ensures that the main seam and any tape placements remain hidden on the bottom of the finished gift.
To secure the main body, pull one side of the paper tightly over the bottom of the box and secure it temporarily with a small piece of tape. Next, take the opposite edge of the paper and fold it over by about one centimeter to create a clean, finished hem. Pull this hemmed edge tightly over the first layer, aligning it neatly along the center or edge of the box. Secure this seam with double-sided tape placed along the inside of the folded hem, pressing firmly to create a flat, seamless connection.
Now, turn your attention to the open ends of the box. Start on one side by pushing the top flap of paper downward against the side of the box, smoothing it flat to create two sharp, diagonal creases on the left and right. Crease these side flaps firmly with your thumb and forefinger to establish crisp, clean lines.
Next, fold the left and right side flaps inward against the box, forming a neat triangle or envelope shape with the remaining bottom flap. Each fold should be pulled tight against the box structure to prevent any sagging or air pockets. Crease the edges of these side flaps thoroughly.
Finally, fold the bottom triangular flap upward. Before securing it, fold the raw edge of this flap inward by half a centimeter to create a clean, straight hem. Pull the flap tightly against the side of the box and secure it with a piece of double-sided tape hidden underneath the fold. Repeat this entire process on the opposite end of the box, ensuring the tension remains consistent so the paper does not shift or warp.
Adding and Tying the Ribbon for a Polished Finish
A beautifully tied ribbon acts as the perfect frame for your wrapped box, adding texture and a sense of luxury. To begin, you must measure the correct length of ribbon. A practical method is to wrap the ribbon loosely around the length and width of the box, adding about thirty to forty centimeters of extra length to accommodate the final bow and tails.
To apply the classic cross-ribbon method, place the center of your ribbon across the top of the wrapped box. Hold the ribbon in place while flipping the box upside down. Bring the two loose ends of the ribbon together at the bottom of the box, twist them around each other at a ninety-degree angle, and pull them tight. This twist redirects the ribbon ends so they can wrap around the remaining two sides of the box.
Keep the ribbon taut as you flip the box back to its upright position. Thread the loose ends of the ribbon under the original center strip on the top of the box. Pull both ends firmly to ensure the ribbon sits flat and snug against all four sides of the box without warping the cardboard underneath.
Tie a simple, secure knot at the center to lock the ribbon tension in place. To form a balanced standard bow, create a loop with one end of the ribbon, wrap the other end around the base of the loop, and push it through the opening to form the second loop. Adjust the size of the loops and the length of the tails until they are symmetrical and proportional to the size of the box.
To finish, trim the ribbon tails to prevent fraying and elevate the aesthetic. Fold each tail in half vertically and cut upward at a forty-five-degree angle from the folded edge to the outer edge to create a classic swallowtail or V-shape. Alternatively, make a single clean, diagonal cut across each tail.
Troubleshooting Common Wrapping Mistakes
Even with careful preparation, minor errors can occur during the wrapping process. If you notice the paper looks wrinkled or loose after taping, do not tear it all off. Often, you can gently peel back the tape, pull the paper tighter from the opposite side, and re-secure it using double-sided tape to smooth out the surface.
If a sharp corner of the box accidentally punctures or tears the paper, you can easily conceal the damage without starting over. Strategically position your ribbon directly over the tear, or cover the spot with a decorative gift tag, a pressed flower, or a stylish sticker that complements the wrapping design.
Another common issue is items shifting inside the box, which can cause the paper to tear from the inside during transport. To prevent this, always stabilize the contents of your boxes for gifts before wrapping. Fill any empty space inside the box with crumpled tissue paper, shredded paper, or wood wool to keep the gift securely in place and maintain the structural integrity of the box.
Frequently Asked Questions (FAQ)
Can I wrap a box without using tape?
Yes, you can wrap a box completely tape-free by utilizing traditional origami-style folding techniques or relying on ribbon tension. To do this, fold the paper tightly around the box, making sharp, deliberate creases that lock into one another. Once the folds are in place, wrap a sturdy ribbon tightly around all sides of the box and tie a secure knot; the physical pressure of the ribbon will hold the folded paper flaps firmly in place.
How do I wrap a very large or heavy gift box?
When dealing with large or heavy boxes for gifts, structural reinforcement is key. Before wrapping, reinforce the bottom seams of the box with heavy-duty packing tape to ensure it can support the weight. If your wrapping paper sheet is not wide enough to cover the entire box, neatly tape two sheets together along a straight seam, and position the box so this joined seam is hidden directly underneath the main ribbon run.

Community discussion
Share your experience or ask a question. Comments are reviewed before publication.