
A magnetic strip is an exceptionally efficient, space-saving solution for keeping your desk clear of clutter. By lifting metal stationery, tools, and accessories off your work surface and mounting them vertically, you free up valuable desk real estate while keeping your most-used items within arm’s reach. Installing one requires evaluating your mounting surface, selecting either a non-destructive adhesive or a heavy-duty screw-mount method, and executing a clean, precise installation. Whether you are setting up a home office or organizing a dedicated crafting studio, this guide details the exact steps to secure a magnetic strip safely and effectively.
Planning Your Magnetic Strip Setup
To design an efficient workstation, you must first evaluate the physical characteristics of your workspace. The material of your desk or wall dictates which mounting method is safe and viable. Desk surfaces typically consist of solid wood, veneered particleboard, tempered glass, or plastic laminate. While solid wood can easily accommodate screws, tempered glass and thin laminates will crack or shatter under mechanical drilling, making adhesive mounting the only logical choice. Similarly, if you plan to mount the strip on the wall directly behind your desk, you must identify the wall’s construction. In Singapore, most interior residential walls in HDB flats and condominiums are solid concrete or brick, which require masonry drill bits and wall anchors. Conversely, partition walls in commercial offices or modern study rooms are often drywall, requiring specialized toggle bolts or hollow-wall anchors to prevent the strip from pulling free under weight.
Selecting the right mounting method involves balancing load requirements against your willingness to make permanent alterations. Non-destructive adhesive mounting is highly favored by renters and those who frequently rearrange their setups. This method relies on high-performance double-sided tapes to secure the strip without leaving holes. However, adhesive bonds are subject to environmental factors and have strict weight limits. Permanent screw mounting offers the highest level of stability and weight capacity, making it the superior choice for heavy-duty tools, thick metal rulers, or heavy shears. If you choose to screw directly into a desk, ensure the desktop is thick enough to accept the screw length without piercing through to the other side.
Products mentioned in this guide
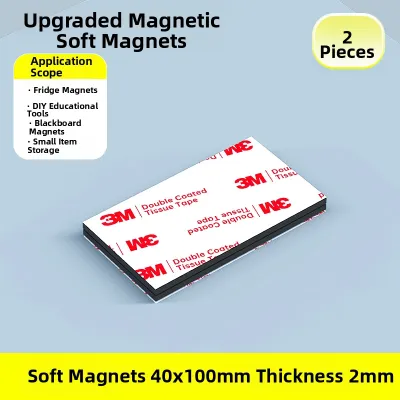

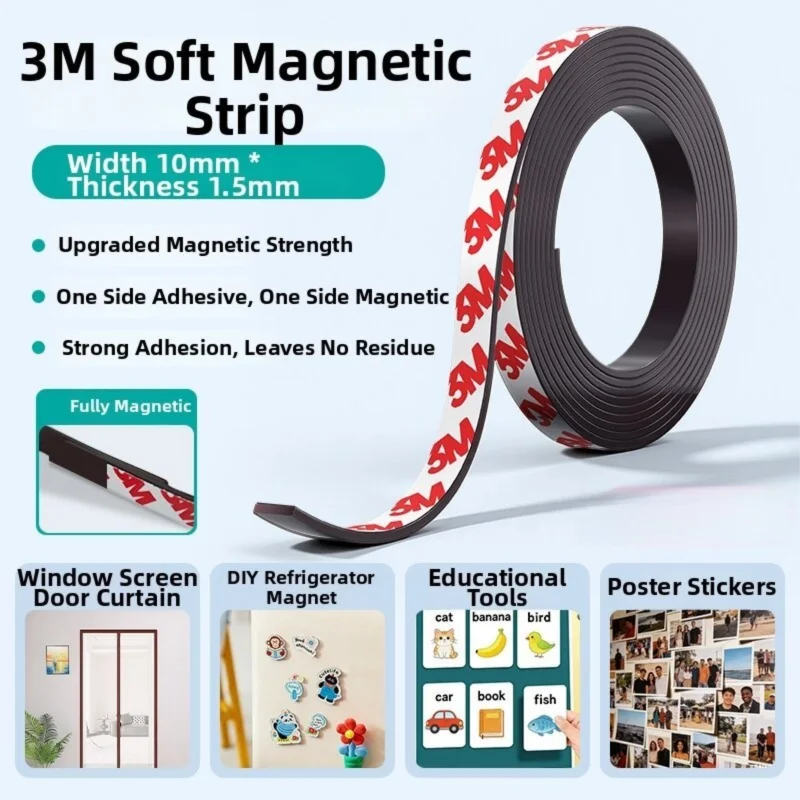
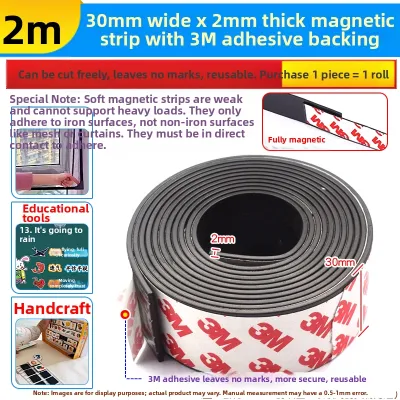
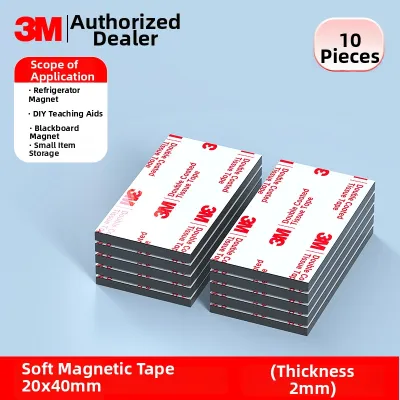
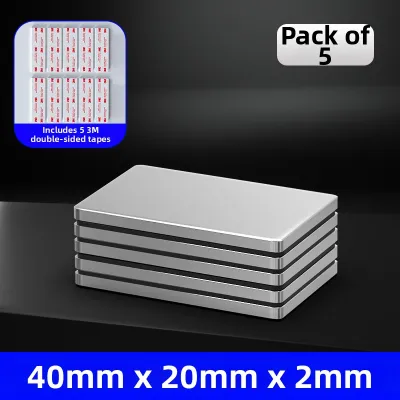
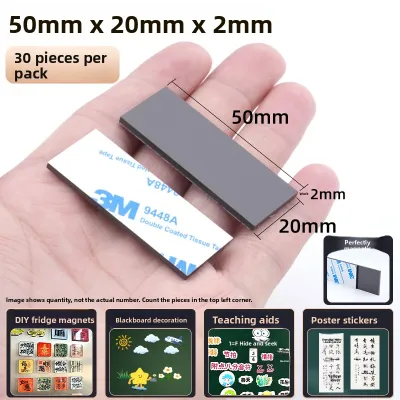
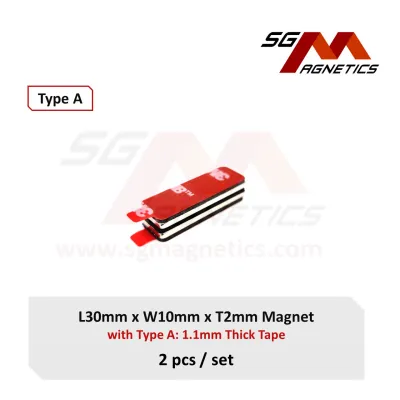
Prices are valid at publication and may change. Please refer to the product page for the latest price.
Magnetic strength is another critical variable to calculate before purchasing your strip. Magnetic strips generally utilize either ferrite (ceramic) magnets or neodymium (rare-earth) magnets. Ferrite strips are highly affordable, typically ranging from S$10 to S$25, but they offer moderate magnetic pull, making them best suited for light stationery such as paperclips, binder clips, and lightweight metal rulers. Neodymium strips are significantly stronger, often priced between S$25 and S$50, and can effortlessly hold heavier items like steel scissors, utility knives, and pliers. When selecting a strip, always check the manufacturer’s specified pull force or weight capacity per centimeter to ensure it matches the inventory of tools you intend to hang.
Finally, precise spatial planning prevents physical conflicts with your existing desk accessories. Measure the intended installation area carefully, keeping in mind the clearance needed for monitor arms, keyboard trays, and desk drawers. A magnetic strip placed too low may obstruct your keyboard space, while one placed too high might force you to stretch awkwardly to reach your tools. Ensure that when metal items are hanging vertically from the strip, their lower edges do not drag on your desk surface or interfere with cables.
Tools and Materials Required
Before starting your installation, gather all necessary tools and materials to ensure a seamless workflow. Having the correct items on hand prevents mid-project delays and guarantees a safer, more secure installation.

For all installation methods, you will need:
- Magnetic strip: Ensure it matches your weight requirements and spatial measurements.
- Measuring tape or ruler: Essential for precise centering and alignment.
- Pencil: For marking placement lines and screw holes.
- Microfiber cloth: To clean surfaces without leaving lint.
If you are using the adhesive mounting method, prepare:
- Isopropyl alcohol (70% or 91%): Crucial for stripping away surface oils, dust, and manufacturing residues. Avoid household glass cleaners, as they often leave behind a thin silicone film that prevents adhesive bonding.
- High-strength double-sided mounting tape: If your magnetic strip did not come with pre-applied adhesive, select a high-quality acrylic foam tape (such as 3M VHB) rated for the weight of your strip and tools.
If you are using the screw mounting method, prepare:
- Power drill: A standard drill for wood, or an impact/hammer drill if mounting into concrete walls.
- Drill bits: Use high-speed steel (HSS) bits for wood desktops, or carbide-tipped masonry bits for concrete or brick walls.
- Screws and wall anchors: Ensure the screws match the mounting holes of your strip, and use plastic wall plugs (rawlplugs) for concrete or specialized anchors for drywall.
- Spirit level: To guarantee the strip is perfectly horizontal.
- Safety glasses: Essential for protecting your eyes from flying wood shavings or masonry dust during drilling.
Step-by-Step Installation Guide
Method 1: Adhesive Mounting for Desk Surfaces
Adhesive mounting is an excellent, damage-free solution for securing lightweight to medium-weight magnetic strips to delicate surfaces like glass, laminate, or polished wood. To ensure the adhesive bond does not fail over time, you must follow a meticulous preparation and application process.
First, prepare the mounting surface. Wipe down the target area on your desk or wall using a microfiber cloth saturated with isopropyl alcohol. This step is critical, as even invisible oils from your fingers or airborne grease can reduce adhesive contact by up to fifty percent. Rub the area firmly and allow it to air-dry completely for at least two minutes. Do not use water or soapy detergents, which can leave a moisture barrier or chemical residue.
Next, prepare the magnetic strip. If your strip does not have pre-applied adhesive, cut your high-strength double-sided mounting tape to match the exact length of the strip. Apply the tape to the back of the magnetic strip, pressing down firmly along the entire length to eliminate air bubbles. Ensure the tape covers the outer edges of the strip, as lifting usually begins at the corners.
Once the tape is secured to the strip, prepare for final positioning. Use a ruler and pencil to lightly mark the alignment boundaries on your desk or wall. Carefully peel away the protective backing from the adhesive tape. Hold the strip by its edges, align it precisely with your pencil marks, and press it against the surface. Apply heavy, localized pressure with your hands, sliding your palms from the center outward to the edges. Hold this firm pressure for at least 30 to 60 seconds to activate the pressure-sensitive adhesive.
Finally, allow the adhesive to cure. This is the most frequently bypassed step, yet it is the most vital for long-term success. Most high-strength acrylic tapes require 24 hours to reach approximately 90% of their ultimate bond strength, and up to 72 hours to cure completely. Do not hang any metal tools or apply any weight to the magnetic strip during this curing period. Loading the strip prematurely will shear the developing chemical bonds, leading to eventual failure.
Method 2: Screw Mounting for Walls or Permanent Setups
For heavy-duty applications, permanent workspaces, or concrete walls, mechanical fastening with screws provides unmatched security. This method ensures that your magnetic strip can bear the weight of heavier tools without any risk of peeling or falling.
Begin by positioning and leveling the strip. Hold the magnetic strip against the wall or the solid wood edge of your desk at your desired height. Place a spirit level on top of the strip and adjust its angle until the bubble is perfectly centered between the indicator lines. Once level, use a sharp pencil to mark the exact center of each mounting screw hole onto the surface. Double-check your marks by holding the strip up to them once more before drilling.
Next, prepare to drill your pilot holes. Select a drill bit that matches the diameter of your screws (for direct wood mounting) or your wall anchors (for concrete or drywall). If you are drilling into a wooden desk, wrap a piece of masking tape around the drill bit at a depth slightly shallower than the thickness of the desktop; this acts as a visual depth stop to prevent you from drilling completely through your desk. Put on your safety glasses, hold the drill perpendicular to the surface, and drill straight, clean pilot holes at your marked points. If you are drilling into concrete, use a hammer drill with a masonry bit, keeping the drill steady to avoid widening the hole.
Once the holes are drilled, secure the strip. If you are mounting on concrete or drywall, press the plastic wall anchors or plugs firmly into the drilled holes until they are flush with the surface; you may use a rubber mallet to gently tap them in if necessary. Align the mounting holes of the magnetic strip with the anchors or pilot holes. Insert the screws and drive them in using a manual screwdriver or a power drill on a low clutch setting. Drive the screws until they are flush with the strip’s surface. Avoid overtightening, as excessive torque can strip the threads in wood, crack plastic mounting brackets, or warp the metal casing of the magnetic strip.
To complete the installation, perform a manual verification check. Give the mounted magnetic strip a firm, gentle tug to ensure there is no wobbling, play, or shifting. If the strip feels loose, check if the screws need a quarter-turn tightening or if the wall anchors are seated correctly. Once verified, your strip is ready for immediate use.
Organizing Your Stationery and Tools
An organized magnetic strip improves your workflow efficiency and keeps your workspace safe. To maximize the utility of your new storage setup, you should categorize and arrange your items systematically.
Start by categorizing your tools by their frequency of use. Place your most frequently accessed items—such as scissors, utility knives, or metal pens—in the central “active zone” directly in front of your primary working position. Reserve the outer edges of the strip for tools you use less often, such as specialized tweezers, draft compasses, or spare metal rulers. This ergonomic layout minimizes reaching and keeps your eyes focused on your primary task.
Weight distribution is also essential for maintaining the structural integrity of your installation. Distribute heavier tools evenly across the entire span of the strip rather than clustering them in one section. Concentrating heavy items in a single spot creates localized stress points that can warp the strip or cause adhesive backing to peel prematurely. If you have exceptionally heavy tools, place them directly over or adjacent to the screw mounting points to transfer the load directly into the wall anchors or desk frame.
Safety must be your top priority when arranging sharp tools on a magnetic strip. Always mount scissors, craft knives, and scalpels with their sharp tips pointing upward or away from the direction of your hand movements. This orientation prevents you from accidentally scraping your knuckles or puncturing your skin when reaching for adjacent items. Additionally, ensure that items with exposed blades are placed high enough that they cannot be bumped by your keyboard, mouse, or hands during normal desk activity.
Before relying on the strip to hold your accessories, perform a magnetic compatibility test. Not all metals are ferromagnetic. Iron, steel, nickel, and cobalt possess high magnetic permeability and will hold securely. However, many modern stationery items are made of aluminum, brass, copper, or austenitic stainless steel, which are non-magnetic and will slide off immediately. Test each tool by gently placing it against the strip; if you feel a weak attraction or if the item slides downward, do not leave it unattended, as it could fall and damage your desk or injure your feet.
Maintenance and Safety Verification
To keep your magnetic strip functioning safely over time, establish a simple routine for maintenance and structural checks. This preventive care ensures that your tools remain securely mounted and your desk stays protected.
For adhesive-mounted strips, conduct periodic inspections of the tape bond. Singapore’s tropical climate and high indoor humidity can gradually degrade some adhesives over several years. Look closely at the edges of the strip every few months to check for signs of peeling, lifting, or separation from the wall or desk. If you notice any gap forming, remove the strip, clean off the old adhesive, and reapply high-quality, moisture-resistant mounting tape.
If you opted for a screw-mounted setup, check the tightness of the screws occasionally. The repeated action of pulling metal tools off a strong magnet exerts outward leverage on the mounting hardware. Over time, this constant pulling force can slightly loosen screws in wooden desks or drywall anchors. If you detect any slight wobble or movement when removing an item, use a screwdriver to tighten the screws back to a flush position.
Regular cleaning is also necessary to maintain optimal magnetic hold. As metal tools contact the strip, tiny microscopic metal filings, paper fibers, and household dust can accumulate on the magnetic surface. This debris creates a physical barrier that increases the distance between the magnet and your tools, significantly reducing the magnetic grip. Wipe down the strip once a month with a clean, dry microfiber cloth. For stubborn grime, use a slightly damp cloth, but dry the strip immediately afterward to prevent rust on both the strip and your steel tools.
Finally, strictly respect the manufacturer’s specified load limits. Avoid the temptation to hang heavy non-stationery items, such as heavy power tools, large metal tape dispensers, or heavy desk lamps, unless the strip is explicitly rated for such weights. Exceeding the weight capacity risks catastrophic failure, which could damage your expensive desk setup, break your tools, or cause personal injury.
Frequently Asked Questions (FAQ)
Will adhesive magnetic strips damage my desk surface?
High-strength double-sided mounting tape is generally safe for glass, metal, laminate, and fully cured solid wood surfaces, but it can pose a risk to delicate finishes. If your desk features a thin wood veneer, a painted surface, or a delicate paper laminate, the aggressive adhesive bond of heavy-duty tape may pull up the surface layer or leave stubborn residue upon removal. To safely remove an adhesive strip without damaging your desk, use a handheld hairdryer to gently warm the adhesive backing for a few minutes; this softens the acrylic polymers. Next, take a piece of dental floss or thin fishing line, slide it behind the magnetic strip, and use a sawing motion to slice through the softened tape. Any remaining adhesive residue can be safely rubbed away with a small amount of eucalyptus oil or a dedicated adhesive remover, followed by a quick wipe with isopropyl alcohol.
How do I know if my tools are magnetic enough for the strip?
Determining whether your stationery and tools will hold securely depends entirely on their metallurgical composition. Ferromagnetic metals, such as carbon steel, cast iron, and nickel, exhibit strong magnetic attraction and are ideal for magnetic strips. Conversely, metals like aluminum, brass, copper, and titanium are completely non-magnetic. Additionally, many high-end kitchen shears and office rulers are made of austenitic stainless steel (such as 304 stainless steel), which contains chromium and nickel in a crystalline structure that renders it non-magnetic. The easiest way to verify compatibility is to perform a quick pre-test using a standard refrigerator magnet. If the fridge magnet sticks firmly to your scissors, ruler, or craft knife, the item will hold securely on your desk-mounted magnetic strip. If the attraction feels weak or non-existent, the tool must be stored in a drawer or traditional organizer instead.
Community discussion
Share your experience or ask a question. Comments are reviewed before publication.