
When embarking on a custom denim project, securing the right hardware is the difference between a professional, long-lasting garment and a frustrating construction failure. If you are struggling to determine the correct jeans clip length, the solution lies in understanding how your specific fabric layers behave under compression.
In the sewing and haberdashery world, the term “jeans clip length” typically refers to one of two critical items: the tack (pin) length of a metal jeans button, or the jaw capacity and length of heavy-duty plastic sewing clips used to hold thick denim layers together during construction. Choosing the wrong size can lead to loose, wobbling buttons that tear your fabric, or bent sewing pins that ruin your machine’s timing. By measuring your fabric stack accurately and applying a simple hardware formula, you can ensure a flawless, secure finish every time.
What "Jeans Clip Length" Means for Denim Projects
To avoid purchasing incorrect supplies, you must first identify which type of “clip” your project requires. In sewing communities and online marketplaces, this terminology is often shared between two entirely different tools: metal jeans tack buttons and plastic sewing binding clips.
Products mentioned in this guide
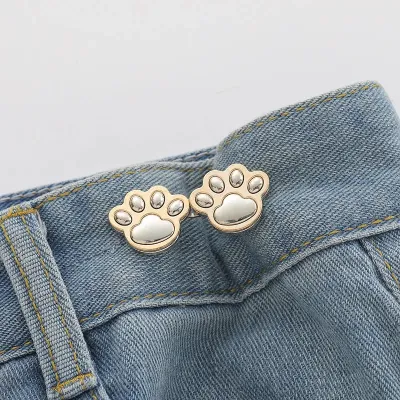
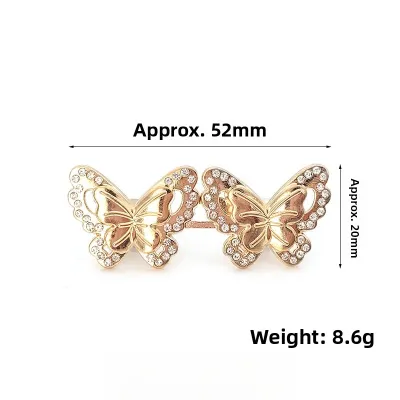
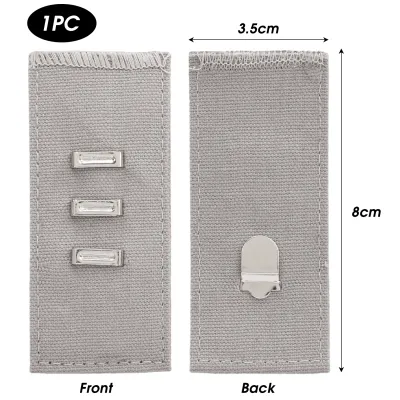
Prices are valid at publication and may change. Please refer to the product page for the latest price.
Jeans Tack Buttons (Tack/Pin Length) A traditional jeans button is a two-part metal fastener. It consists of a decorative front button head and a metal tack (or pin) that pierces the fabric from the reverse side. When suppliers refer to the “clip length” or “tack length” of these buttons, they are talking about the height of this metal pin. Matching this hardware length to your fabric thickness is critical. If the pin is too long, the button head will wobble, sag, and eventually tear through the denim fibers. If the pin is too short, it will fail to reach the internal locking mechanism inside the button head, causing the button to pop off under normal wear and tension.
Sewing Binding Clips (Jaw Capacity and Length) Alternatively, “jeans clips” can refer to heavy-duty plastic utility clips used to hold thick layers of denim together before they are stitched. Unlike standard sewing pins, which easily bend, warp, or break when forced through multiple layers of heavy denim, these spring-loaded clips clamp firmly onto the edges of the fabric. In this scenario, the clip length and jaw capacity dictate how many layers of fabric the clip can hold securely without slipping off or leaving permanent, unsightly pressure creases on your denim.
The Role of Denim Weight and Layering Denim is a unique, dense woven fabric whose physical thickness varies dramatically based on its weight, weave, and construction. Denim weight is measured in ounces per square yard (oz). Lightweight denim (8 to 10 oz) is relatively thin and easy to penetrate, while midweight (11 to 12 oz) and heavyweight selvedge denim (14 oz and above) present massive physical bulk. When constructing a waistband, fly, or pocket, you are never dealing with just a single layer of denim; you are compounding multiple layers of denim, fusible interfacing, and pocket lining. This combined thickness determines the physical space your hardware must accommodate.
Tools You Need to Measure Denim Accurately
Measuring thick, textured, and compressible materials like denim requires far more precision than a standard flexible sewing tape measure can provide. To obtain an accurate reading of your fabric layers and hardware dimensions, you should gather a few specialized tools.

- Digital or Vernier Calipers: This is the gold standard tool for the job. Calipers allow you to measure both the exact length of your metal tack pins and the compressed thickness of your fabric stack down to a fraction of a millimeter. A basic digital caliper can be sourced from local hardware shops in Singapore for around S$15 to S$30.
- Fabric Thickness Gauge: While not strictly mandatory, a dedicated, spring-loaded thickness gauge provides a quick, standardized measurement of fabric layers under consistent pressure.
- Standard Ruler or Measuring Tape: Useful for mapping out seam allowances and marking the general layout of your button placement on your pattern.
- A "Scrap Sandwich": Before taking any measurements, you must prepare a test piece using the exact materials from your project. Cut small scraps of your main denim, interfacing, and lining fabrics, and layer them exactly as they will be constructed on the finished garment.
How to Measure Fabric Thickness for Hardware
To find the exact jeans clip length required for your project, you must measure your fabric under simulated wear conditions. Follow this step-by-step process to ensure your measurements are highly accurate.
Step 1: Construct a Realistic Sample Stack Do not try to measure a single sheet of denim and multiply it mathematically. Instead, assemble your “scrap sandwich” to mimic the exact area where the button or clip will be installed. For a standard waistband, this usually involves two layers of denim and one layer of interfacing. If you are measuring for a button fly, you may have three or four layers of denim plus interfacing and pocketing fabric.
Note on Climate and Fabric Prep: In humid environments like Singapore, denim fibers can absorb moisture and swell slightly. Always pre-wash, dry, and thoroughly press your denim scraps with a hot iron to remove any residual moisture and shrinkage before constructing your sample stack.
Step 2: Compress the Stack Firmly Denim is a woven fabric with a natural loft that compresses significantly under pressure. When a jeans button is installed, the tack and the button head are pressed together tightly, compressing the fabric between them. To simulate this, place your sample stack between the jaws of your calipers and squeeze them together firmly. If you are using a thickness gauge, let the spring mechanism compress the fabric fully.
Step 3: Measure the Compressed Thickness in Millimeters Read the measurement on your calipers while the fabric is fully compressed. Always record this measurement in millimeters, as most sewing hardware and jeans tacks are manufactured and sold using metric specifications. Take measurements at three different spots on your sample stack and calculate the average to account for any natural variations in the weave.
Step 4: Identify and Measure the Thickest Intersection Points One of the most common mistakes in hardware installation is measuring only the flat, uniform sections of the waistband. In reality, the button is often placed near intersecting seams, belt loops, or folded edges where the fabric thickness doubles or triples. Identify the exact spot where your button will sit, construct your sample stack to match that specific intersection, and measure the maximum compressed thickness. This maximum value dictates the minimum length your hardware must accommodate.
How to Choose the Right Jeans Clip Length for Your Measurement
Once you have your compressed fabric thickness measurement, you can translate that number into the correct hardware specifications for your project.
Selection Formula for Jeans Tack Buttons To find the ideal tack length for a metal button, use this straightforward formula:
Compressed Fabric Thickness (mm) + 1.5mm (for the button head depth) = Ideal Tack Length (mm)
Most standard jeans buttons require the tack pin to extend approximately 1mm to 2mm beyond the compressed fabric so that it can lock securely into the internal plastic or metal sleeve inside the button head. If your compressed fabric stack measures 4mm, you will need a tack length of approximately 5.5mm to 6mm.
General Framework for Common Denim Projects To help you contextualize your measurements, consider these standard guidelines:
- Lightweight Denim Projects (8–10 oz): Typically result in a compressed waistband thickness of 2mm to 3mm. These projects generally require standard tack lengths of 6mm to 7mm.
- Midweight Denim Projects (11–12 oz): Usually yield a compressed thickness of 3mm to 4.5mm. These are best suited for tack lengths of 8mm to 8.5mm.
- Heavyweight Selvedge Denim (14 oz+): Can easily compress to 5mm or more, especially at seam intersections. These heavy-duty projects require extra-long tacks, often ranging from 9.5mm to 11mm.
Selecting Sewing Binding Clips If you are choosing plastic sewing clips to hold your project together during construction, match the clip’s jaw capacity to your maximum layer thickness. Standard sewing clips typically have a jaw opening of 10mm, which is sufficient for most midweight denim projects. However, if you are sewing heavy selvedge denim or multi-layered flat-felled seams, look for jumbo sewing clips with a jaw capacity of 15mm to 20mm. This ensures the clips can hold the bulk securely without slipping off under the weight of the fabric.
Consequences of Incorrect Sizing Choosing the wrong size carries immediate consequences. A tack that is too long will leave a gap between the button head and the fabric, causing the button to flop around, catch on threads, and eventually tear the buttonhole. Conversely, a tack that is too short will either fail to lock entirely, or it will compress the fabric so violently that it cuts the denim fibers, leading to premature wear and fabric failure around the button site.
Testing and Securing Your Hardware on Scrap Fabric
Before you install any metal hardware on your final, hours-in-the-making garment, you must perform a test run. Metal jeans buttons are designed to be permanent; once locked, they are incredibly difficult to remove without damaging the surrounding fabric.
Perform a Test Installation Take your prepared scrap sandwich and mark the insertion point. Push the tack through from the back, place the button head on top, and use your setting tools to secure them. This test run allows you to verify that your calculated jeans clip length works perfectly in practice.
Visual and Physical Checks Once installed, inspect the test button closely:
- Check the Back: The base of the tack should sit completely flush against the back of the fabric. There should be no visible gap or play.
- Check the Front: The button head should feel snug against the front of the denim. Try to wiggle the button; it should not wobble or rotate loosely.
- Check for Puckering: The fabric around the button should lie flat. If the denim is puckered or pulled tightly into a cone shape, your tack pin is too short and is over-compressing the fibers.
Adjusting After a Failed Test If the button wobbles, your tack is too long. You will need to source a shorter tack pin or add an extra layer of structural interfacing inside the waistband to fill the gap. If the button fails to lock or pops apart under a gentle tug, your tack is too short. You must step up to a longer tack length or grade down the internal seam allowances of your waistband to reduce the overall thickness.
Safety and Tooling Boundaries Always consult your hardware manufacturer’s instructions for specific installation steps. Working with metal fasteners requires appropriate setting tools, such as a dedicated hand press, heavy-duty setting pliers, or a hammer paired with a specialized setting anvil. Never attempt to install jeans buttons with standard household pliers, as they can easily slip and crush the decorative button head. To protect your hands and eyes from flying metal fragments or slipping tools, always wear safety glasses and work on a stable, solid surface like a heavy workbench or a concrete floor.
Frequently Asked Questions (FAQ)
Can I cut down a jeans tack pin if it is too long?
It is highly recommended that you do not cut metal tack pins with wire cutters or pliers. Cutting the pin alters its engineered shape, creating sharp, jagged edges that will slice through the denim fibers from the inside out as the garment is worn. Furthermore, trimming the pin destroys the chamfered tip designed to guide the pin into the button’s locking sleeve, which compromises the structural integrity of the lock and can cause the button to fail unexpectedly. If your tack is too long, the safest and most professional solution is to purchase the correct tack length or add a fabric shim (such as a small hidden circle of denim or leather) to the inside of the waistband.
How do I handle extremely thick intersecting seams?
When standard jeans clip lengths are not long enough to accommodate massive seam intersections, you must actively reduce the local bulk of your fabric. Start by using a clean cobbler’s hammer or a rubber mallet to gently tap the thick seams flat before sewing or installing hardware; this compresses the fibers permanently. Additionally, trim away any excess fusible interfacing from the seam allowances and grade your seams by cutting adjacent layers to different widths. When sewing over these bulky areas, place a hump jumper (or a folded piece of thick cardboard) under the back of your presser foot to keep it level, ensuring even feed dog pressure and preventing skipped stitches.
Community discussion
Share your experience or ask a question. Comments are reviewed before publication.