
To find the correct replacement zipper, you must determine three critical specifications: the exact length of the zipper teeth, the material and structure of those teeth, and the size number of the zipper chain. A mismatch in any of these areas will prevent the slider from gliding smoothly or cause the entire zipper assembly to fail when sewn into your garment, bag, or cushion. By taking precise measurements from stop to stop, identifying whether you have a coil, plastic, or metal zipper, and reading the markings on the back of your original slider, you can confidently source a compatible replacement. This guide walks you through each step of the identification and measurement process so you can restore your item to full functionality.
Step 1: Measure the Exact Zipper Length Required
Measuring a zipper correctly requires focusing solely on the functional elements rather than the entire strip of fabric. The correct measurement points run from the very top stop (the small metal or plastic barriers at the top of the teeth) to the bottom stop (the metal or plastic bar at the bottom of a closed-end zipper). For separating zippers, which are common on jackets and outerwear, measure from the top stop all the way down to the bottom edge of the insertion pin and retainer box. Do not include the extra fabric tape extending past the stops at either end, as this excess fabric is simply meant for sewing into the seam allowance and does not represent the working length of the zipper.
The measurement technique varies slightly depending on whether you are dealing with a closed-end zipper or a separating zipper. Closed-end zippers, typically found on trousers, skirts, and pockets, remain joined at the bottom by a single stop. For these, measure the distance between the top stops and the bottom stop. Separating zippers open completely at both ends and feature a pin-and-box mechanism at the bottom. When measuring these, ensure the zipper is fully zipped up and measure from the top stop down to the very bottom of the retainer box.
Products mentioned in this guide
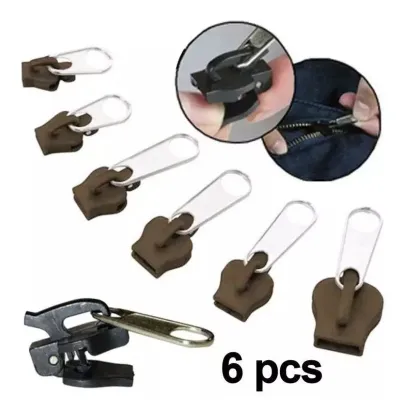
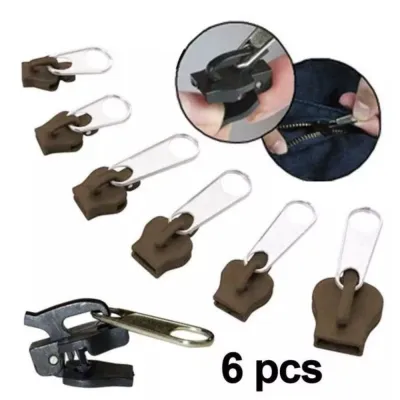
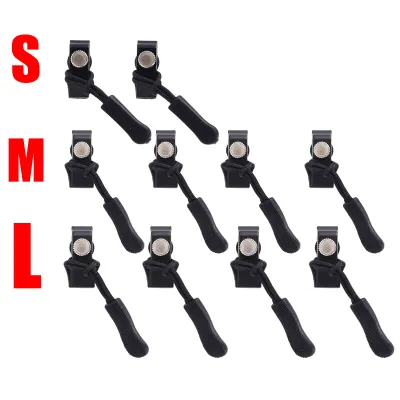
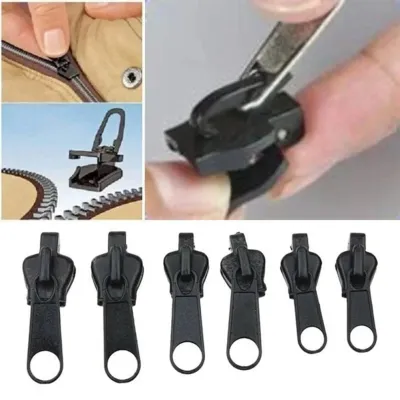
Prices are valid at publication and may change. Please refer to the product page for the latest price.
If the original zipper is completely missing, torn, or too badly damaged to measure, you can determine the required length by measuring the opening of the item itself. Lay the garment or fabric item completely flat on a hard surface, smoothing out any wrinkles along the zipper seam. Use a flexible sewing tape measure to find the distance between the top edge of the opening and the bottom seam where the zipper must terminate. It is generally safer to purchase a replacement zipper that is slightly longer than your measurement, as many zipper types can be shortened during installation, whereas a zipper that is too short will leave an unusable gap in your project.
Step 2: Identify the Teeth Type and Material
Once you have the correct length, you must identify the specific material and structure of the zipper teeth. Zipper teeth are engineered for different levels of flexibility, weight, and durability, and mixing types will prevent the slider from functioning.

Nylon coil zippers are characterized by a continuous spiral of nylon monofilament sewn onto the zipper tape. This design makes them highly flexible, lightweight, and soft against the skin. You will commonly find nylon coil zippers on lightweight garments, dresses, skirts, inner pockets, and cushions. Because the teeth are formed from a continuous loop, they are highly resistant to snagging and can easily bend around gentle curves without binding.
Molded plastic zippers, often referred to as Vislon zippers, feature individual, chunky teeth molded directly onto the fabric tape. These teeth are typically made of polyacetal resin, making them stiff, highly durable, and completely rustproof. Molded plastic zippers are ideal for heavy-duty outerwear, sportswear, marine gear, and casual jackets. Their distinct, blocky appearance is easy to spot, and they offer excellent strength in outdoor environments where metal might corrode.
Metal zippers utilize individual metal teeth clamped onto the fabric tape at regular intervals. These teeth can be made of brass, aluminum, nickel, or antique bronze, providing a classic, rugged aesthetic and exceptional tensile strength. Metal zippers are the standard choice for denim jeans, heavy leather jackets, workwear, and sturdy canvas bags. While they are incredibly durable, they are heavier and less flexible than nylon or plastic alternatives, and they require occasional lubrication to maintain smooth operation.
Invisible zippers are a specialized subset of nylon coil zippers designed to disappear completely into the seam of a garment. When viewed from the front, only a fine seam line and the pull tab are visible because the coil is folded backward toward the inside of the garment. Installing an invisible zipper requires a specialized sewing machine foot to roll the coils out of the way as you stitch. They are almost exclusively used in formal wear, dresses, and skirts where a clean, uninterrupted fabric finish is desired.
Step 3: Read Zipper Size Markings and Slider Specs
Zipper sizes are standardized using a numbering system that corresponds directly to the width of the zipper teeth when they are fully closed. The size number (such as #3, #5, #8, or #10) represents the approximate width of the closed teeth in millimeters. For example, a #5 zipper has teeth that measure approximately 5 millimeters across when zipped. This size correlates directly with the overall weight, strength, and bulk of the zipper assembly.
Matching the size to the application is crucial for structural integrity. A lightweight #3 zipper is suitable for delicate fabrics, pocket linings, and lightweight dresses. A #5 zipper is the most versatile size, commonly found on casual jackets, backpacks, sleeping bags, and hoodies. Heavy-duty gear, such as motorcycle jackets, tents, and industrial canvas covers, typically requires a #8 or #10 zipper to withstand high lateral tension and rugged use.
To find the exact size of your original zipper, look closely at the back or bottom of the metal slider. Manufacturers often stamp the size number directly onto the metal casing. You may also see letters indicating the lock type or manufacturer code. Sliders generally fall into three categories: auto-lock sliders, which feature a tiny internal pin that prevents the zipper from sliding open on its own (essential for clothing); non-lock sliders, which glide freely and are preferred for bags and cushions; and semi-auto lock sliders, which lock only when the pull tab is pressed flat against the teeth.
If the markings on your slider have worn away or are illegible, you can use a pair of digital or vernier calipers to measure the width of the closed teeth. Clamp the calipers gently across the zipped teeth to read the millimeter measurement, which will point you to the correct size number. Alternatively, you can bring the old slider or the entire item to a local haberdashery shop in Singapore to physically compare it against standard sizing charts and replacement parts.
Step 4: Diagnose the Fault to Decide on Full or Partial Replacement
Before purchasing a complete replacement zipper, inspect the damage to determine if a full replacement is truly necessary. In many cases, the fabric tape and teeth remain perfectly intact, but the slider has worn down internally. Over time, the metal channels inside a slider can stretch open by fractions of a millimeter, preventing them from properly aligning and interlocking the teeth. If your zipper splits open behind the slider or sticks constantly despite clean teeth, simply swapping out the old slider for a new one of the exact same size and type can resolve the issue, saving you the effort of unpicking stitches.
However, if you observe missing, broken, or severely deformed teeth along the chain, a complete zipper replacement is mandatory. Similarly, if the fabric tape is torn, frayed near the stops, or separating from the teeth, a new slider will not fix the problem. The structural integrity of the tape is what holds the zipper to the garment, and any compromise there requires a full replacement.
Be aware of the limitations of slider-only repairs. Separating zippers on jackets rely on a precise alignment between the insertion pin, the retainer box, and the slider. If the retainer box at the bottom is cracked or loose, a new slider cannot restore function, and the entire zipper must be replaced. Invisible zippers are also notoriously difficult to repair with slider swaps due to their tight tolerances and folded construction, meaning a full replacement is usually the most reliable path.
Step 5: Finalize Your Purchasing Checklist and Preparation
To ensure a successful repair, compile a precise purchasing checklist before heading to a local haberdashery shop or browsing specialized online craft stores. Your checklist must include the exact length required, the teeth material (nylon coil, molded plastic, or metal), the size number (such as #5), the slider lock type (auto-lock for garments, non-lock for bags), and a matching tape color and material. Having these details written down prevents purchasing errors that lead to mid-project delays.
When sourcing your replacement zipper, look for reputable haberdashery shops or dedicated sewing supply retailers. If you are repairing a high-end outdoor jacket or branded gear, check if the manufacturer offers official after-sales repair kits or replacement parts to ensure an exact match.
Once you have the replacement zipper, prepare the item carefully. Use a seam ripper to gently remove the old zipper, taking care not to tear the surrounding fabric. Leave the original stitch marks visible on the fabric if possible, as they serve as an excellent alignment guide for sewing the new zipper in place. If your replacement zipper features a natural-fiber tape, such as cotton, pre-wash and press it before installation to prevent it from shrinking and puckering the seam during future laundry cycles.
Frequently Asked Questions (FAQ)
Can I cut a replacement zipper to the exact length I need?
Yes, you can shorten many replacement zippers, but the method depends entirely on the teeth material. Nylon coil zippers are highly customizable; you can easily cut through the nylon coils and fabric tape with standard sewing shears. Once cut, you must create new stops to prevent the slider from running off the track. This can be done by sewing several tight whipstitches over the teeth at the new end point, or by crimping a metal stop over the cut end.
In contrast, metal and molded plastic zippers require more effort to shorten. You cannot simply cut through metal or heavy plastic teeth without damaging your shears or leaving sharp edges. For these types, you must use pliers to carefully pry off the individual teeth above your desired length mark, slide the top stops down to the new termination point, crimp them securely, and then trim the excess tape.
What if I cannot find the exact color match for my zipper tape?
When an exact color match is unavailable, prioritize matching the teeth color if they are exposed and visible when the item is worn or used. For hidden zippers, such as invisible zippers, matching the tape color to the garment fabric is critical since only the tiny pull tab will show. If you are working with a close but imperfect match, you can use fabric markers or fabric dye to carefully tint the visible edges of the zipper tape to blend in with your garment.
Alternatively, you can embrace the color difference as an intentional design choice. Using a contrasting zipper color—such as a bright neon zipper on a neutral jacket or a bold primary color on a canvas bag—can elevate the item’s aesthetic, turning a functional repair into a stylish, custom detail.
Community discussion
Share your experience or ask a question. Comments are reviewed before publication.