
Using a knit patch kit is an accessible way to create custom textile art, repair worn garments, or add a personalized touch to your favorite accessories. To make your first patch, you will secure your yarn to a structured backing fabric, follow a grid pattern using repetitive stitches, transition colors as needed, and secure the final loops to prevent unraveling. By mastering these basic steps and maintaining consistent tension, you can transform a bundle of yarn into a durable, professional-looking fabric emblem.
The rise of visible mending and personalized fashion has made textile crafts incredibly popular. Pre-packaged kits simplify this learning curve by providing pre-sorted materials, eliminating the need to source specialized items individually. This guide will walk you through the entire process, ensuring your first crafting experience is both rewarding and successful.
Understanding Your Knit Patch Kit and Gathering Supplies
Before opening any packages, lay out the contents of your kit on a clean surface to verify that everything is present. Most standard kits include a piece of open-weave backing fabric (often a canvas or a specialized plastic grid), pre-cut or spooled yarn in various colors, a tapestry needle with a blunt tip and a large eye, and a printed pattern guide. Comparing these items against the manufacturer’s inventory list ensures you will not have to pause mid-project due to a missing component.
Products mentioned in this guide
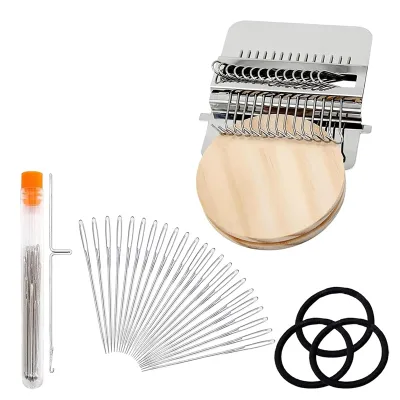
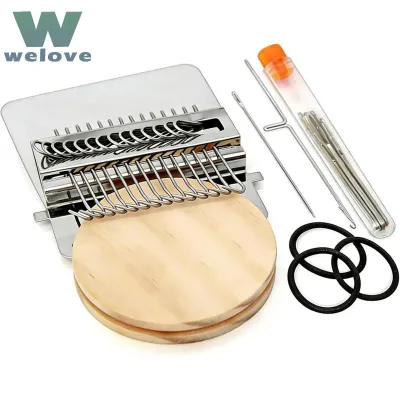
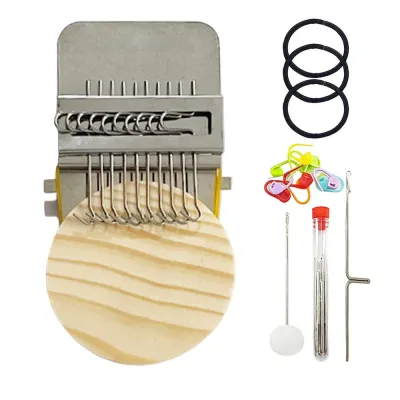
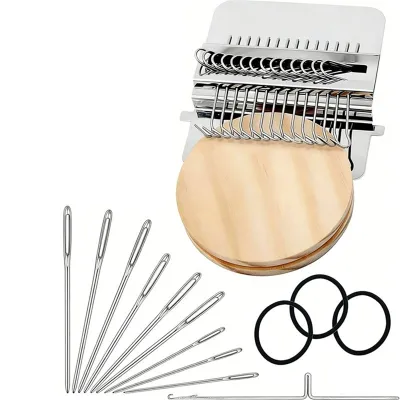
Prices are valid at publication and may change. Please refer to the product page for the latest price.
The type of backing fabric included in your kit will influence the final patch’s flexibility. Stiffer plastic grids are excellent for beginners because they maintain their shape without warping, making it easier to learn stitch placement. Softer canvas or linen backings offer a more traditional fabric feel and are highly flexible, making them ideal for patches destined for curved surfaces like jacket sleeves or hats.
While the kit provides the core materials, keeping a few common household tools nearby will make the process much smoother. A pair of small, sharp embroidery scissors is essential for clean yarn cuts without fraying. A simple ruler helps you measure yarn lengths and verify patch dimensions, while a seam ripper is incredibly useful for gently lifting out any mistaken stitches without damaging the backing grid.
Always take a moment to review the manufacturer’s safety guidelines, age recommendations, and skill-level indicators printed on the packaging. Some kits contain sharp metal needles or require chemical adhesives that may not be suitable for younger crafters without adult supervision. Understanding these parameters beforehand helps you set realistic expectations and ensures a safe, enjoyable crafting session.
Preparing Your Workspace and Materials
Creating a comfortable, organized environment is key to maintaining focus and preventing small components from getting lost. Choose a flat, stable surface such as a dining table or a dedicated craft desk. Good lighting is critical; working under a bright desk lamp or near a window with natural light will help you clearly see the individual holes in the backing grid, distinguish subtle yarn color variations, and track your stitch placement.

Ergonomics play a significant role in your crafting comfort, especially during your first project when you may be working more slowly. Select a chair that supports good posture to prevent neck and shoulder strain as you look down at your work. Taking short breaks every thirty minutes to stretch your hands and shoulders will keep your muscles relaxed and prevent fatigue.
Before you begin threading, organize your yarn, needles, and backing materials into separate, tidy piles or small containers. If your kit includes multiple shades of yarn that look similar under artificial light, label them or keep them in their designated slots in the packaging. This simple step prevents tangles and saves you from the frustration of accidentally stitching with the wrong color.
Cleanliness is another vital factor that is often overlooked. Wash and dry your hands thoroughly before handling the materials to remove any natural skin oils, lotion residue, or dirt. Because you will be handling the yarn and backing fabric repeatedly over several hours, clean hands prevent the fibers from becoming soiled or discolored before the patch is even finished.
Step-by-Step Guide to Creating Your First Knit Patch
Starting the Base To begin your patch, you must first secure the yarn to the backing fabric so that your initial stitches do not pull through. Thread your tapestry needle with the first color indicated by your pattern guide, leaving a short tail of about five centimeters. Depending on the specific kit instructions, you will typically insert the needle from the back of the grid to the front, leaving a small tail of yarn on the underside. Instead of tying a bulky knot that could make the patch sit unevenly, you can hold this tail flat against the back of the fabric and work your first few stitches directly over it to lock it securely in place.
Executing the Core Stitches The beauty of a knit patch comes from the regular, repetitive rhythm of its stitches. Whether your kit utilizes a basic cross-stitch, a satin stitch, or a loop-pile punch needle technique, consistency is the key to a professional finish. Pull the yarn through each grid hole with a steady, gentle tension; pulling too tight will warp the backing fabric and cause the patch to pucker, while leaving the yarn too loose will result in floppy, uneven loops that snag easily. Focus on keeping your hand movements fluid and checking your progress against the visual pattern guide after every row.
Changing Colors or Yarn Most eye-catching patch designs require transitioning between different yarn colors or thicknesses to create contrast and detail. When you reach the end of a color section or run low on your current strand, weave the needle through the back of several completed stitches on the underside of the patch to secure the end, then snip the excess yarn. Thread your needle with the new color and start the next section using the same securing method as your base stitch. Taking the time to secure each transition prevents loose threads from working their way to the front of your finished design.
Securing the Final Stitch Once you have filled the entire pattern area and completed your final row, you must secure the yarn to prevent the entire patch from unraveling. Turn the patch over to expose the underside, which should show a neat network of woven tails. Thread your remaining yarn back through the last three or four stitches on the reverse side, pulling it snug but not tight. For added security, you can tie a small, flat knot against the backing fabric before trimming the yarn close to the surface, ensuring that your hard work remains intact during handling and wear.
Finishing, Trimming, and Attaching Your Patch
With the stitching complete, the next step is to transform your embroidered grid into a clean, standalone patch. Using your sharp embroidery scissors, carefully trim the excess backing fabric from around the perimeter of your design. It is crucial to leave a safe margin of about two to three millimeters of bare backing material; cutting too close to your active stitches can sever the structural threads and cause the entire edge of the patch to fray or fall apart.
To ensure long-term durability, many kits recommend applying a thin layer of fabric glue or a specialized backing sealant to the reverse side of the patch. This adhesive locks the loose yarn tails and backing fibers in place, preventing them from shifting over time. When applying any liquid adhesive, work in a well-ventilated area and allow the patch to dry completely on a non-stick surface, such as wax paper, according to the manufacturer’s specified drying times.
Once dry, you can choose the best method to attach your new patch to a jacket, backpack, or pouch. If your kit included an iron-on adhesive sheet, follow the instructions to fuse it to the back of the patch using a household iron set to the appropriate temperature for your fabric. Alternatively, hand-sewing the patch using a strong whipstitch around the trimmed border offers the most secure and reversible attachment, while fabric glue provides a quick, no-sew option for rigid materials.
Troubleshooting Common Beginner Mistakes
Uneven Tension and Loose Loops If you notice that some of your stitches look sunken while others form loose, floppy loops, your tension is inconsistent. To correct this, gently pull on the working yarn from the back of the fabric to tighten loose loops, or use the tip of your needle to ease some slack into stitches that are pulling too tight. If you are using a punch needle kit, ensure that you are inserting the needle completely down to the handle on every single stitch to maintain a uniform loop height on the front of the patch.
Tangled Yarn and Knots Yarn has a natural tendency to twist and knot as you work, especially if you are using long strands. If you feel resistance when pulling your needle through the backing, stop immediately rather than pulling harder, which will only tighten the knot. Gently trace the yarn back to the source of the tangle and use your fingers or the blunt end of your needle to tease the loop open. To prevent future tangles, try working with shorter lengths of yarn—usually no longer than the distance from your fingertips to your elbow.
Missed or Misplaced Stitches It is common to accidentally skip a hole in the grid or place a color in the wrong section of the pattern. If you spot a mistake, do not panic or try to cut the yarn out. Instead, unthread your needle and use the blunt end to gently back out the incorrect stitches one by one until you reach the error. Once the mistake is cleared, re-thread your needle and continue following the pattern guide, checking your work every few rows to catch any misalignments early.
Frequently Asked Questions (FAQ)
Can I wash a garment after attaching a knit patch?
Yes, but the washing method depends heavily on the materials used in your kit and how the patch was attached. Always check the kit packaging or yarn labels for specific fiber care instructions, as wool yarns can shrink or felt when exposed to hot water and agitation, while acrylic yarns are generally more resilient.
For the best results and to prolong the life of your handmade patch, hand-wash the garment in cool water with a mild detergent and lay it flat to dry. If you must use a washing machine, turn the garment inside out, place it in a mesh laundry bag, and select a gentle cycle with cold water to protect the delicate stitches from friction.
What should I do if my kit runs out of yarn before the patch is finished?
If you run out of yarn before completing your design, you can easily source a matching substitute by identifying the yarn’s characteristics. Look at the remaining scraps or the kit packaging to determine the yarn weight (such as lace, fingering, or worsted), the number of plies, and the fiber content (such as cotton, wool, or acrylic).
Take a small sample of the kit yarn to a local craft store to find a visual and structural match, or check the manufacturer’s official website to see if they offer color-matched refill packs. When introducing the replacement yarn, blend it into a less noticeable area of the design or use it to complete a distinct color block to keep the transition seamless.
Community discussion
Share your experience or ask a question. Comments are reviewed before publication.