
Creating personalized Teacher’s Day gift tags at home is a thoughtful way to show appreciation to educators who dedicate their time and energy to guiding students. By crafting these tags yourself, you can tailor the design, message, and colors to match each teacher’s personality or the specific gift you are presenting. The process requires only a few basic stationery items, a bit of planning, and some simple assembly steps to achieve a polished, professional look.
Whether you are pairing the tag with a hand-poured candle, a box of treats, or a practical set of classroom supplies, a custom tag elevates the entire presentation. This guide will walk you through selecting the right materials, planning your layout, cutting and decorating your tags safely, and securing them beautifully to your gifts.
Materials and Tools for DIY Gift Tags
Before beginning your crafting session, gather your materials on a clean, flat workspace. Having everything prepared beforehand ensures a smooth workflow and prevents mistakes caused by searching for tools mid-project.
Products mentioned in this guide



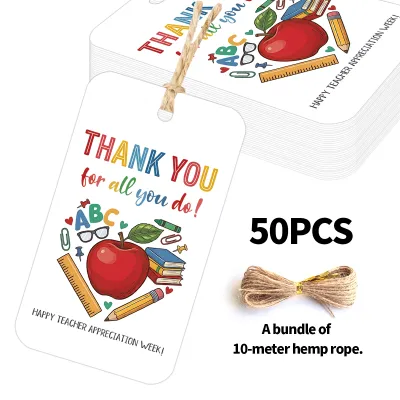
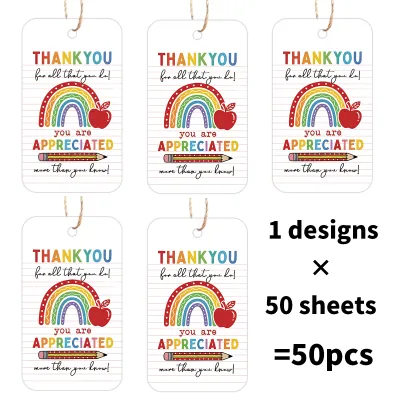
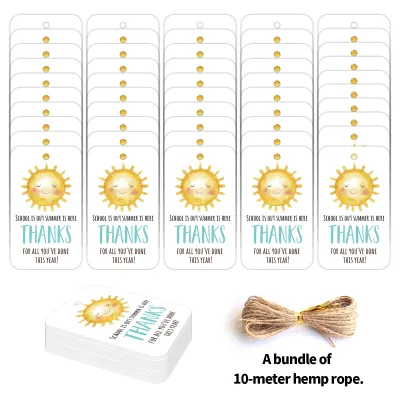

![[SG SELLER] Mini Teachers Day Cards Custom Teachers Day Gift Card Mini Card Customised Thank You Cards Tags](https://img.lazcdn.com/g/p/dd7be998920fe274da8fbcb157d37b58.jpg_400x400q80.jpg_.webp)
Prices are valid at publication and may change. Please refer to the product page for the latest price.
For the base of your tags, cardstock is the most reliable option. Look for paper with a weight between 220 gsm and 300 gsm to ensure the tag remains stiff and does not curl when ink or adhesive is applied. Watercolor paper is an excellent alternative if you plan to use wet mediums, as its textured surface absorbs water without warping. You can also repurpose clean, high-quality recycled cardboard from packaging for a rustic, eco-friendly aesthetic.
Precision cutting requires the right tools. A sharp pair of craft scissors is essential for basic shapes, while a utility knife or craft scalpel paired with a metal-edged ruler provides perfectly straight, clean edges. Always use a self-healing cutting mat to protect your tabletop from deep scratches. For creating the attachment point, a standard single-hole puncher with a 6mm diameter is ideal, though smaller decorative punches can also work.
Decorating supplies allow you to customize each tag. Gather water-based or pigment-based ink markers, fine-liner pens, and stamps. If you plan to use stamps, select a fast-drying pigment ink pad to prevent smudging. For embellishments, collect ribbons, cotton baker’s twine, or natural jute twine. If your project involves adhesives, a double-sided tape runner or a quick-drying glue pen is preferred over liquid school glue, which can cause paper fibers to swell and wrinkle.
Safety is paramount when working with sharp tools and adhesives. Always cut away from your body, keep your fingers well behind the edge of your metal ruler, and store blades in a secure place when not in use. If you choose to use any solvent-based markers or spray sealants, work in a well-ventilated room to avoid inhaling fumes.
Choosing the Right Base and Design Layout
Selecting the appropriate paper and planning your visual layout are critical steps that determine both the durability and the aesthetic appeal of your finished gift tags. A tag that is too flimsy will look worn before the gift is even delivered, while a poorly planned layout can make your message difficult to read.

When evaluating paper thickness, perform a simple bend test. Hold a small strip of the paper horizontally between two fingers; if it droops significantly under its own weight, it is too light for a standalone tag. For thinner papers, you can laminate two sheets together using a dry adhesive runner to create a sturdier composite base.
Scale your tag dimensions to match the size of the gift packaging. A standard gift tag typically measures approximately 5 cm by 9 cm, which fits well on medium-sized gift bags, boxes, or wrapped parcels. For smaller items, such as a single premium pen or a small jar of honey, scale the tag down to a compact 3 cm by 6 cm to avoid overwhelming the gift itself.
Before cutting into your premium cardstock, sketch a few basic layouts on scrap paper. A well-balanced tag design allocates distinct zones for the decorative elements, the main appreciation message, and the names of the recipient and giver. Leave a clear margin of at least 1.5 cm at the top of the tag to accommodate the punched hole without interfering with your text or design. Keep the text legible by choosing high-contrast color combinations, such as dark ink on light-colored cardstock.
Step-by-Step Guide to Crafting the Tags
Once your materials are ready and your layout is planned, you can begin the physical construction of the tags. Following a systematic process ensures consistency across multiple tags and minimizes paper waste.
First, place your cardstock face down on the cutting mat. Using a light pencil and your metal ruler, mark out the outer boundaries of your tags on the back of the paper. Drawing a grid allows you to maximize the use of your paper sheet. Double-check your measurements before making any cuts to ensure all your lines are perfectly parallel and perpendicular.
Next, align your metal ruler with the pencil lines. Pressing down firmly on the center of the ruler to prevent it from slipping, draw your craft knife along the edge of the ruler in a single, smooth motion. It is safer and more effective to make two or three light passes with the blade rather than trying to cut through thick cardstock in a single heavy stroke. Once the main rectangular shapes are cut, you can clip the top two corners at a 45-degree angle to create the classic luggage-tag shape. To ensure symmetry, cut one corner first, use the tiny paper scrap as a template for the opposite side, and trace it before cutting.
If you prefer rounded corners, use a dedicated corner-rounding punch. Alternatively, you can trace the curve of a small coin onto each corner and carefully trim along the line with sharp scissors. Gently rub a clean white eraser over any visible pencil marks on the edges to clean up the guide lines.
Finally, mark the center point for the hanging hole, ensuring it is perfectly aligned horizontally and positioned at least 1 cm down from the top edge. Place your hole punch over the mark, verify the alignment through the bottom of the punch mechanism, and press down firmly. Inspect the hole to ensure the paper fibers cut cleanly without tearing or leaving ragged edges.
Adding Personal Touches and Finishing Details
With the blank tag bases prepared, you can now focus on personalization and decorative details. This stage is where you can truly tailor each tag to reflect the recipient’s subject area or personal interests.
Start with the lettering. If you are hand-writing the messages, use a pencil to lightly sketch the letters first to ensure proper spacing. Write the teacher’s name in a bold, stylized font or elegant calligraphy, and use a simpler, highly legible print for the supporting message. Once you are satisfied with the pencil layout, trace over it with a high-quality gel pen or fine-liner. Let the ink dry completely before erasing the pencil guidelines. In humid climates, some gel inks can take several minutes to dry fully; perform a quick smudge test on a scrap piece of the same paper to determine the safe waiting time.
For a multi-dimensional look, consider layering materials. You can cut a slightly smaller piece of patterned paper, vellum, or kraft paper and adhere it to the center of your base tag before writing. This creates a beautiful border frame that draws attention to your message. If you are using stamps, press the stamp firmly and evenly onto the paper without rocking it, which can cause double-images or ink halos.
If your gift is a potted plant, a cold beverage, or an item that might be handled frequently outdoors, protect your handiwork from moisture. You can apply a thin, even coat of clear matte protective spray over the dry ink, or apply a clear self-laminating sheet over the front of the tag before punching the hole. This step preserves the vibrant colors and prevents the ink from bleeding if it encounters stray water droplets.
Attaching the Tags to Your Gifts
The final step is securing your completed tag to the gift packaging. The way you attach the tag should complement the overall design and ensure the tag remains intact during transport to the school.
Select a binding material that matches the texture and weight of your gift wrap. Natural jute twine pairs beautifully with brown kraft paper wrapping for a rustic, organic look. For a more polished or festive presentation, satin, grosgrain, or organza ribbon in school colors or soft pastels works exceptionally well. Ensure the width of the ribbon or twine passes easily through the punched hole without bunching or tearing the paper.
To attach the tag, cut a length of ribbon or twine approximately 20 cm to 25 cm long. Thread one end through the punched hole from front to back, loop it over the top, and tie a secure knot close to the paper edge to keep the tag from sliding freely along the string. You can then tie the remaining loose ends around the handle of a gift bag, the neck of a jar, or the main ribbon of a wrapped box. Use a classic bow or a neat double knot, trimming the excess ends at an angle to prevent fraying.
Position the tag so that it lies flat and is immediately visible to the recipient. It should not obscure any key decorative elements of the main gift wrap, nor should it hang so low that it gets caught or bent when the gift is set down on a flat surface. A well-placed tag serves as the visual focal point of your packaging, inviting the teacher to read your personalized message first.
Frequently Asked Questions (FAQ)
What is the best paper weight for durable gift tags?
The ideal paper weight for durable, professional-looking gift tags is between 250 gsm and 300 gsm. Paper within this range is thick enough to resist bending, tearing, and curling when decorated with inks or light adhesives. To test if a household paper or cardstock is stiff enough, cut a small strip and hold it horizontally by one end. If the paper remains straight or bends only slightly, it is suitable for crafting tags. If it sags significantly, consider gluing two sheets together to increase the overall thickness and rigidity.
How can I fix a mistake while writing on the tag?
If you make a lettering mistake, you do not necessarily have to discard the entire tag. A practical solution is to cover the error with a decorative element, such as a small piece of contrasting cardstock, a printed sticker, or a stamped motif, and write the corrected text on top of that layer. This technique adds an intentional, multi-layered look to your design. If the mistake is minor, you can use a high-quality correction tape that closely matches the color and texture of your paper, or carefully scrape away dried gel ink using the edge of a clean craft knife on thick, uncoated cardstock.

Community discussion
Share your experience or ask a question. Comments are reviewed before publication.