
Creating handmade stationery brings a tactile warmth that store-bought alternatives cannot replicate. Making a classic smiley face greeting card at home is an approachable, highly customizable project that suits creators of all skill levels. By understanding how different paper weights interact with various inks, and by mastering basic folding and layout techniques, you can produce cards that look clean, crisp, and professional. Whether you are celebrating a birthday, sending a thank-you note, or simply sharing a bright moment with someone, a handmade smiley card offers a personal touch that resonates.
Materials and Tools You Will Need
Selecting the right supplies is the first step toward ensuring your handmade card is durable and visually appealing.
Cardstock Options The foundation of any card is its paper. Standard printer paper (typically 80 gsm) is too thin and will warp or bleed immediately when colored. Look for heavy cardstock between 220 gsm and 300 gsm. Smooth cardstock works best for clean pen lines, while slightly textured cardstock (such as cold-press watercolor paper) is ideal if you plan to use light watercolor washes or gouache for your smiley motif.
Products mentioned in this guide
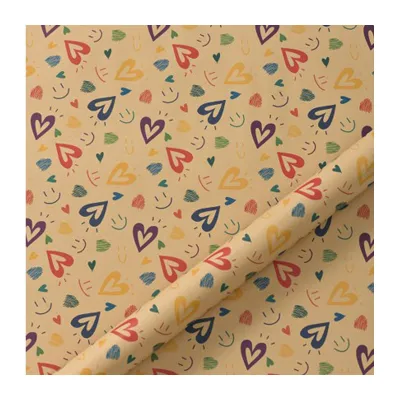
Prices are valid at publication and may change. Please refer to the product page for the latest price.
Drawing and Coloring Instruments To outline the iconic smiley face, select water-resistant, pigment-based fine liners. Sizes between 0.5 mm and 0.8 mm are excellent for bold, clean outlines. For coloring the classic yellow fill, water-based dual brush pens offer smooth, streak-free coverage. If you prefer alcohol-based markers, keep in mind they are highly prone to bleeding and require a specialized bleedproof marker paper or a double-layered card design.
Cutting and Folding Tools A sharp utility knife or heavy-duty craft scissors will ensure clean edges. To achieve a professional fold without unsightly paper cracking, a metal ruler and a bone folder (or the smooth back of a plastic spoon) are indispensable.
Adhesives and Embellishments For attaching extra layers or decorative elements, use an acid-free glue stick or double-sided tape to prevent paper warping. Optional additions include patterned washi tape, decorative stamps, and self-adhesive gems to add depth.
Step-by-Step Guide to Crafting Your Smiley Card
Crafting a polished card requires a methodical approach. Before starting, clear your workspace of dust and debris, wash your hands to prevent transferring oils to the paper, and ensure you have a flat, stable cutting mat or surface to work on.

Preparing and Folding the Card Base
To create a standard folded card, start with an A5 sheet of cardstock (148 mm x 210 mm), which folds perfectly into an A6 card (105 mm x 148 mm). This size fits standard C6 envelopes, making it easy to mail or gift.
Before folding, identify the grain direction of your cardstock. Folding along the grain results in a much smoother crease, whereas folding against the grain can cause the outer fibers of the paper to crack and tear.
Place your cardstock flat on your cutting mat. Use a metal ruler to locate the exact center line (105 mm along the 210 mm side). Instead of folding it immediately by hand, align your ruler along this line and firmly run the pointed end of a bone folder or a scoring tool down the paper to create a shallow indentation. This scores the paper, compressing the fibers and guiding the fold. Fold the paper away from the score mark, then run the flat side of the bone folder along the folded edge to press it into a sharp, flat crease.
Designing and Drawing the Smiley Face
A perfect circle is the anchor of the classic smiley design. To avoid mistakes on your final card, lightly sketch your circle using a compass or by tracing the rim of a small glass or roll of washi tape. Use a hard pencil (such as a 2H) and apply very light pressure to avoid denting the fibers of the cardstock.
Once your circle is sketched, map out the facial features. The traditional smiley features two vertical oval eyes and a wide, upturned arc smile, often with small dimple lines at the ends. Position the eyes in the upper half of the circle, leaving enough space below for a balanced, cheerful grin. Sketch these features lightly with your pencil first.
Next, apply your color. If you are using water-based markers, apply the yellow ink in consistent, overlapping circular motions to minimize streaking. Work relatively quickly so the wet edges blend together smoothly. Allow the yellow ink to dry completely—typically two to five minutes, depending on the humidity and paper absorption—before outlining. If you ink the outline while the yellow fill is still damp, the black ink may feather or bleed into the yellow area. Once dry, trace your pencil outlines with a black pigment fine liner, keeping your hand steady and using uniform pressure.
Adding Personalized Messages and Finishing Touches
A well-placed message elevates the design from a simple drawing to a complete greeting card. Decide whether your text will sit below the smiley face on the front, or if the front will remain purely visual with the text reserved for the inside.
To keep your lettering straight and centered, use your ruler to draw very light horizontal pencil guidelines. Write your message—such as “Keep Smiling,” “Thinking of You,” or a simple “Hello”—using a fine liner or brush calligraphy pen. Let the ink dry completely before erasing the guidelines.
To add extra personality, consider drawing small pink or red circles for rosy cheeks on your smiley face. You can also frame the card border with a thin black line or apply a strip of colorful, patterned washi tape along the folded spine to create a cohesive, decorative frame.
Creative Variations for Different Recipients
The simplicity of the smiley face makes it incredibly versatile. By altering your materials and design choices, you can tailor the card’s aesthetic to suit any recipient.
For Kids Children respond well to tactile, high-contrast, and interactive elements. Instead of drawing a flat face, use non-toxic craft glue to attach large, plastic googly eyes that wiggle when the card is moved. You can also create a simple pop-up element. To do this, cut a separate, sturdy paper circle, draw the smiley face on it, and mount it to the center of the card using thick double-sided foam tape to give it a 3D effect. For younger children assisting with the project, ensure they use safety scissors and non-toxic, washable school glue.
For Colleagues or Acquaintances When gifting a card in a professional setting, a minimalist and refined aesthetic is often preferred. Swap bright yellow cardstock for a rustic, heavy-weight kraft paper base. Instead of a solid yellow fill, draw a series of clean, fine-line black smileys of varying sizes across the front of the card. This understated, monochromatic look feels modern, sophisticated, and thoughtful without being overly casual.
For Close Friends Personalization is key for close relationships. You can use a mixed-media approach to create a unique collage. Cut a circle out of a patterned fabric scrap, an old map, or a colorful page from an old magazine, and glue it to the card front as the body of the smiley. Draw the facial features on top with a bold paint marker. You can also incorporate inside jokes in the text or use scented markers to add a playful, nostalgic sensory element to the card.
Tips for a Polished and Professional Finish
To ensure your handmade cards look as polished as commercial stationery, incorporate a few professional habits into your crafting routine.
Always Swatch and Test Your Pens Different papers react uniquely to different inks. Before applying any ink to your carefully folded card base, test your markers and fine liners on a scrap piece of the exact same cardstock. Observe how long the ink takes to dry, whether it feathers (spreads outward along the paper fibers), or if it bleeds through to the reverse side. This simple step prevents ruined projects.
Use a Kneaded Eraser Standard pink or white rubber erasers can be abrasive, tearing paper fibers and leaving messy crumbs that can smear damp ink. A kneaded rubber eraser is much gentler. Press and roll the kneaded eraser over your pencil guidelines to lift the graphite off the page without rubbing or friction, keeping your paper clean and smooth.
Prevent and Cure Paper Warping Applying heavy layers of water-based ink or wet craft glue can cause paper fibers to expand and curl as they dry. To prevent this, apply adhesives sparingly and keep ink layers thin. Once your card is fully dry, place it between two clean sheets of scrap paper and tuck it inside a heavy book for 24 hours. The constant, even pressure will flatten any minor warping, leaving you with a perfectly crisp, flat card.
Frequently Asked Questions (FAQ)
What is the best paper weight for DIY greeting cards?
For a sturdy greeting card that stands upright on a desk or shelf without sagging, choose cardstock with a weight between 220 gsm and 300 gsm. Paper lighter than 200 gsm tends to warp easily when colored with markers or glued, while paper heavier than 300 gsm can be difficult to score and fold cleanly at home without specialized heavy-duty equipment.
How do I prevent my markers from bleeding through the card?
To prevent ink from bleeding through to the inside of your card, always place a sheet of scrap paper directly underneath your working page to catch any excess pigment. Opt for water-based markers or pigment gel pens, which sit on top of the paper fibers, rather than alcohol-based markers, which penetrate deeply. Additionally, apply your color in light, quick strokes rather than saturating one spot repeatedly.

Community discussion
Share your experience or ask a question. Comments are reviewed before publication.